

Hi everyone! Today I’ll show you the postcard that I did for my boyfriend Gerlac on his birthday last October. It is a scratch card, so he has to use a coin to reveal the prize (the present) he will get. If you want to see how I made it and what he got as a present, continue reading…Enjoy!
Hola a todos! Hoy os voy a mostrar la tarjeta que hice para mi novio Gerlac en su cumpleaños el pasado octubre. Se trata de una tarjeta de rasca y gana, así que tiene que utilizar una moneda para rascar y descubrir qué regalo le ha tocado. Si queréis ver cómo lo hice y qué regalos le tocaron, continuad leyendo… Espero que os guste!

En castellano por aquí / Spanish here
This will be the last but one post on the retrospective series for now. After my final post tomorrow I will go back to my original plan, which was to post once per week or once every 2 weeks. But for now, let’s carry on with this card.
October was coming closer and I had no idea on what to give to Gerlac as a present, so instead of buying something I decided to do something for him. The idea was to give him different activities as a present. Instead of writing a note saying Voucher for a massage or Voucher for a trip to Venice for 2 I decided to give it a different format.
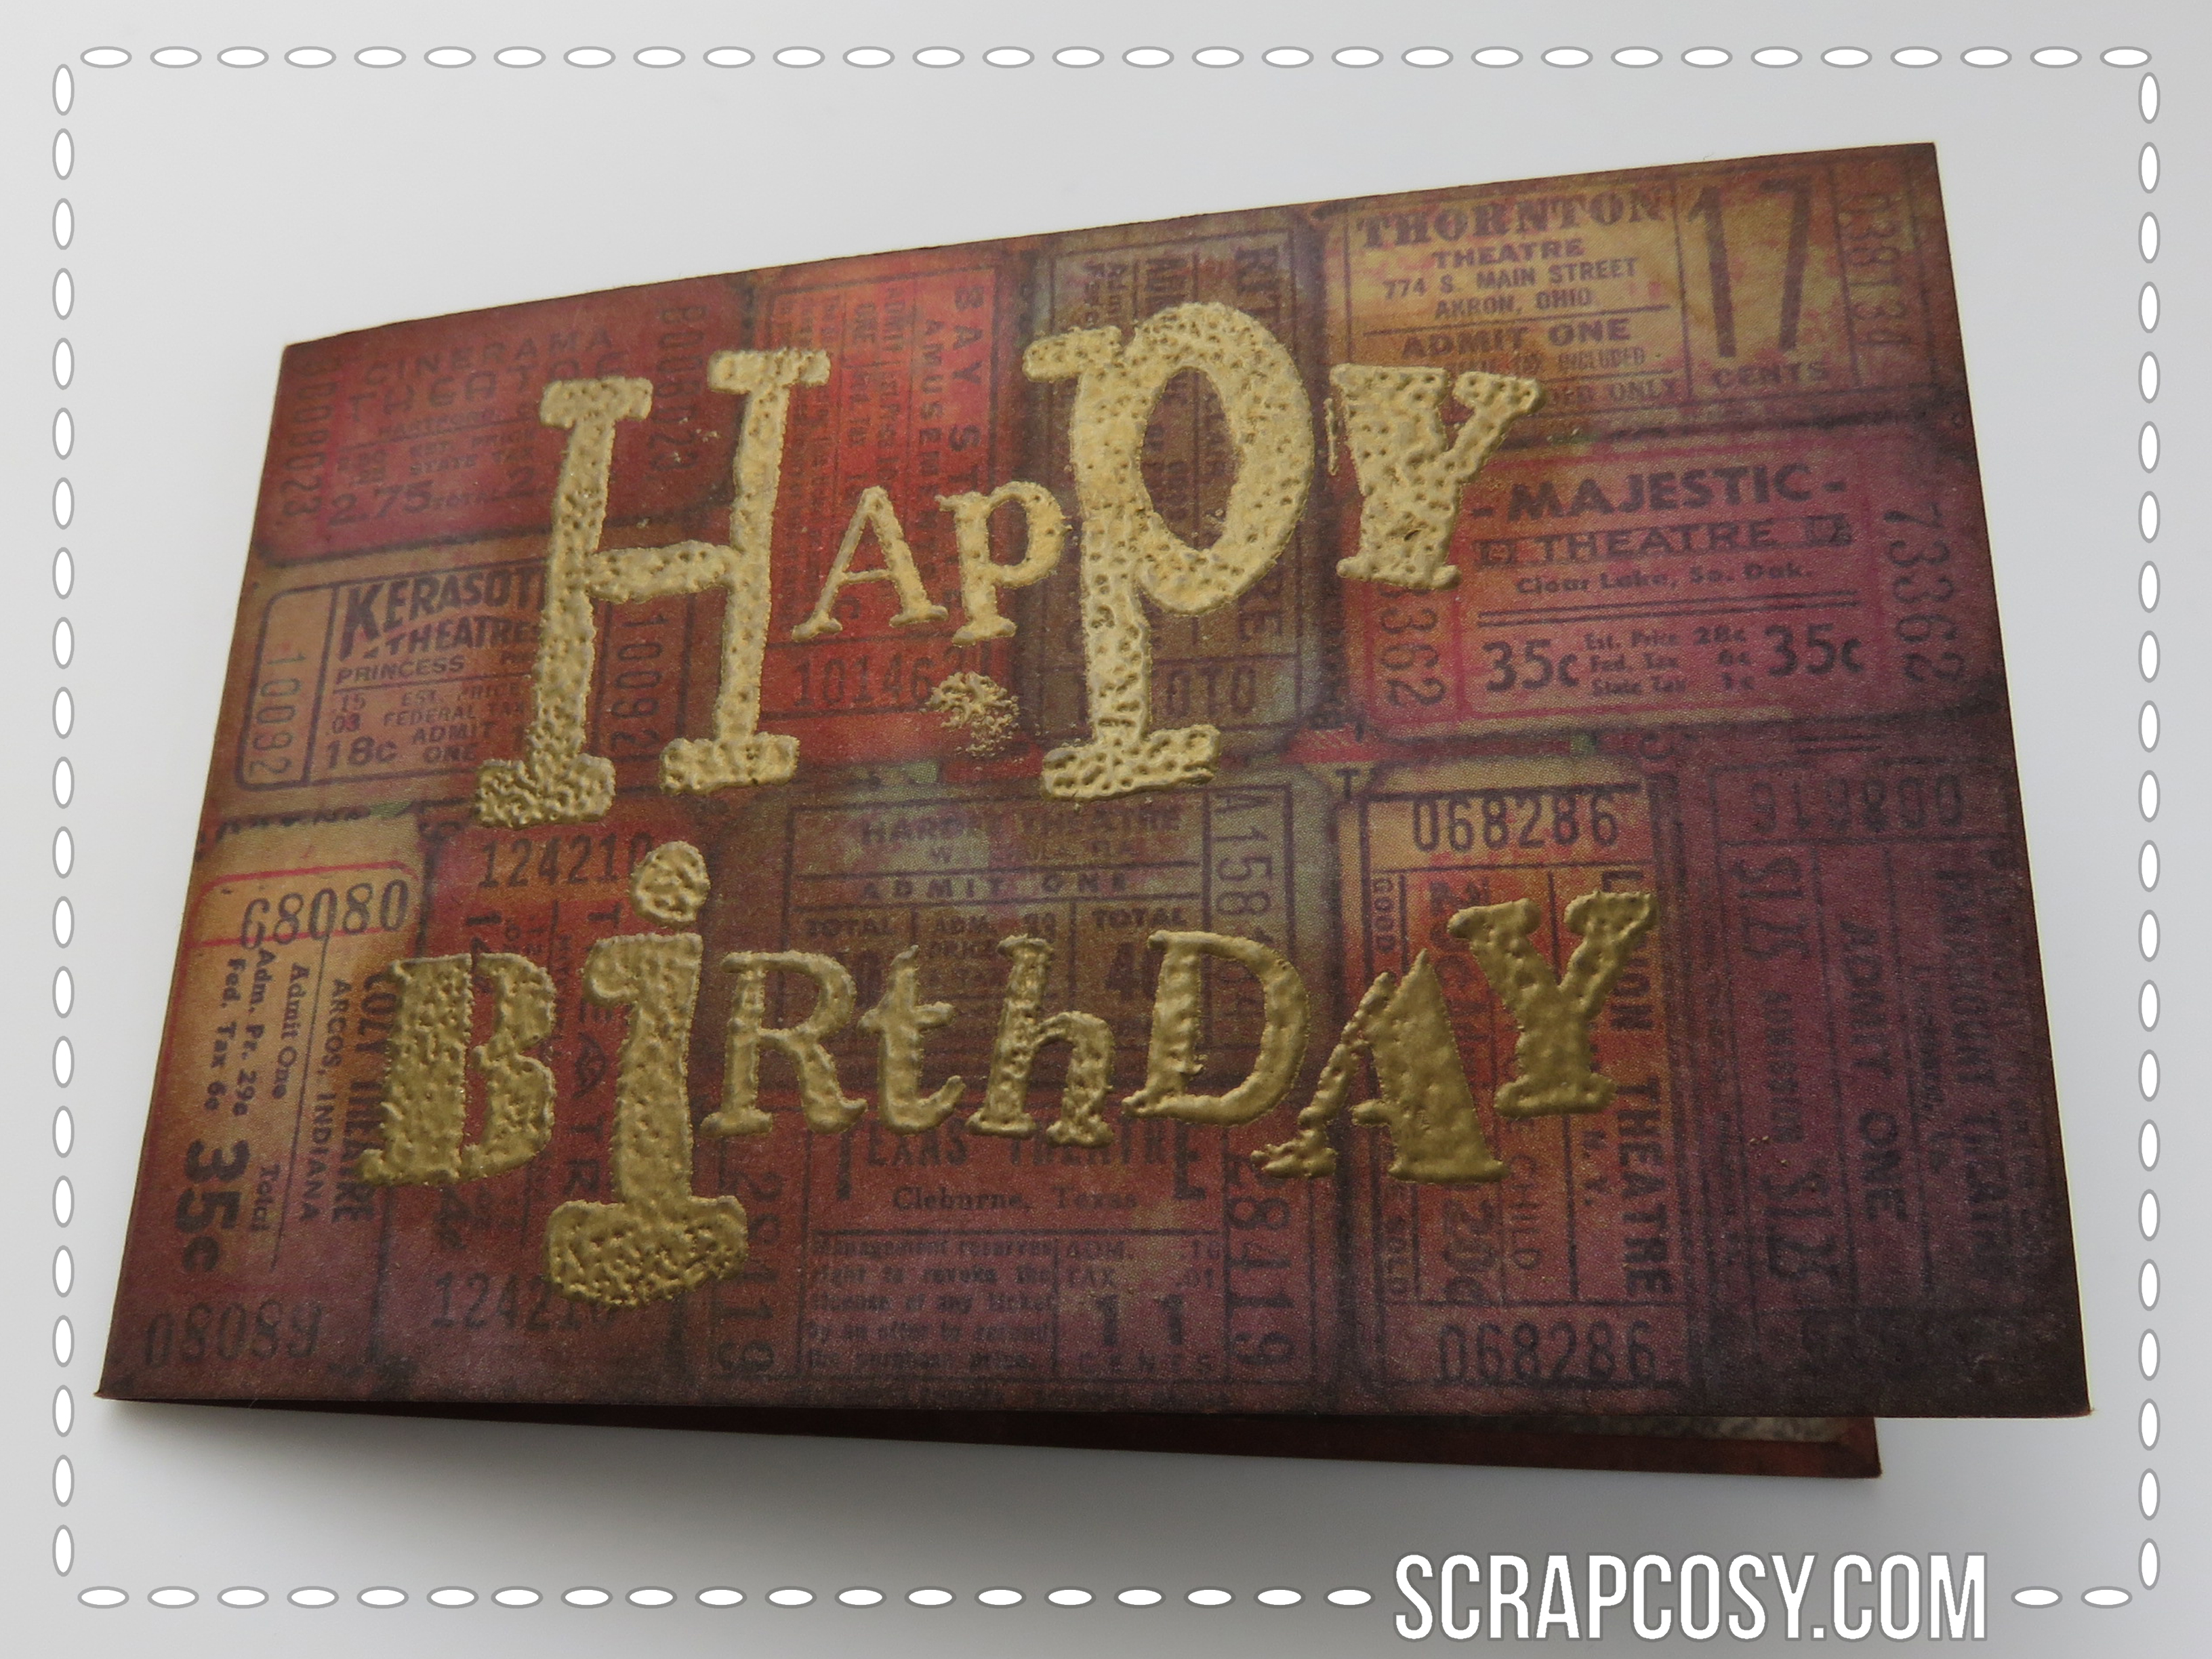
I created a small card of 10cm by 6,8cm out of a patterned paper by Tim Holtz (piece of 20cm by 6,8cm folded by half) and I stamped a Happy Birthday and I heat embossed it in gold. I inked the edges and the happy birthday with vintage photo distress ink (if you want to highlight the gold embossed you can apply it on top, so the paper around the letters gets the ink. Then rub with a napkin on top of the letters to clean them from ink and they will shine again). This is the result of the front of the card:
Then I prepared the scratch tickets:
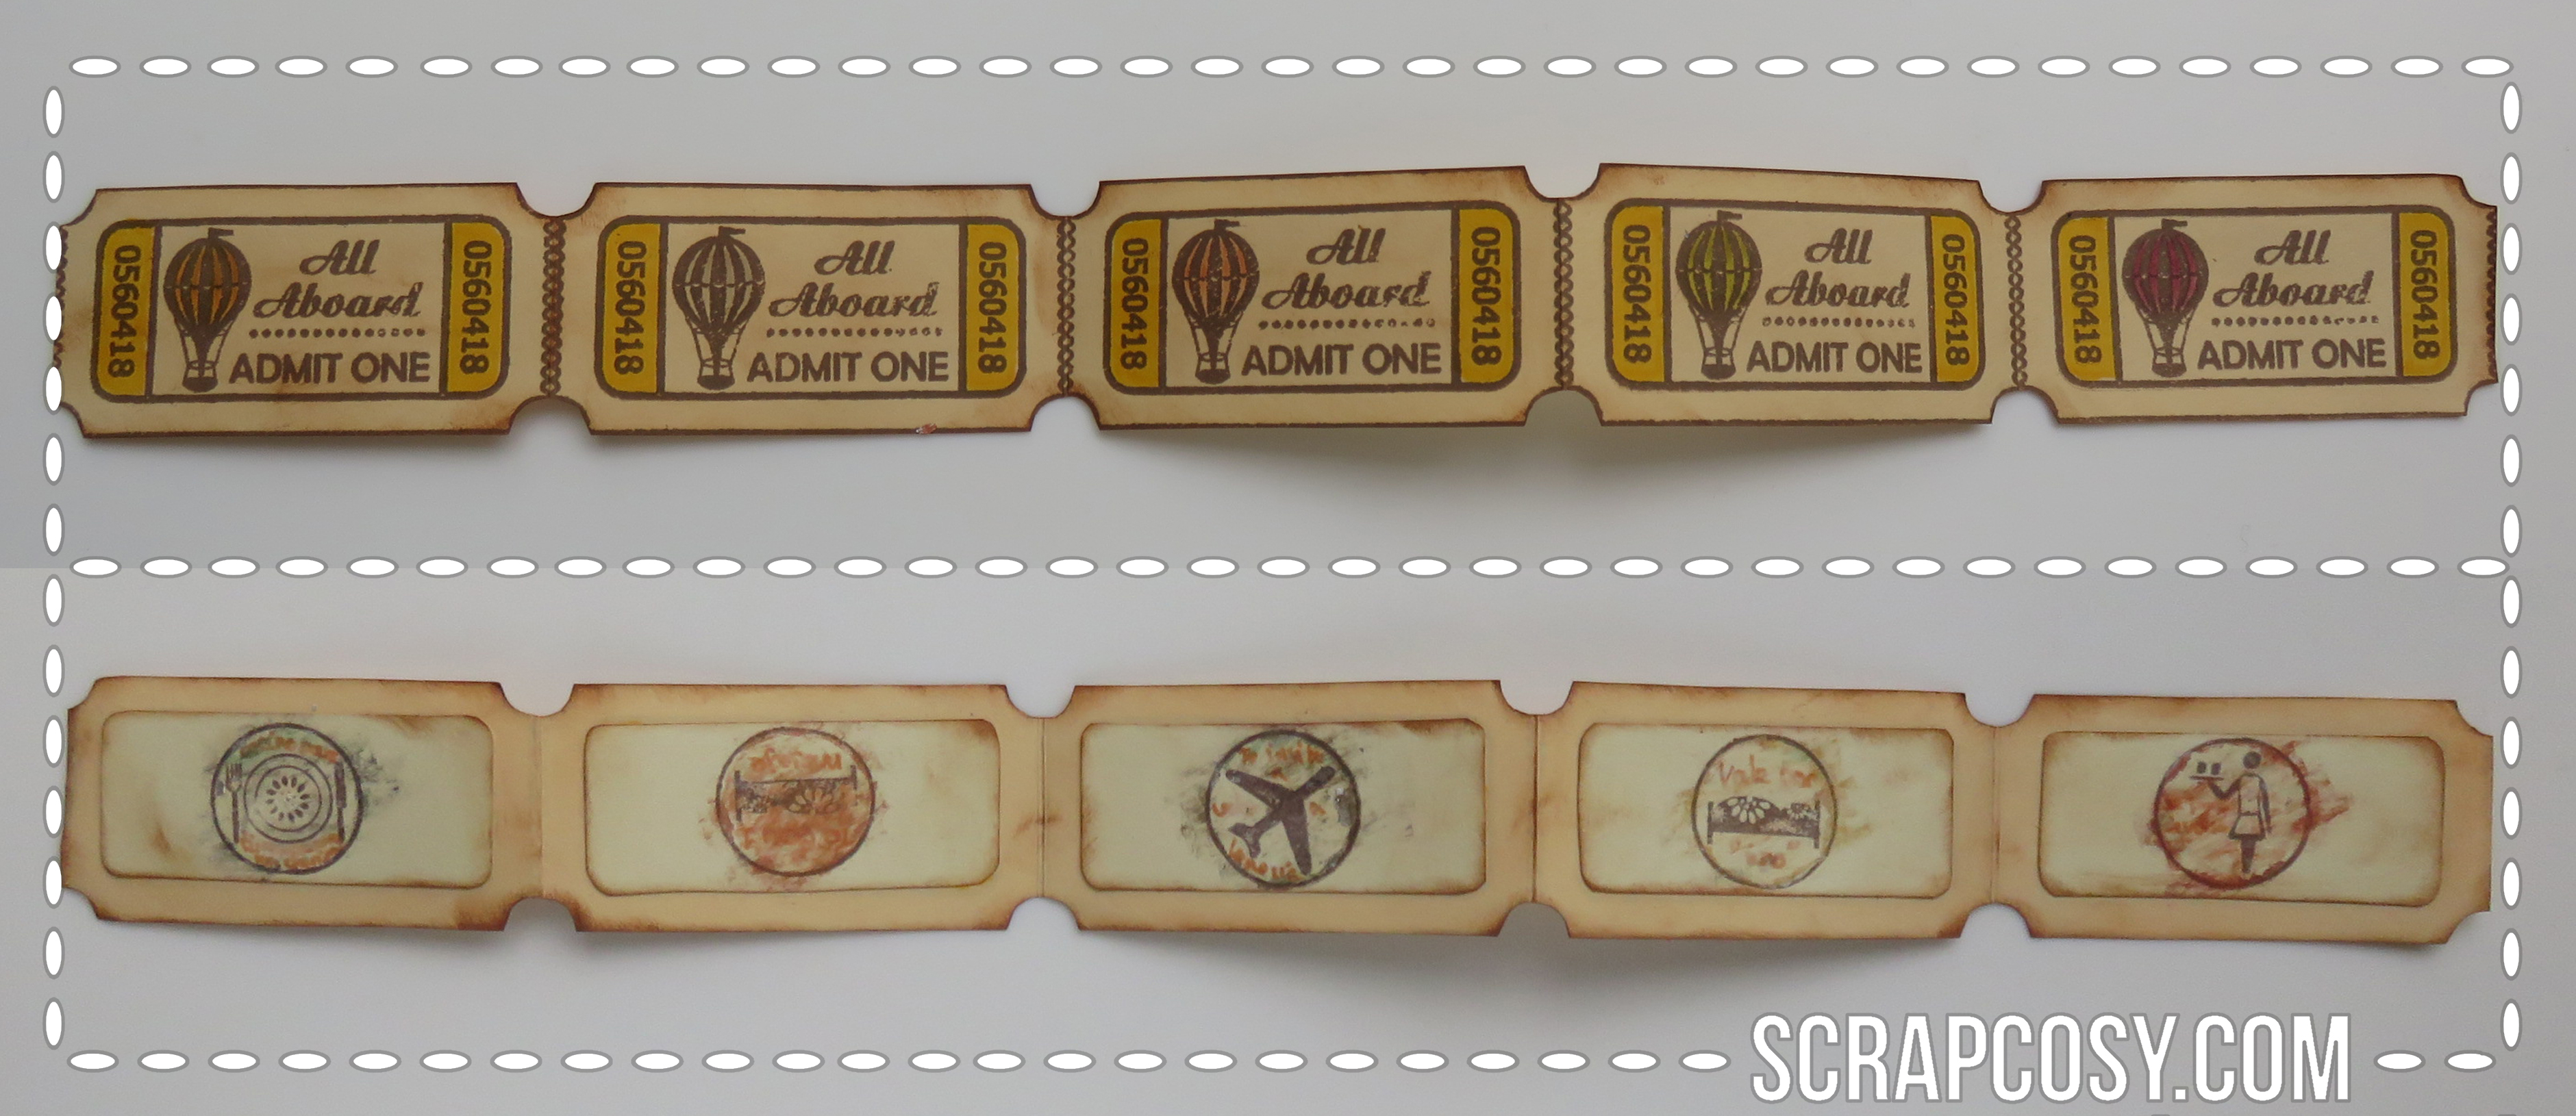
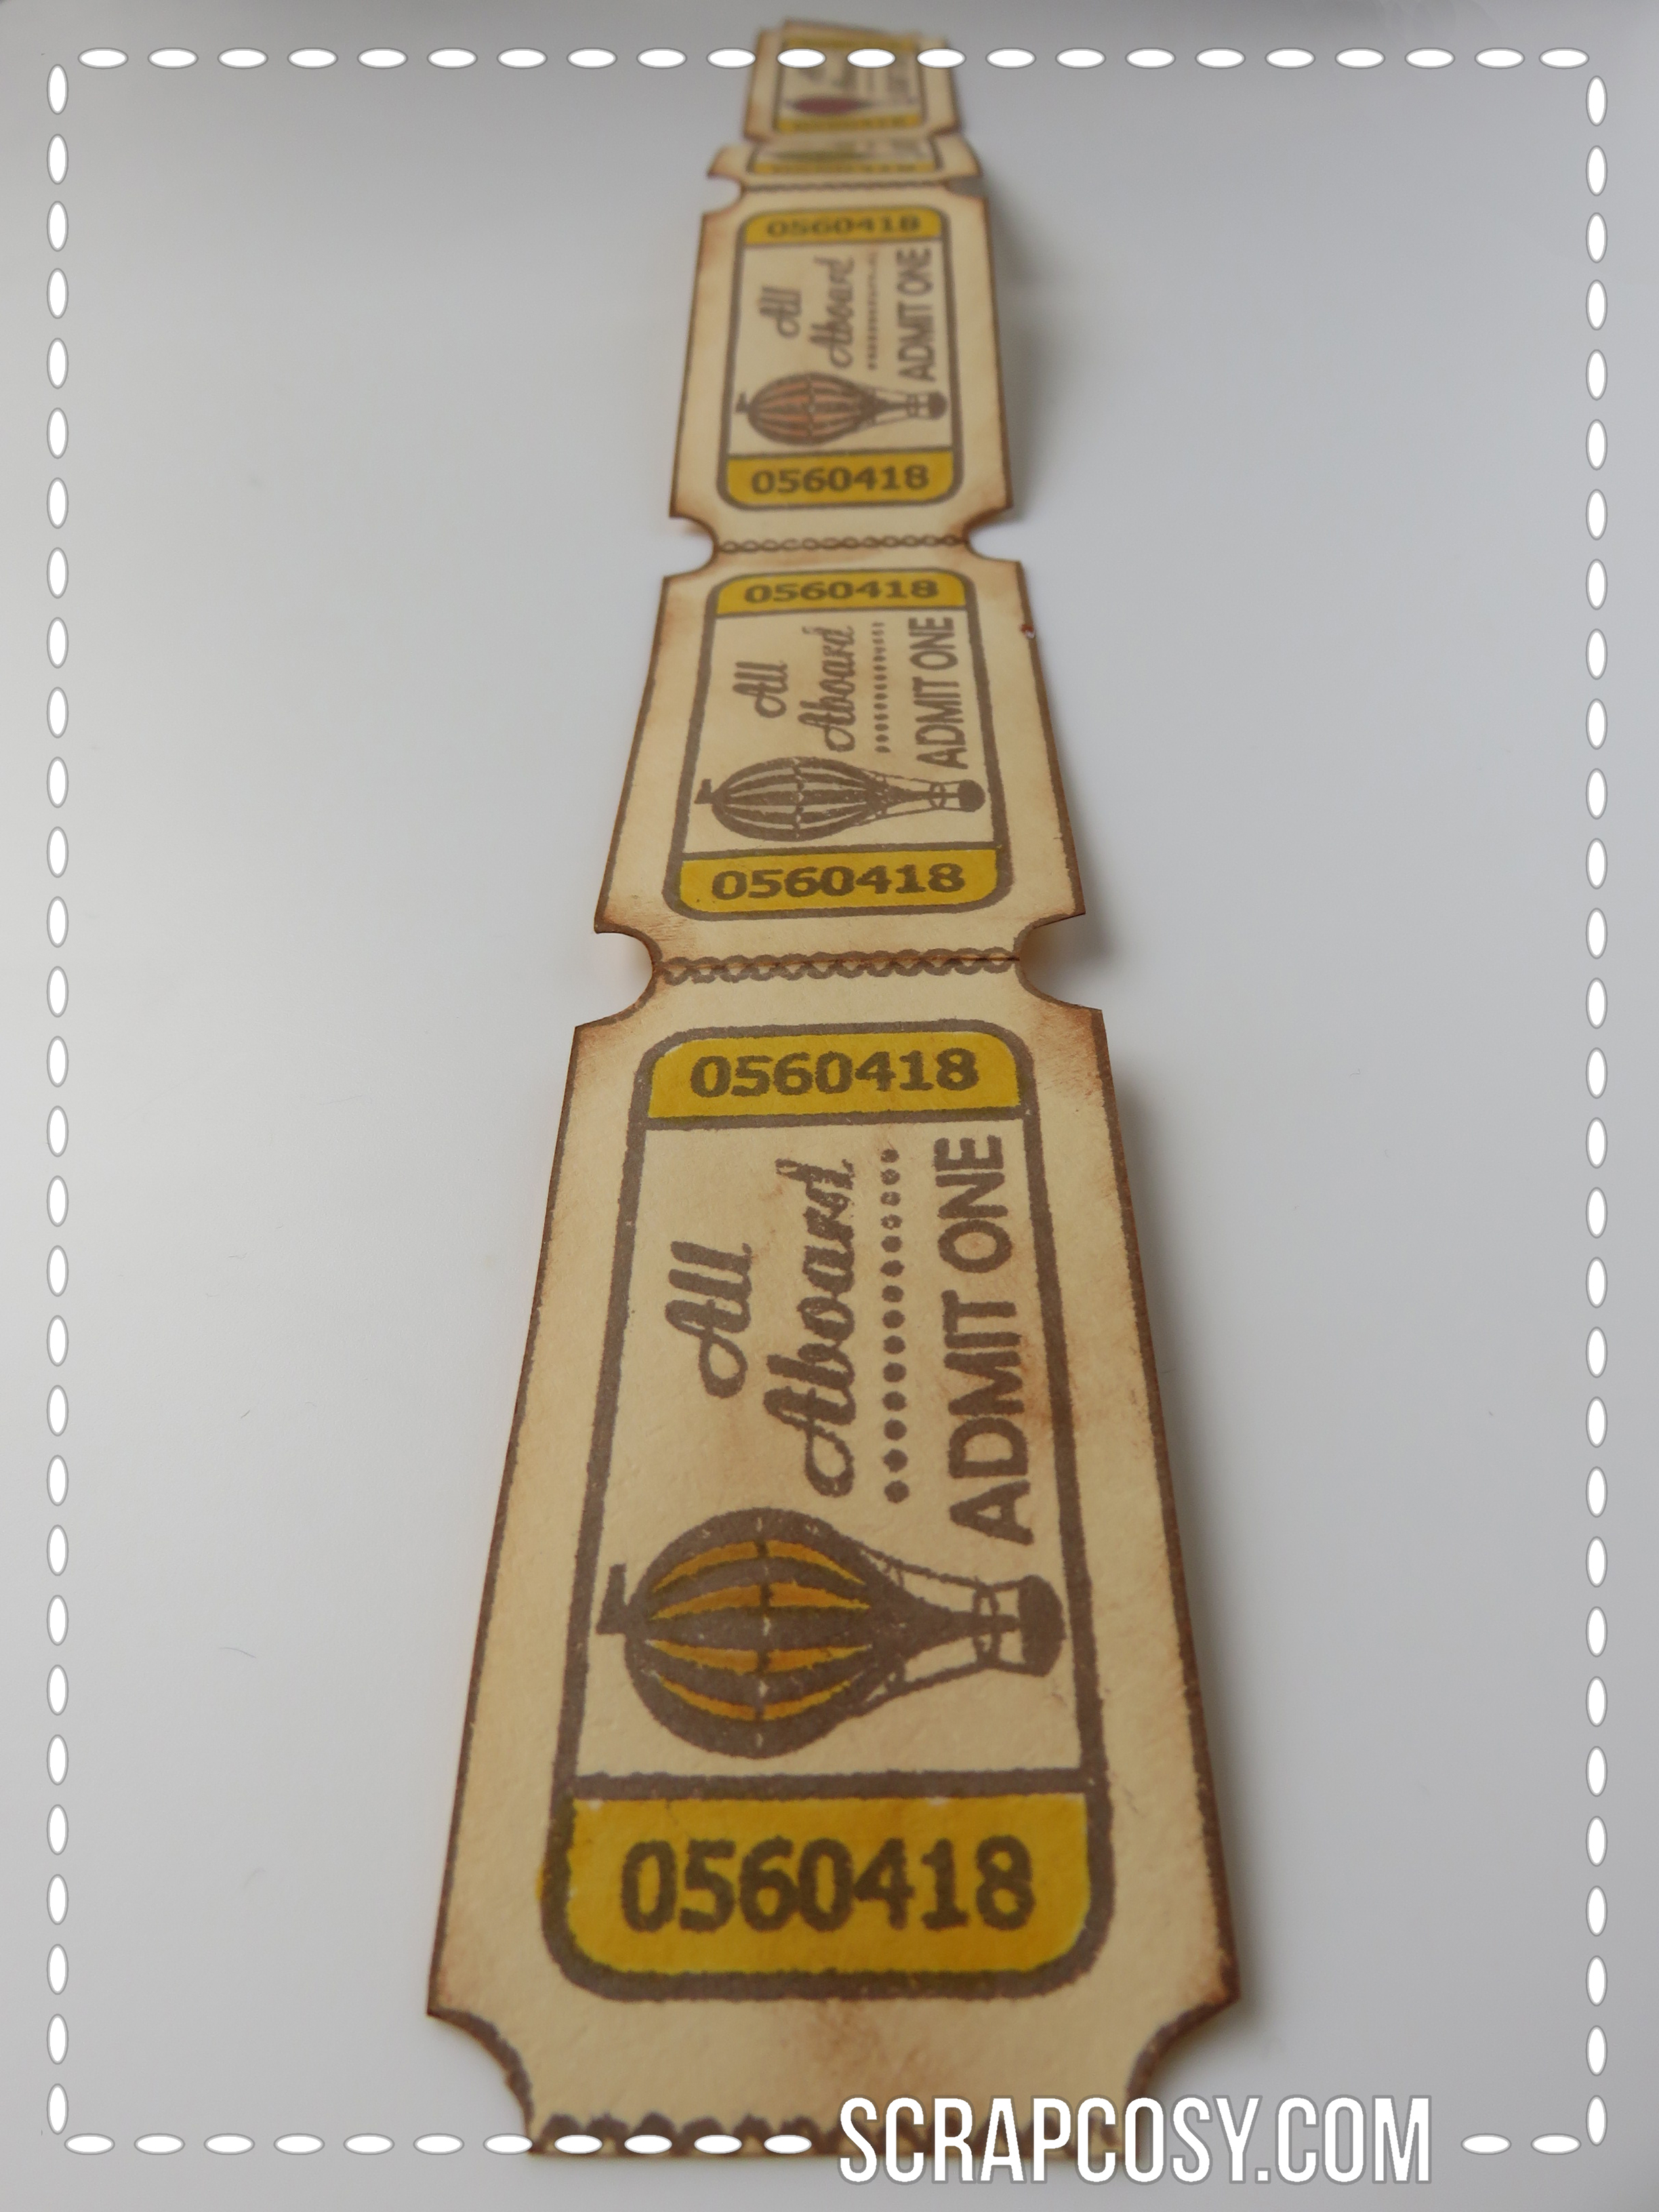
I took a stripe of cream cardstock and I stamped 5 times the ticket, one side by side with the other, so they seem to be a stripe of tickets. Then I cut the stamps stripe (as below) I inked the edges with vintage photo, then I coloured the balloons and the tickets details with alcohol markers.
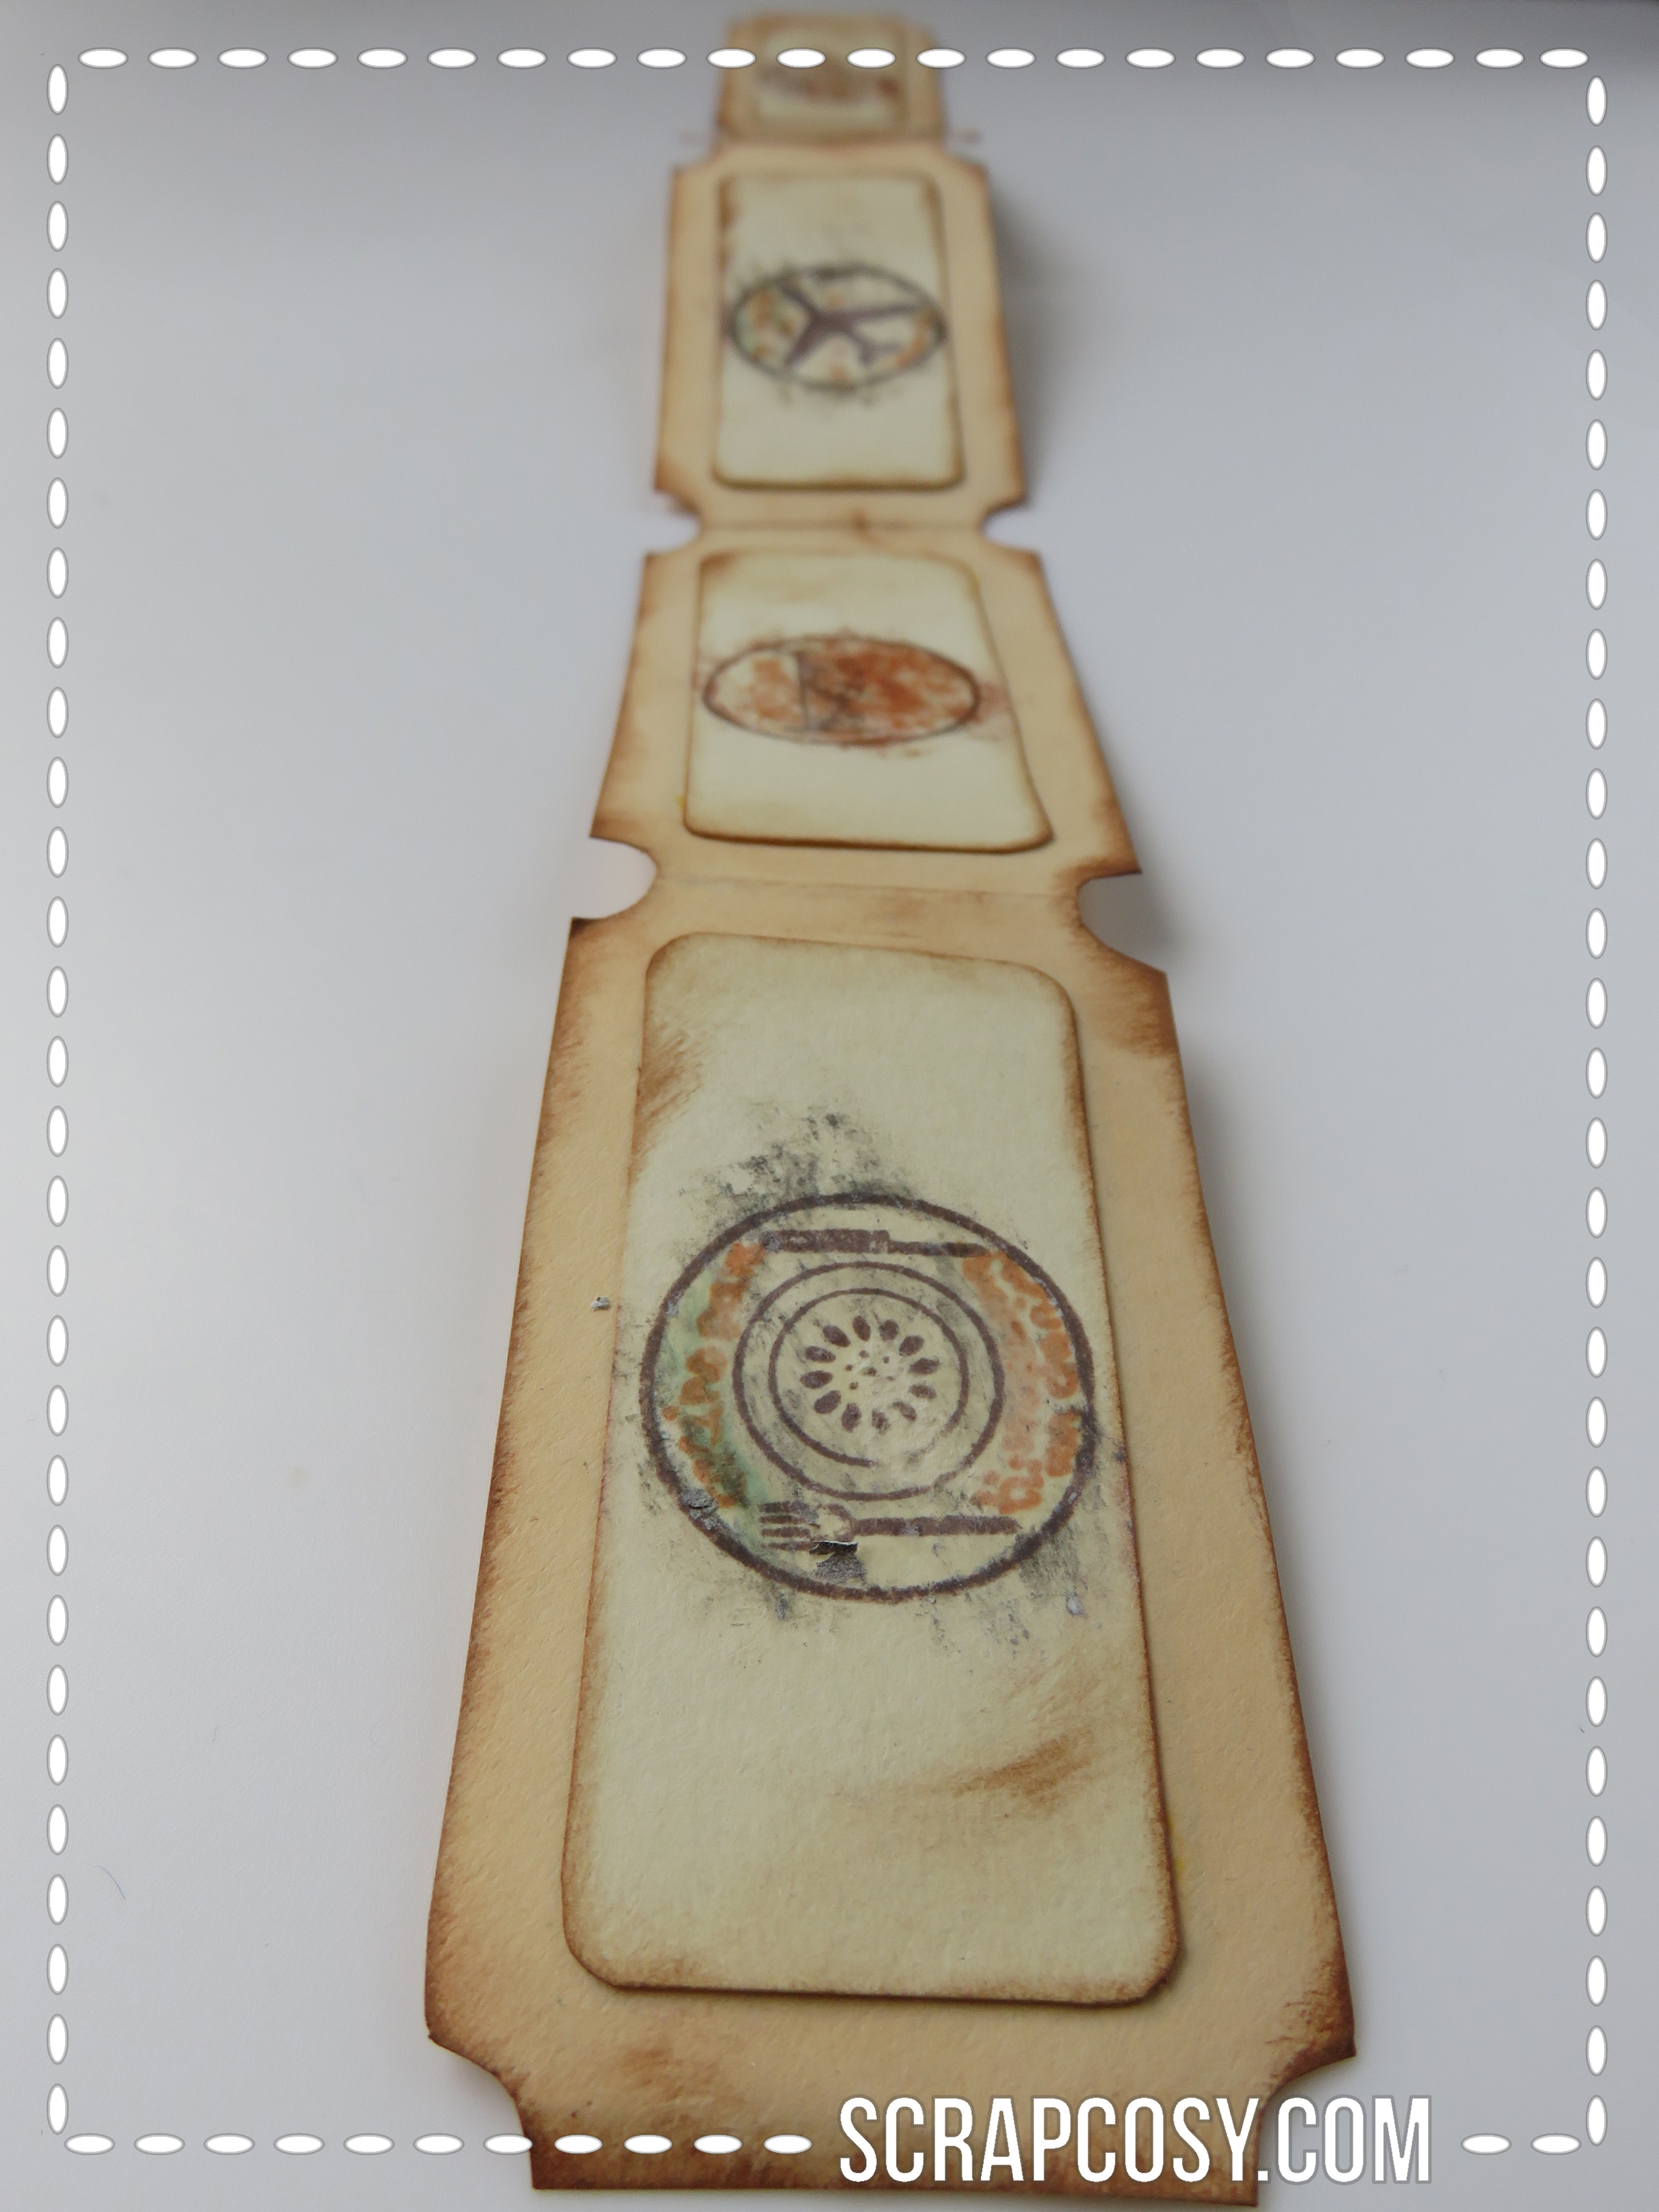
For the scratch (you can see them scratched already) I first stamped the images in versafine black ink and I wrote in tiny letters with alcohol markers what was the actual present). Then I rubbed on with a white wax crayon on top of the stamped circles, to protect the images. Intead of crayon, you can put a piece of cell tape that covers the area you want to scratch. I followed a step by step similar to this one that I saved on pinterest. Basically the idea is to mix acrylic paint (silver, gold, whichever- 2tbsp) with detergent (fairy type – 1tbsp) and then paint on top of the protected area (which you protect with a wax crayon or transparent cell tape). Leave it aside to dry and once done, you can fold them.
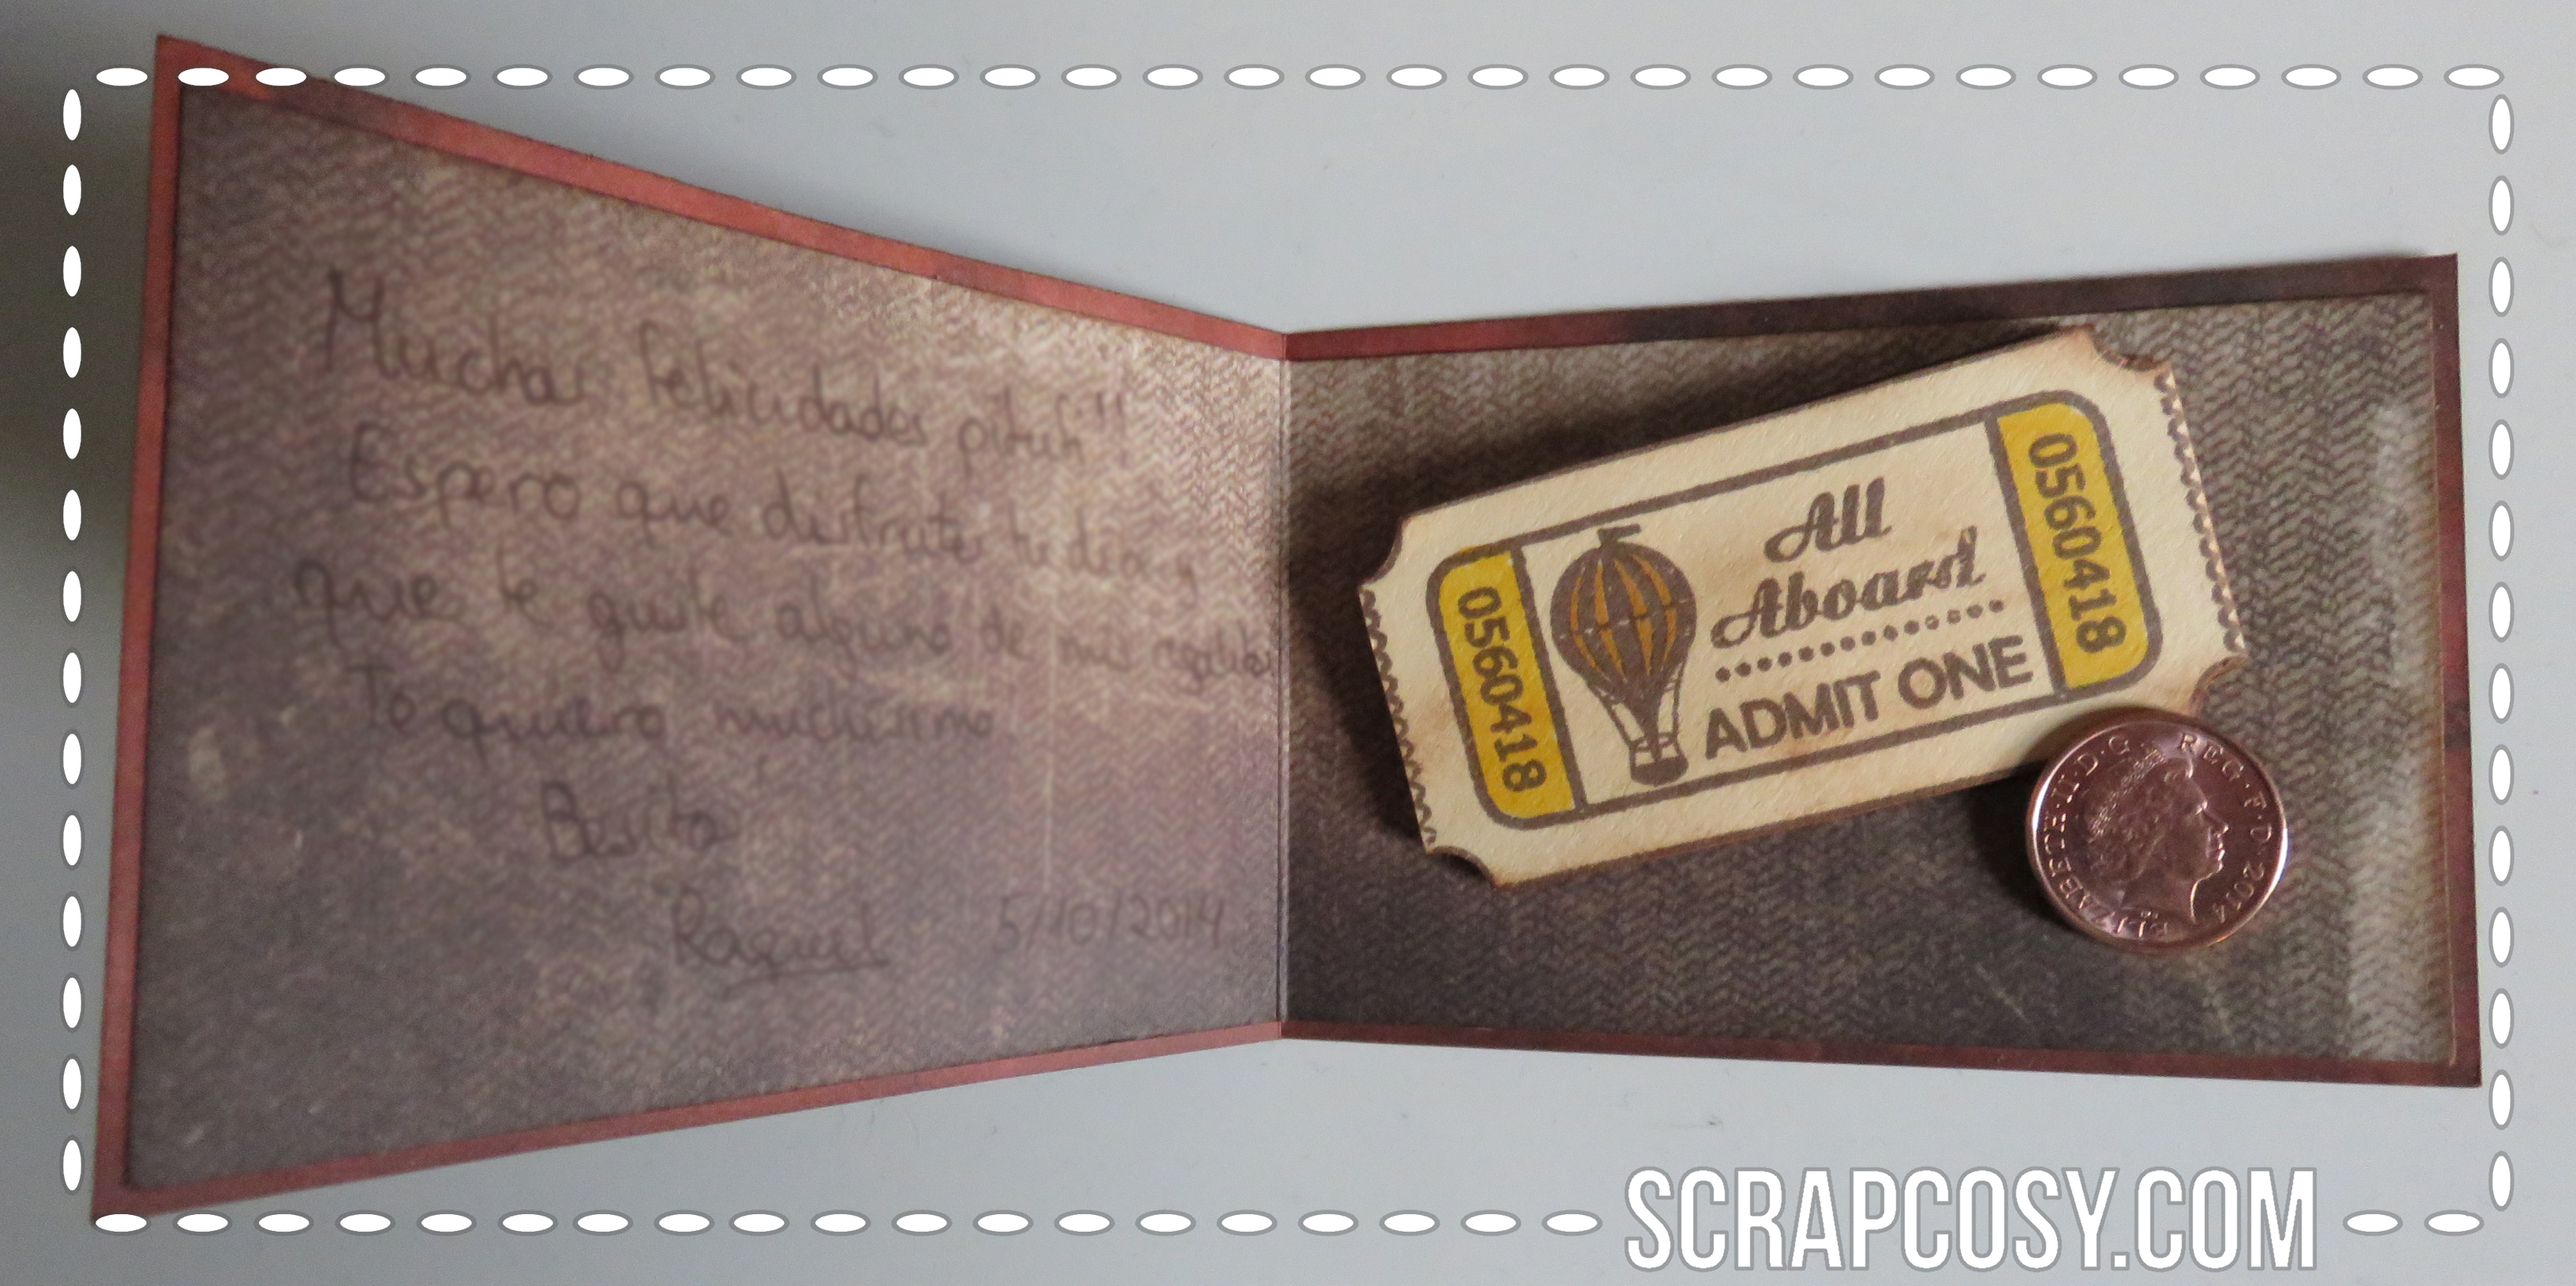
This is the inside of the card. I cut another dessign paper from the same collection to a slightly smaller size (0,5cm less) and I sticked it to the base, centred. Then I used 2 glue dots to place the tickets folded and the penny. I wrote my card on the left.
SUPPLIES
- Tim holtz patterned paper – ideology 8×8
- Ticket stamp
- Versafine ink
- Aladin travel stamp set
- Vintage photo distress ink
- Tsukineko sponge dauber
- Versamark ink
- Gold embossing powder
- Embossing tool
- Glue dots
- Alcohol markers
- Adhesive
- Scissors
I hope you liked it! Thanks for reading! And see you tomorrow with the final post for this series! 🙂 If you want to send any comments or subscribe, go to the end of the post below
RETROSPECTIVA – OCTUBRE 2014 – LUCKY PENNY – RASCA Y GANA
Este será el penúltimo post de la serie retrospectiva, por ahora. Después de mi post final de mañana voy a volver a mi plan original, que era publicar una vez por semana o una vez cada 2 semanas. Pero por ahora, vamos a seguir adelante con esta tarjeta.
Octubre se acercaba y yo no tenía ni idea de qué regalarle a Gerlac (mi novio) por su cumpleaños, así que en vez de comprar algo que decidí hacer algo por él. La idea era darle diferentes actividades como regalo. En lugar de escribir una nota diciendo vale por un masaje o un vale para un viaje a Venecia por 2 decidí darle un formato diferente.
Creé una pequeña tarjeta de 10cm por 6,8cm de un papel de Tim Holtz (pieza de 20cm por 6,8cm doblado a la mitad) y estampé y embosé un feliz cumpleaños en dorado. Entinté los bordes y el feliz cumpleaños con la foto con tinta distress vintage photo (si quieres destacar el embossing dorado se puede aplicar la tinta encima, por lo que el papel alrededor de las letras queda entintado pero las letras se pueden limpiar con una servilleta y volverán a brillar. Este es el resultado de la parte delantera de la tarjeta::
Entonces preparé los tickets de rasca y gana:
Cogí una cartulina color crema, corté una tira y estampé 5 veces el billete, uno al lado del otro para que pareciese una tita de tickets de las de la feria y los recorté (quedaron como abajo) entinté los bordes con vintage photo, entonces pinté los globos y los detalles con rotuladores de alcohol
Para el rasca y gana (puedes verlos ya rascados aquí) estampé las imágenes en tinta negro versafine y escribí en pequeñas letras con marcadores de alcohol lo que rea el regalo: masajes viajes, cenita). Entonces pinte encima con un lápiz de cera blanco encima de los círculos estampados, para proteger las imágenes. En lugar de cera puedes poner un trozo de celo para cubrir el área que se ha de rascar. Seguí un paso a paso similar a este que salvé en pinterest. Básicamente la idea es mezclar pintura acrílica (plata, oro, 2 cucharadas grandes) con detergente (rollo Fairy – 1 cucharada) y luego pintar con esa mezcla encima de la zona protegida (que se protege con una cera blanca o con celo transparente). Deja secar y una vez hecho esto, puedes doblarlas.
Este es el interior de la tarjeta. Corté otro papel de la misma colección o similar a un tamaño ligeramente más pequeño (0,5cm menos) y lo pegué a la base, centrado. Luego usé 2 glue dots para colocar los billetes doblados y la moneda. Eescribí mi tarjeta a la izquierda.
MATERIALES
- Tim holtz patterned paper – ideology 8×8
- Ticket stamp
- Versafine ink
- Aladin travel stamp set
- Vintage photo distress ink
- Tsukineko sponge dauber
- Versamark ink
- Gold embossing powder
- Embossing tool
- Glue dots
- Alcohol markers
- Adhesive
- Scissors
Espero que os haya gustado! Os veo mañana con el último post de esta serie por ahora. Gracias por leer!

Muy bonita, me encanta.
LikeLike