
Hi everyone! Here’s my newest release of stamps. Enjoy!
Hola a todos! Os presento mis nuevos sellos y estenciles 😉 Espero que os gusten!
I’m sooo excited to share with you my newest release for PaperArtsy which has 2 stamps and 2 coordinating stencils.
This release comes after a big change in my life has happened. I became mum in April 2019 and since then I’ve been taking care of my baby boy Matt, so I had very little time to spend on crafting and designing. I spent most of the time changing nappies, giving cuddles and kisses to my baby and sleeping and resting while I could. Still, during that time I had time to think and evolve the ideas that came to me while being pregnant.
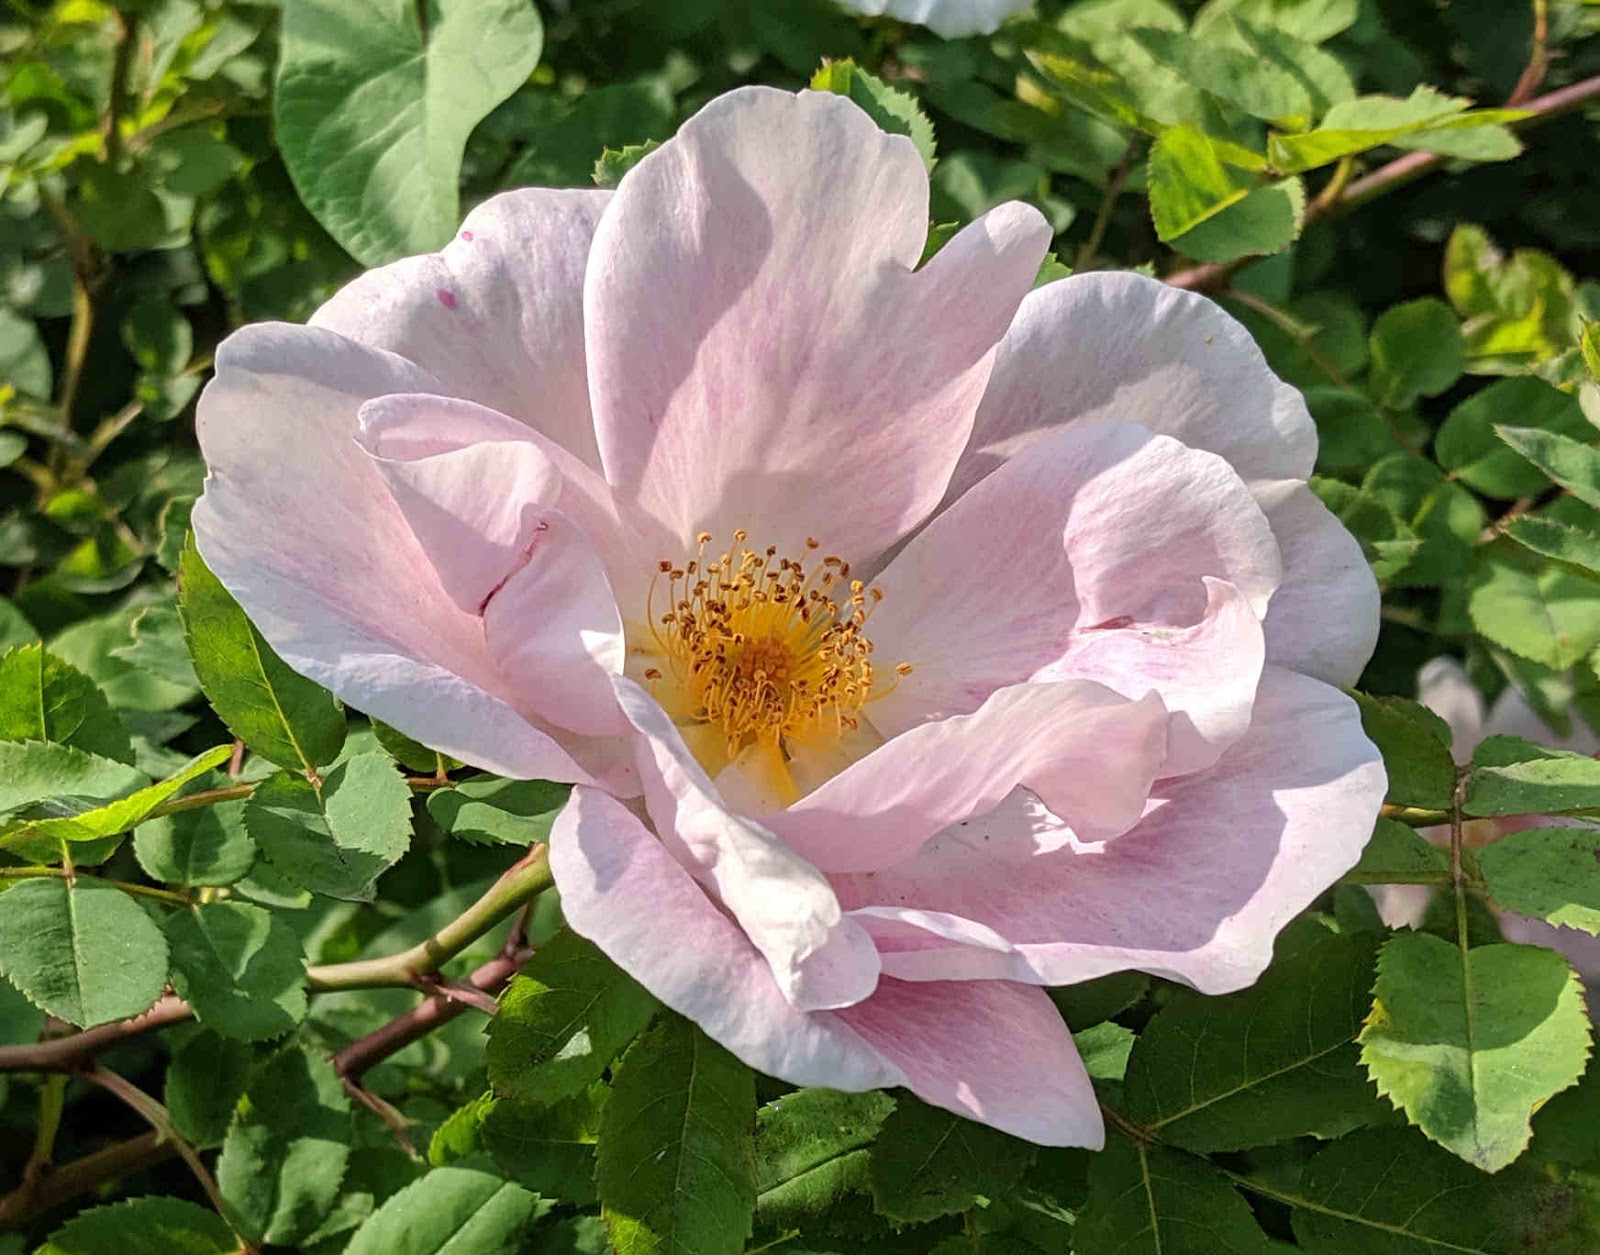
One day during my pregnancy, I decided that my next theme would be birds and I knew I wanted a robin bird to appear on it. The only problem was that I couldn’t find the proper robin in any vintage book… but one beautiful morning in March, after doing my pregnancy yoga exercises, I looked through the window and something magic happened! I saw a robin bird! I went quickly (as quickly as my big belly bump allowed me) to grab my camera and I took some pictures of it. The robin started to pose, looking up, down, left, right, changing positions and places. It was a magical photo session from the comfort of my living room on a lovely morning. Note: the same day I captured 2 squirrels as well, so who knows what will happen next ;P
Here is the robin (or what I thought a robin was, maybe I’m totally wrong, hehe) and from it I draw the bird on ESC19.

Similarly, I draw the flower corner arrangement from flowers I saw while walking on the street and looking at the front gardens of some houses in London. I love taking pictures of flowers in bloom for future inspiration!
And after finding other elements in vintage books and rearranging them in postage stamps and several frames, I got the 2 plates designed. So this is how this release came to life!
Today and Tomorrow you will see ideas with these stamps from myself and another of the Team PA Bloggers. You can also see plenty of activity on PaperArtsy’s Instagram, Facebook, Twitter, Pinterest. (links at the foot of this post) So no matter what your preferred social media platform, we will be sharing with you!
Let’s check out these new beauties, some ideas from each set and few projects. And so you get inspired I’ve added few videos in between.
New Stamps
Eclectica Scrapcosy Set 19 (ESC19)
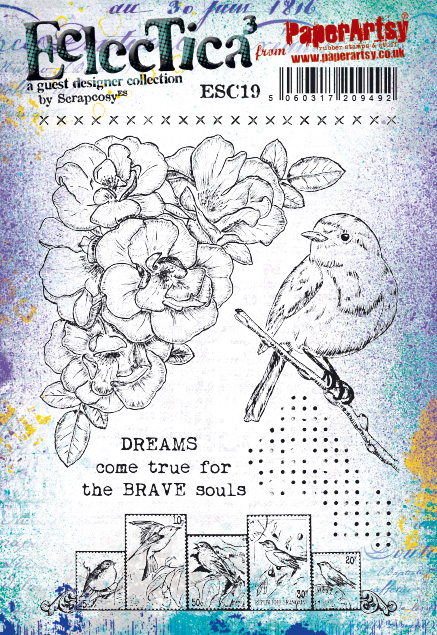

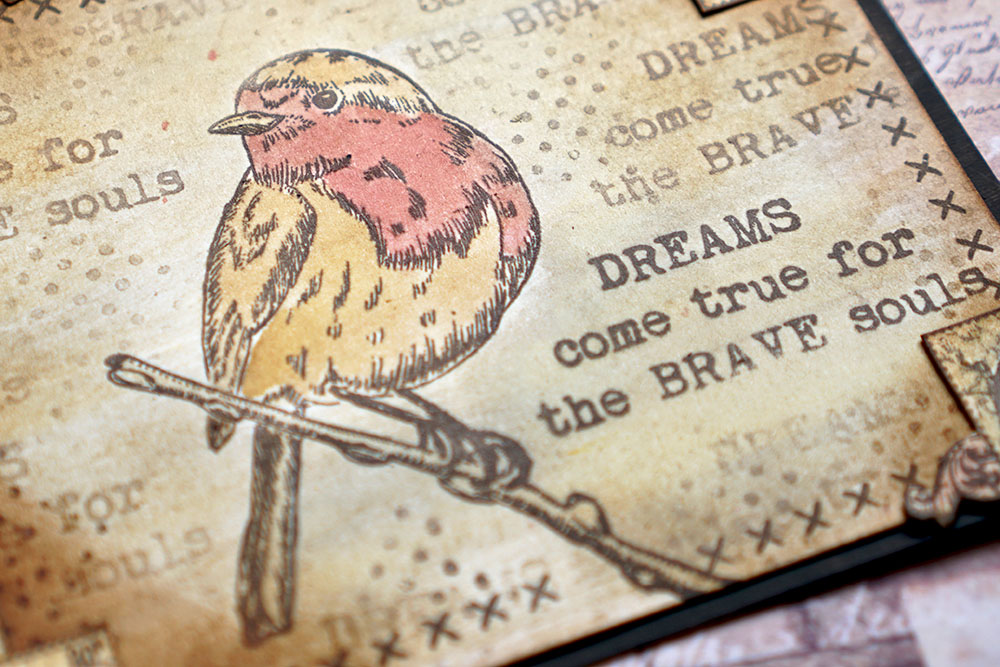
I had in mind to create a vintage postcard and I wanted the bird to be the focal point, so I decided to place him in the centre and paint him as a robin. I love to use vintage postage stamps in my projects, that is why I created the collage of postage stamps, so I can create my own ephemera, and in this case use it to decorate all the corners of my postcard

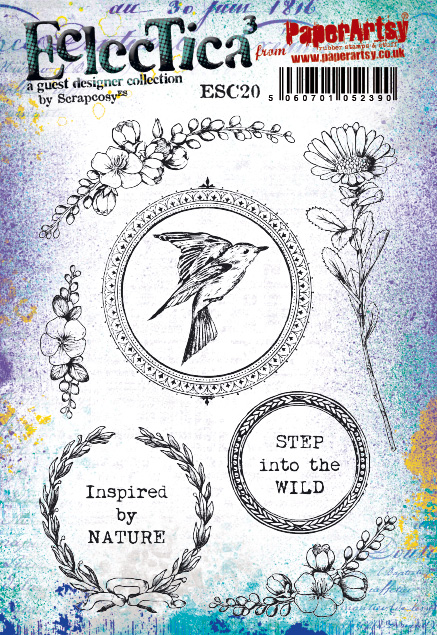
Eclectica Scrapcosy Set 20 (ESC20)
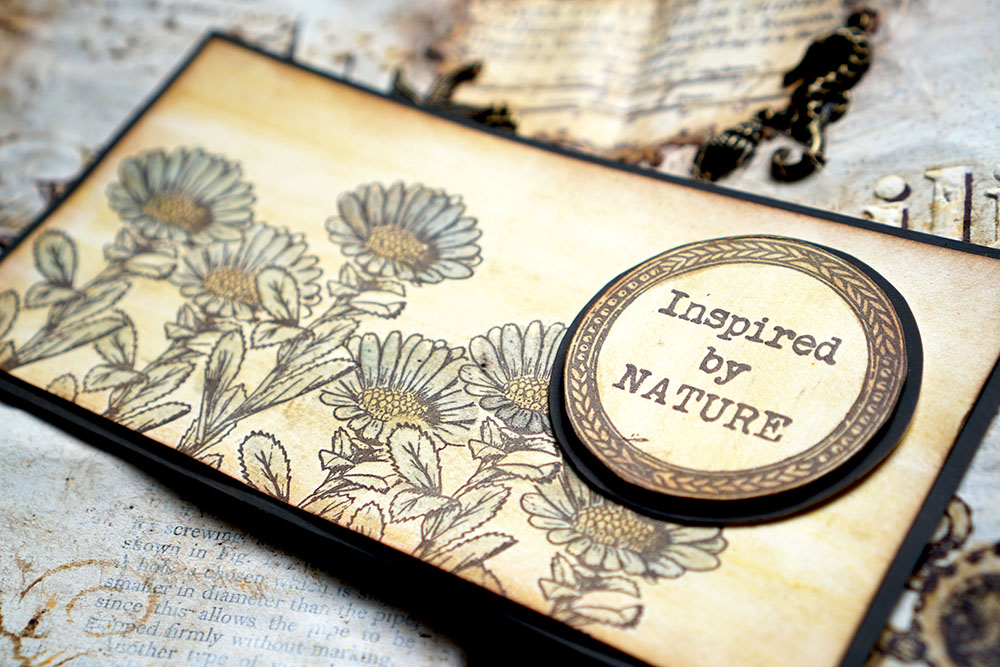
It was so much fun creating this field of daisies using just one stamp and masking it in places! I also decided to mask the sentiment and swap it for the other one in the set. So you can see that these can be interchanged.

New Stencils
PaperArtsy Stencil 190 (PS190)


The filigrees in the stencil are very similar to other filigrees I’ve made in the past for other stencils (like PS072, PS074 or PS106) but this time they can be used to just frame a word, or like here, to decorate the corners.
The sentiments included follow the same style I’ve used in the past too. I find them really useful not only for cards, but also for art journaling and other mixed media projects.
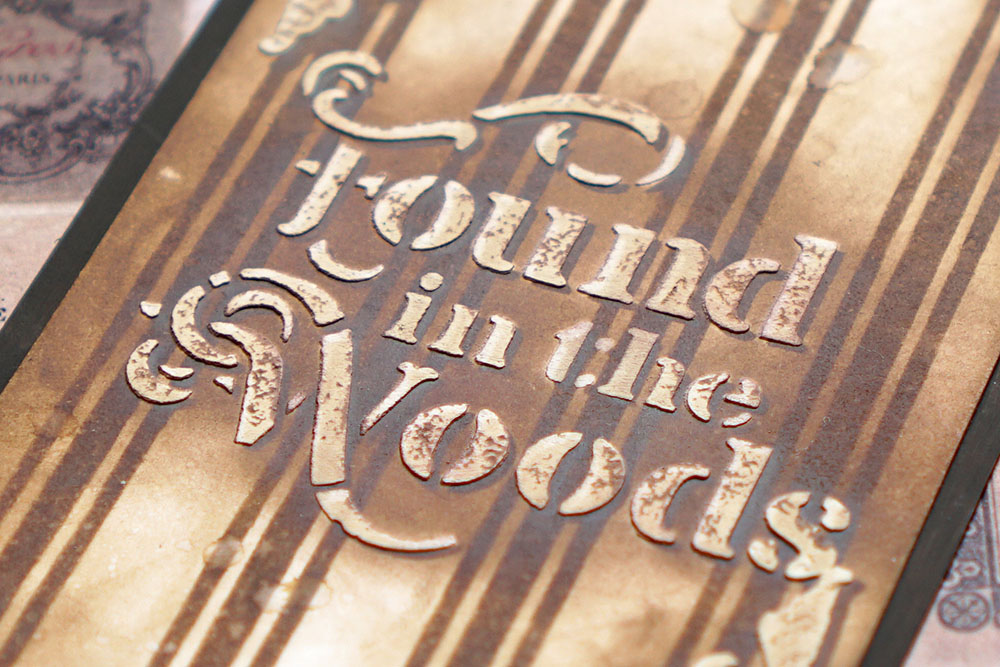
PaperArtsy Stencil 191 (PS191)


I wanted to use both stencils so they can emulate a wallpaper. Not only that, I wanted to be able to get 3 patterns out of them, the third one achieved by combining both stencils at the same time, as I’ve done here.
The idea behind the circles in the stencil, apart from framing the sentiments, is to use them in conjunction with the stamp set ESC20. They can be used to put a frame in the stamped circles, since they are slightly smaller. You could also use them to mask part of the stamps.

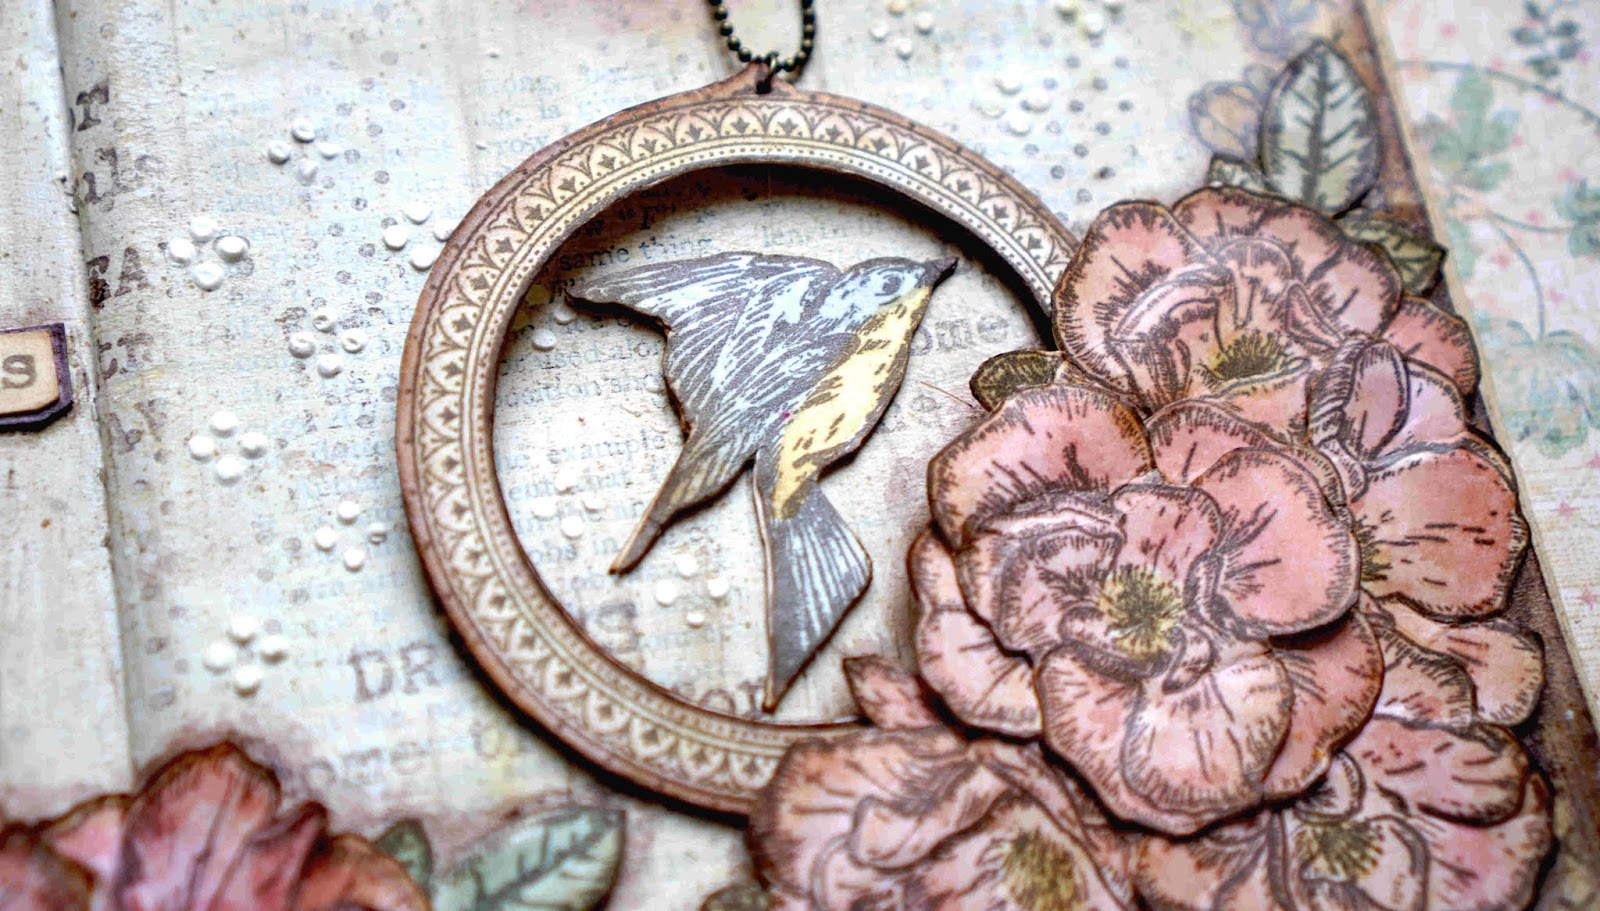
This project is actually a part of a class I’ll be teaching in Barcelona the next weekend (08/02/2019) in Paper, Scrap & Experiences. I decided to use most of the stamps and part of both stencils to create a vintage art journal. Lots of fussy cutting, colouring with infusions, stamping background and adding texture with Grunge Paste

I love to fussy cut elements and to stamp and cut same image several times, so I can arrange it and give it dimension, like the bird, which legs are on top of the branch, but the tail is behind the actual branch. Using that plus adding a shadow with a brush (mix Satin Glaze with Rocky Road to get that brown shadow) you get the feeling it is popping out of the paper. Same thing you can achieve if you frame the words of the sentiment in a piece of paper painted with French Roast in this case, so they stand out
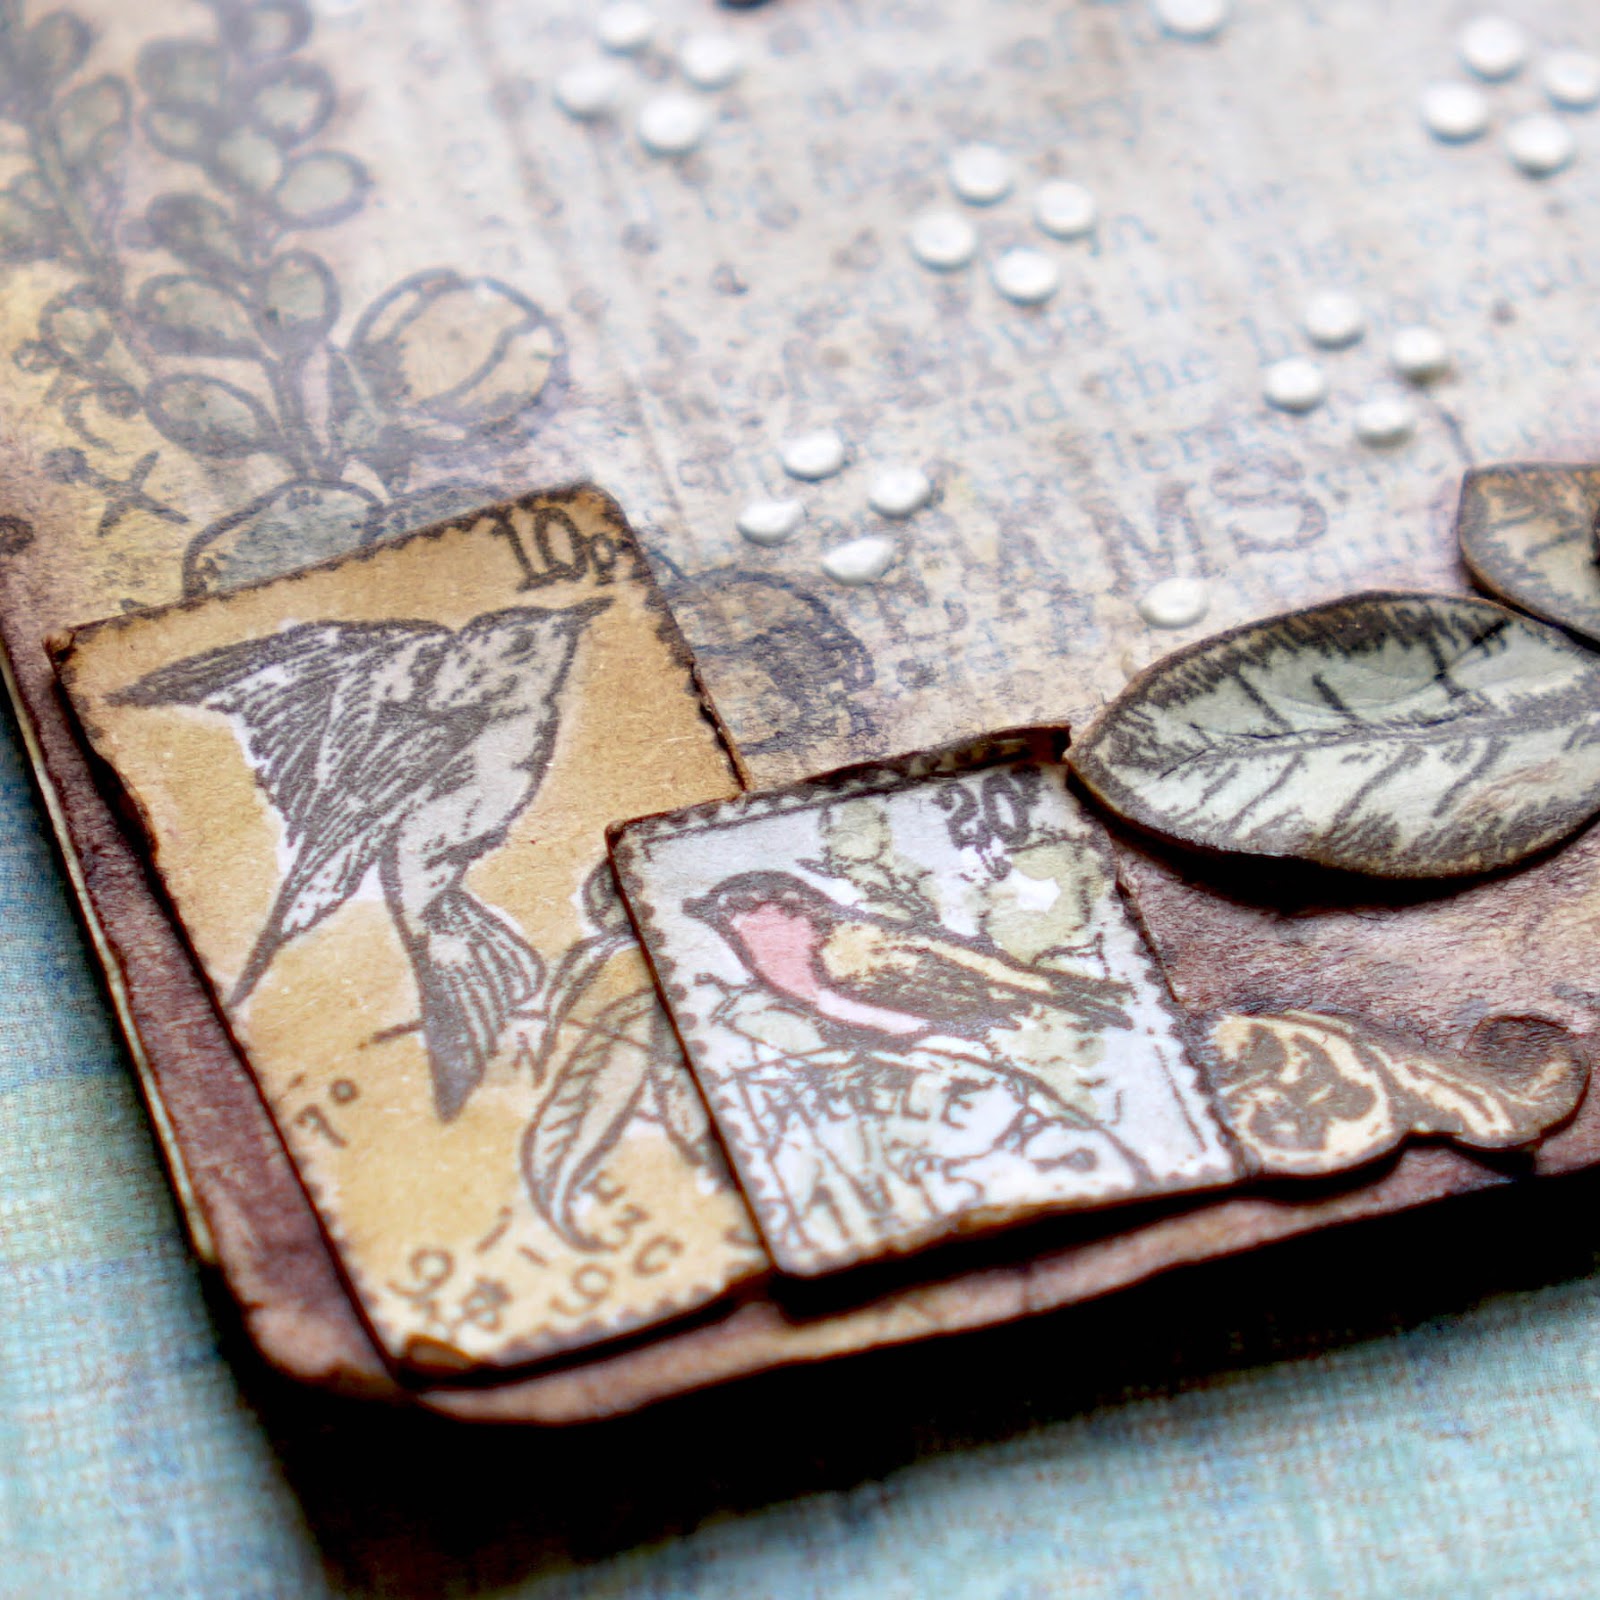
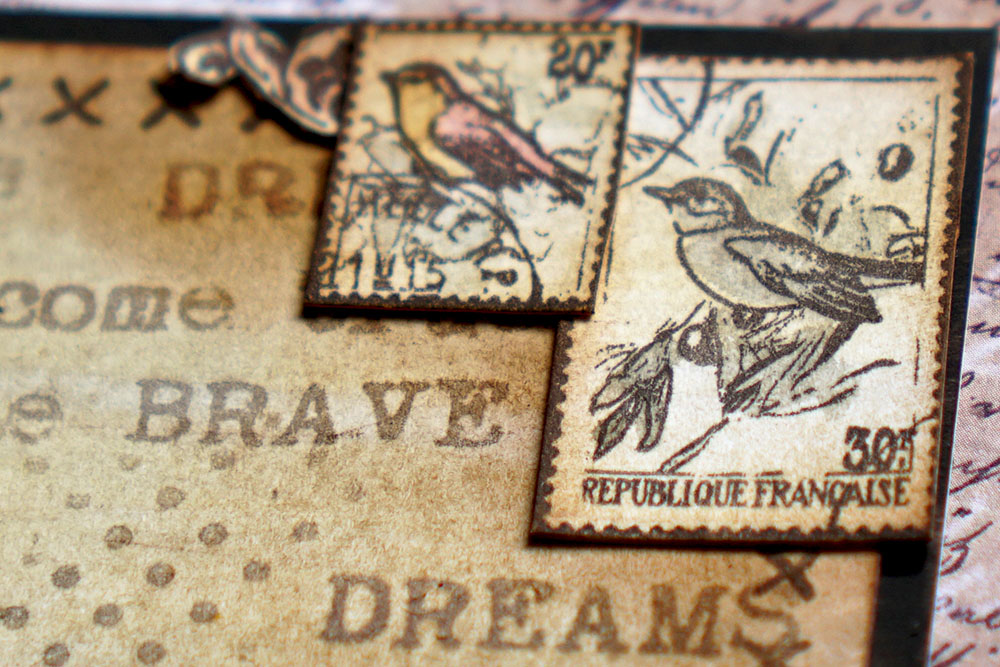
When I fussy cut papers, I don’t like to just cut, colour and paste them on the journal, I like to age them and also worn them a bit, so they fit the vintage vibe. As you can see, my postage stamps and the leaf in the image above, have been altered and modelled by hand to achieve that result.
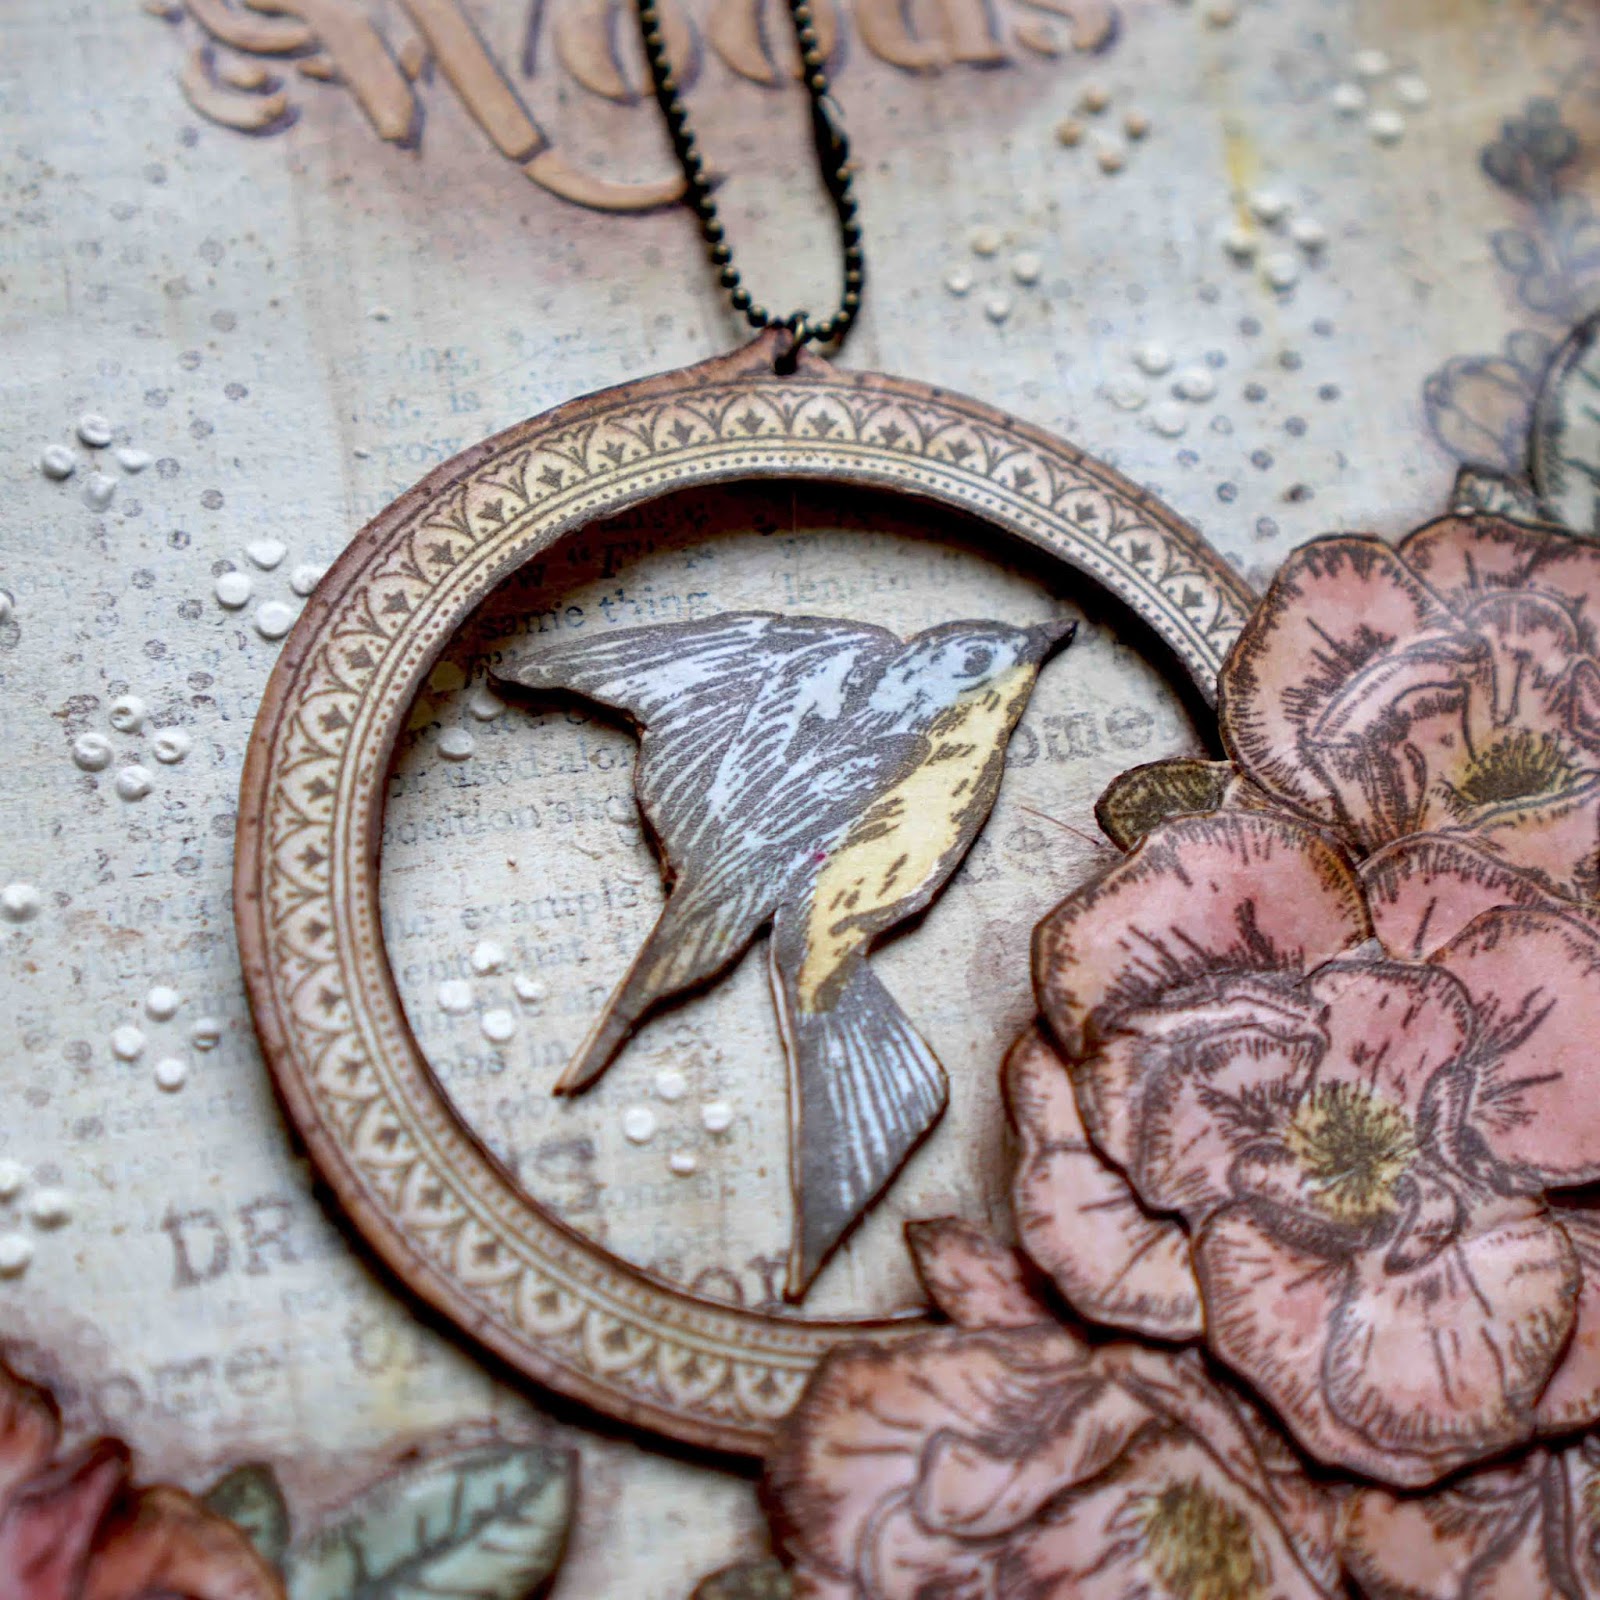
I love to add interactive elements in my art journals. In this case, I decided to add a flipping bird hanging from a metallic chain. The bird has been stamped and cut twice: first time stamped in the normal way and second time it has been stamp-inverted using a gelly plate, so I have the bird stamped in both directions and it can fly as you can see in the mini video below using the right strings
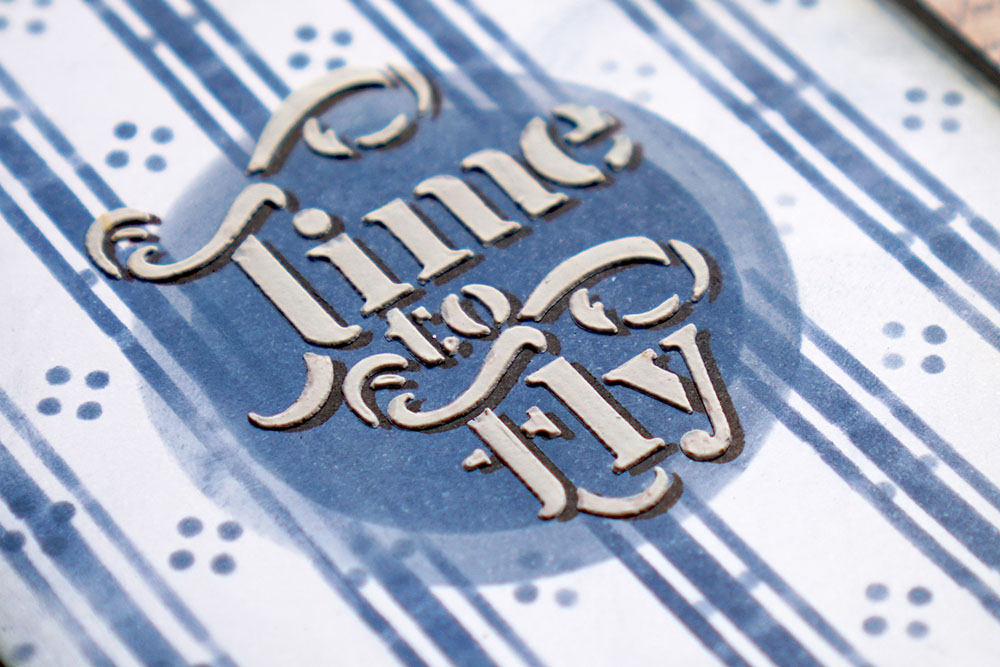
Project 2: Time to fly

I created the different flowers in ESC20 so you could create wreaths as above. There are different sizes of flowers, so you can get different sizes of wreaths.

Other projects
Bird in the wild: Smudge with distress oxides
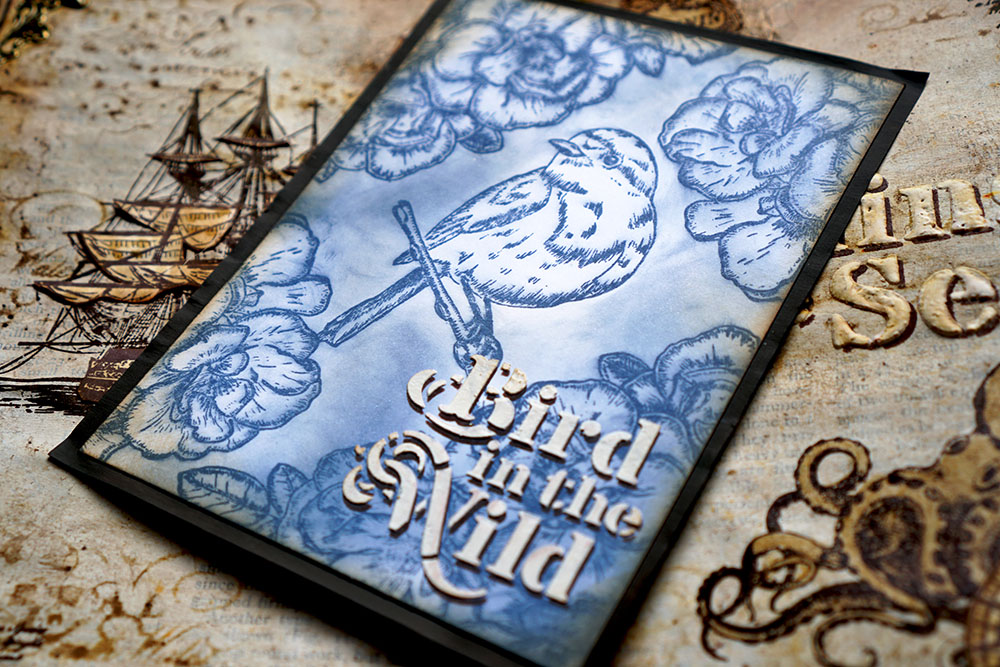


I used one of my favourite techniques to create this sample. If you want to learn how to do it, just watch this video from my previous release:
Squared daisy

This is how the stencil looks like when used in squares. I just love to use it in this way too! You can combine different colours on vertical and horizontal lines and you’ll get also very nice results!
The wood panel


It’s so much fun to create a wood panel! You just need to paint the surface with a white Fresco Paint, for example Chalk or Cloud 9, and when dry add a hint of infusions and spread with a flat brush loaded with glaze in vertical strokes. If you want to see this in action, here is an old video (from my very first release in February 2017).
Finally, if you want to see more, here are a couple of recent live videos from Creativation 2020 where I used these stamps to create a couple of samples. Enjoy!
I hope you enjoyed my new release and got inspired with some of my projects! I’m looking forward to share more with you! See you soon!
My blog: https://scrapcosy.com
YouTube: https://www.youtube.com/c/scrapcosy
Instagram: https://instagram.com/scrapcosy/
Teaching Schedule:
08/02/2020, Scrap, Papers & Experiences – Already sold out!
I hope you liked it! Thanks for reading! And see you soon!

Love them all! Give you many options for applications. Good job!
LikeLike
The stamps our fabulous and I also lik the stencil very much!!
LikeLike
Thanks so much!!
LikeLike
Raquel, vos tampons et pochoirs sont magnifiques ! comme d’habitude ! et les créations aussi ! quand seront-ils disponibles ?
LikeLike
>
LikeLike