

Hi everyone! Today I’ sharing with you how to make these coasters with a waterproof finish, using my newest stamps and stencils that I’ve designed for PaperArtsy, all tea related. This is related to Topic 18: Stamp Platform Techniques, the current challenge at PaperArtsy blog. There is also a long video, so grab a cup of tea, and enjoy.
Hola a todos! Hoy os enseño como crear estos posavasos con acabado resistente al agua, usando mis últimos sellos y estenciles que he diseñado para PaperArtsy, todos relacionados con el mundo del té. Este post va relacionado con el reto que ha propuesto PaperArtsy Topic 18: Stamp Platform Techniques. Ya me diréis qué os parece en la sección de comentarios de abajo. Hay un vídeo muy largo, así que preparaos una taza de té y a pasarlo bien!

En castellano por aquí / Spanish here
Today I’ll share with you my main reason why I use a stamping platform: Peace of mind. Yes, you can do many things with it, but 90% of the time I decide to use the platform is because in my mind the slightest doubt comes (or a combination of them): Will I stamp straight? Will the surface catch enough ink? Will I press evenly that huge stamp? Well, with a stamping platform you can test how the image will look first (in a scrap piece of paper of same size of your project), you don’t need to do too much effort to press, also, if you don’t have a firm hand you still get a sharp image, and the best part: if the first press gives you an image missing ink, just reink again and press once more on that area for a sharper result! And if you have to repeat the same stamping over and over (many repeated designs), using a stamping platform really, really saves time. I know it sounds like an ad, but I’ll say it anyway, because it’s true: now that I have a stamping platform, I can’t live without it…
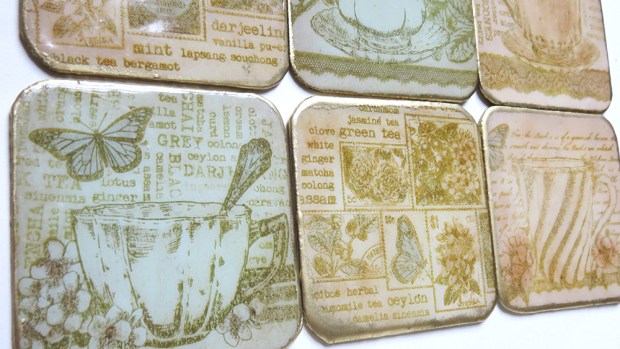
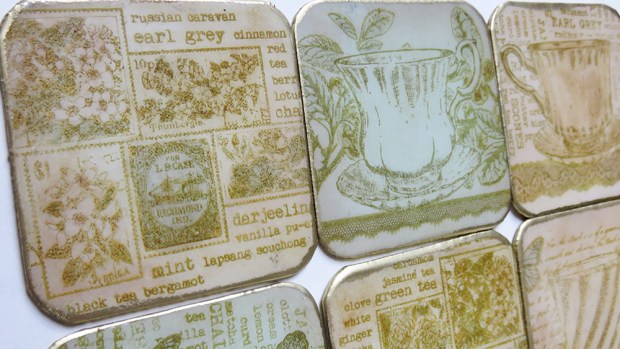
So for today’s project I’ll share with you these coasters that you may have already seen on my blog post release. I used the stamping platform to stamp on grey card board. Yes, you can stamp there too. And you can use the magnets on top (if thin enough) or as I did in my case, you can place them around the coaster, touching the edges to make sure the coaster stays in place. I used 3 magnets (the 2 that come with the platform and one of those mini magnets that are still very strong).
I’ve used my newest stamps and stencils tea related:
Eclectica³ Scrapcosy Set 13 (ESC13)

Eclectica³ Scrapcosy Set 14 (ESC14)

Eclectica³ Scrapcosy Set 15 (ESC15)

Eclectica³ Scrapcosy Set 16 (ESC16)

Stencil PS105

Stencil PS106

Stencil PS107

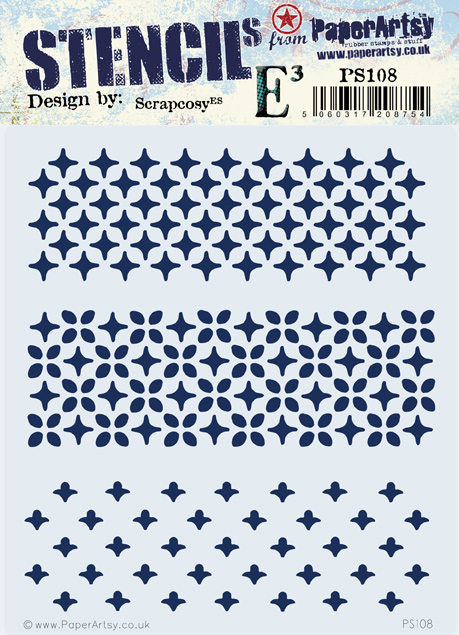
Stencil PS108
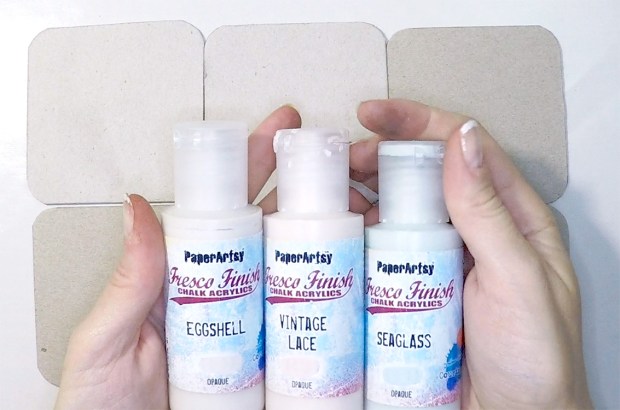
I started my project by cutting 6 pieces of grey card board and covering them with 2 to 3 layers of the new paints by Courtney Franich: eggshell, vintage lace and sea glass.
I stamped the first coaster free handed (with a waterproof ink, I went for Ranger Archival Ink Pad – Potting soil and when I saw the image was not perfect, I thought: not again, I’ll use the platform so I have the chance of re-stamping if needed. And I found that for grey cardboard, it’s better to place the magnets on the edges, to keep the piece in place.

Then I coloured my images using my favourite technique to add colour to non porous surfaces: mixing Fresco Finish – Satin glaze with a hint of Infusions Dye Stains. I used these colours: Sleight blue, Sunset Beach, Golden Sands and Olive Tree
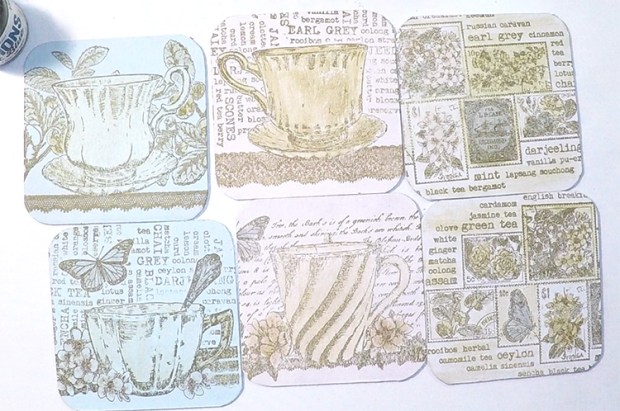
After all that was done, I added some age to my coasters by using distress vintage photo regular ink on the edges, so the front of the coasters was ready.

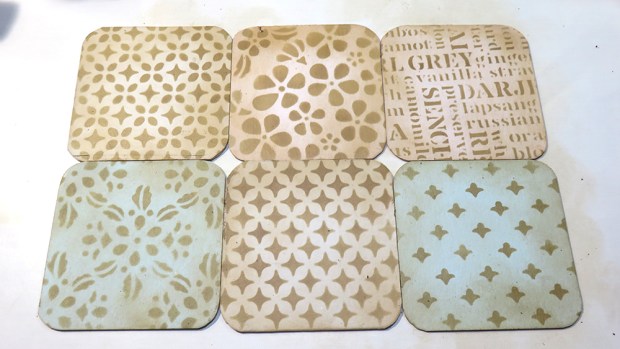
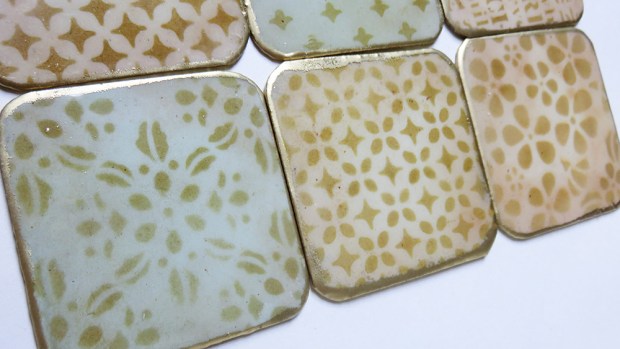
Then I moved to the back and I did a very simple but striking technique: I just used my newest stencils, one pattern for each coaster, and with a foam applicator you get ink from the inkpad (I went again for Ranger Archival Ink Pad – Potting soil for consistency), rub it on well in circular motion (as I say in my workshops, if you really ink it well, this stencilling task takes you 20 seconds, if you are stingy and just lightly dab your ink, it can take you 5 to 10 minutes) and once is loaded with ink, apply ink through the stencil in circular motion to apply the pattern. I try to make my stencils with a repeatable pattern, so you can re-place them and make your pattern as big as you need.

Then I aged that side as well with vintage distress regular ink until my vintage me was content.
The next and final step is making them waterproof! For that I used UTE (Ultra Thick Enamel Embossing Powder) and a touch of Seth’s Baked Texture powders Vintage Beeswax. Then for the edges, some WOW gold embossing powder and these are done!
Here are some pictures of the back sides.


And of course, if you want to see me in action and you don’t want to miss any detail, just watch the video. It’s a long one, so grab a cup of tea and see how these coasters came to life!
Thanks very much for reading and for watching the video! I really had fun creating these coasters and they are so useful! We use coasters on a daily basis at home, since we have our glasses for water, one for each person, in the kitchen and instead of washing them after each use, we place them on top of a coaster. Since each coaster has a unique design that each of us recognise as our own, we know which glass belongs to whom.
If you want to stay in touch, you can find me on these links below.
YouTube: https://www.youtube.com/c/scrapcosy
Blog: https://scrapcosy.com/
Instagram: https://instagram.com/scrapcosy/
Facebook: https://www.facebook.com/raquel.burilloperez
My Etsy shop: https://www.etsy.com/uk/shop/Scrapcosy
I’ll be teaching at Creativation this year, here is the courses list and if you are looking for more educational sources from me, just visit and subscribe to my YouTube channel.
To join PaperArtsy challenge and win a PaperArtsy £50 voucher:
Simply make something arty relevant to the topic, and link your creation from any social URL (eg. Instagram, Pinterest, Blog Post etc) sharing your original make to this challenge page.
The current topic link Topic 18: Stamp Platform Techniques will close 17:00 (London Time) Sunday, 28th October 2018, and the winner will be announced 2 hours later at 19:00.
I hope you liked it! Thanks for reading! And see you soon! 🙂 If you want to send any comments or subscribe, go to the end of the post below
DIY COASTERS – Posavasos
Hola! Como voy un poco liada, dejaré que las imágenes y el vídeo hablen por sí solas.
Espero que os haya gustado!
