

Hi everyone! This is my first post. Since the blog is barely new and it is almost empty, I’ve decided to start today a retrospective session where I’ll be creating one post per day with some of my recent works, which I created previous to the launch of scrapcosy (my blog).
This is the first one on the list! Enjoy! And let me know your thoughts 🙂
Hola a todos! Esta es mi primera publicación. Como el blog es prácticamente nuevo y está casi vacío, he decidido iniciar hoy una sesión retrospectiva durante la que voy a sacar un post cada día , con mis creaciones más recientes y previas a la puesta en marcha de scrapcosy (mi blog).
Este es el primero en la lista! Espero que lo disfrutéis! Ya me diréis qué os parece! 🙂
En castellano por aquí / Spanish here
In December 2014, while I was in Barcelona for Christmas time, I wanted to give a very special present to my aunt. She loves writing, stationary stuff (like me) and on her busy life she barely has time for herself, so I decided to create a few nice notebooks for her where she can write her thoughts and her wishes, and by doing that I was hoping to encourage her to go for them 🙂
So I went to Abacus and I bought 2 sets of Moleskines (plain kraft cover, no decoration at all), one small and one medium size. This first set of 3 is the small one (tomorrow I’ll show you the other one) and the result of my crafting evening was the following:

The ones on the sides are very easy to make, you just need some nice paper, double side tape or any other adhesive, a ruler, scissors and patience to cut and paste (see below the list of main supplies for each and a how-to steps).
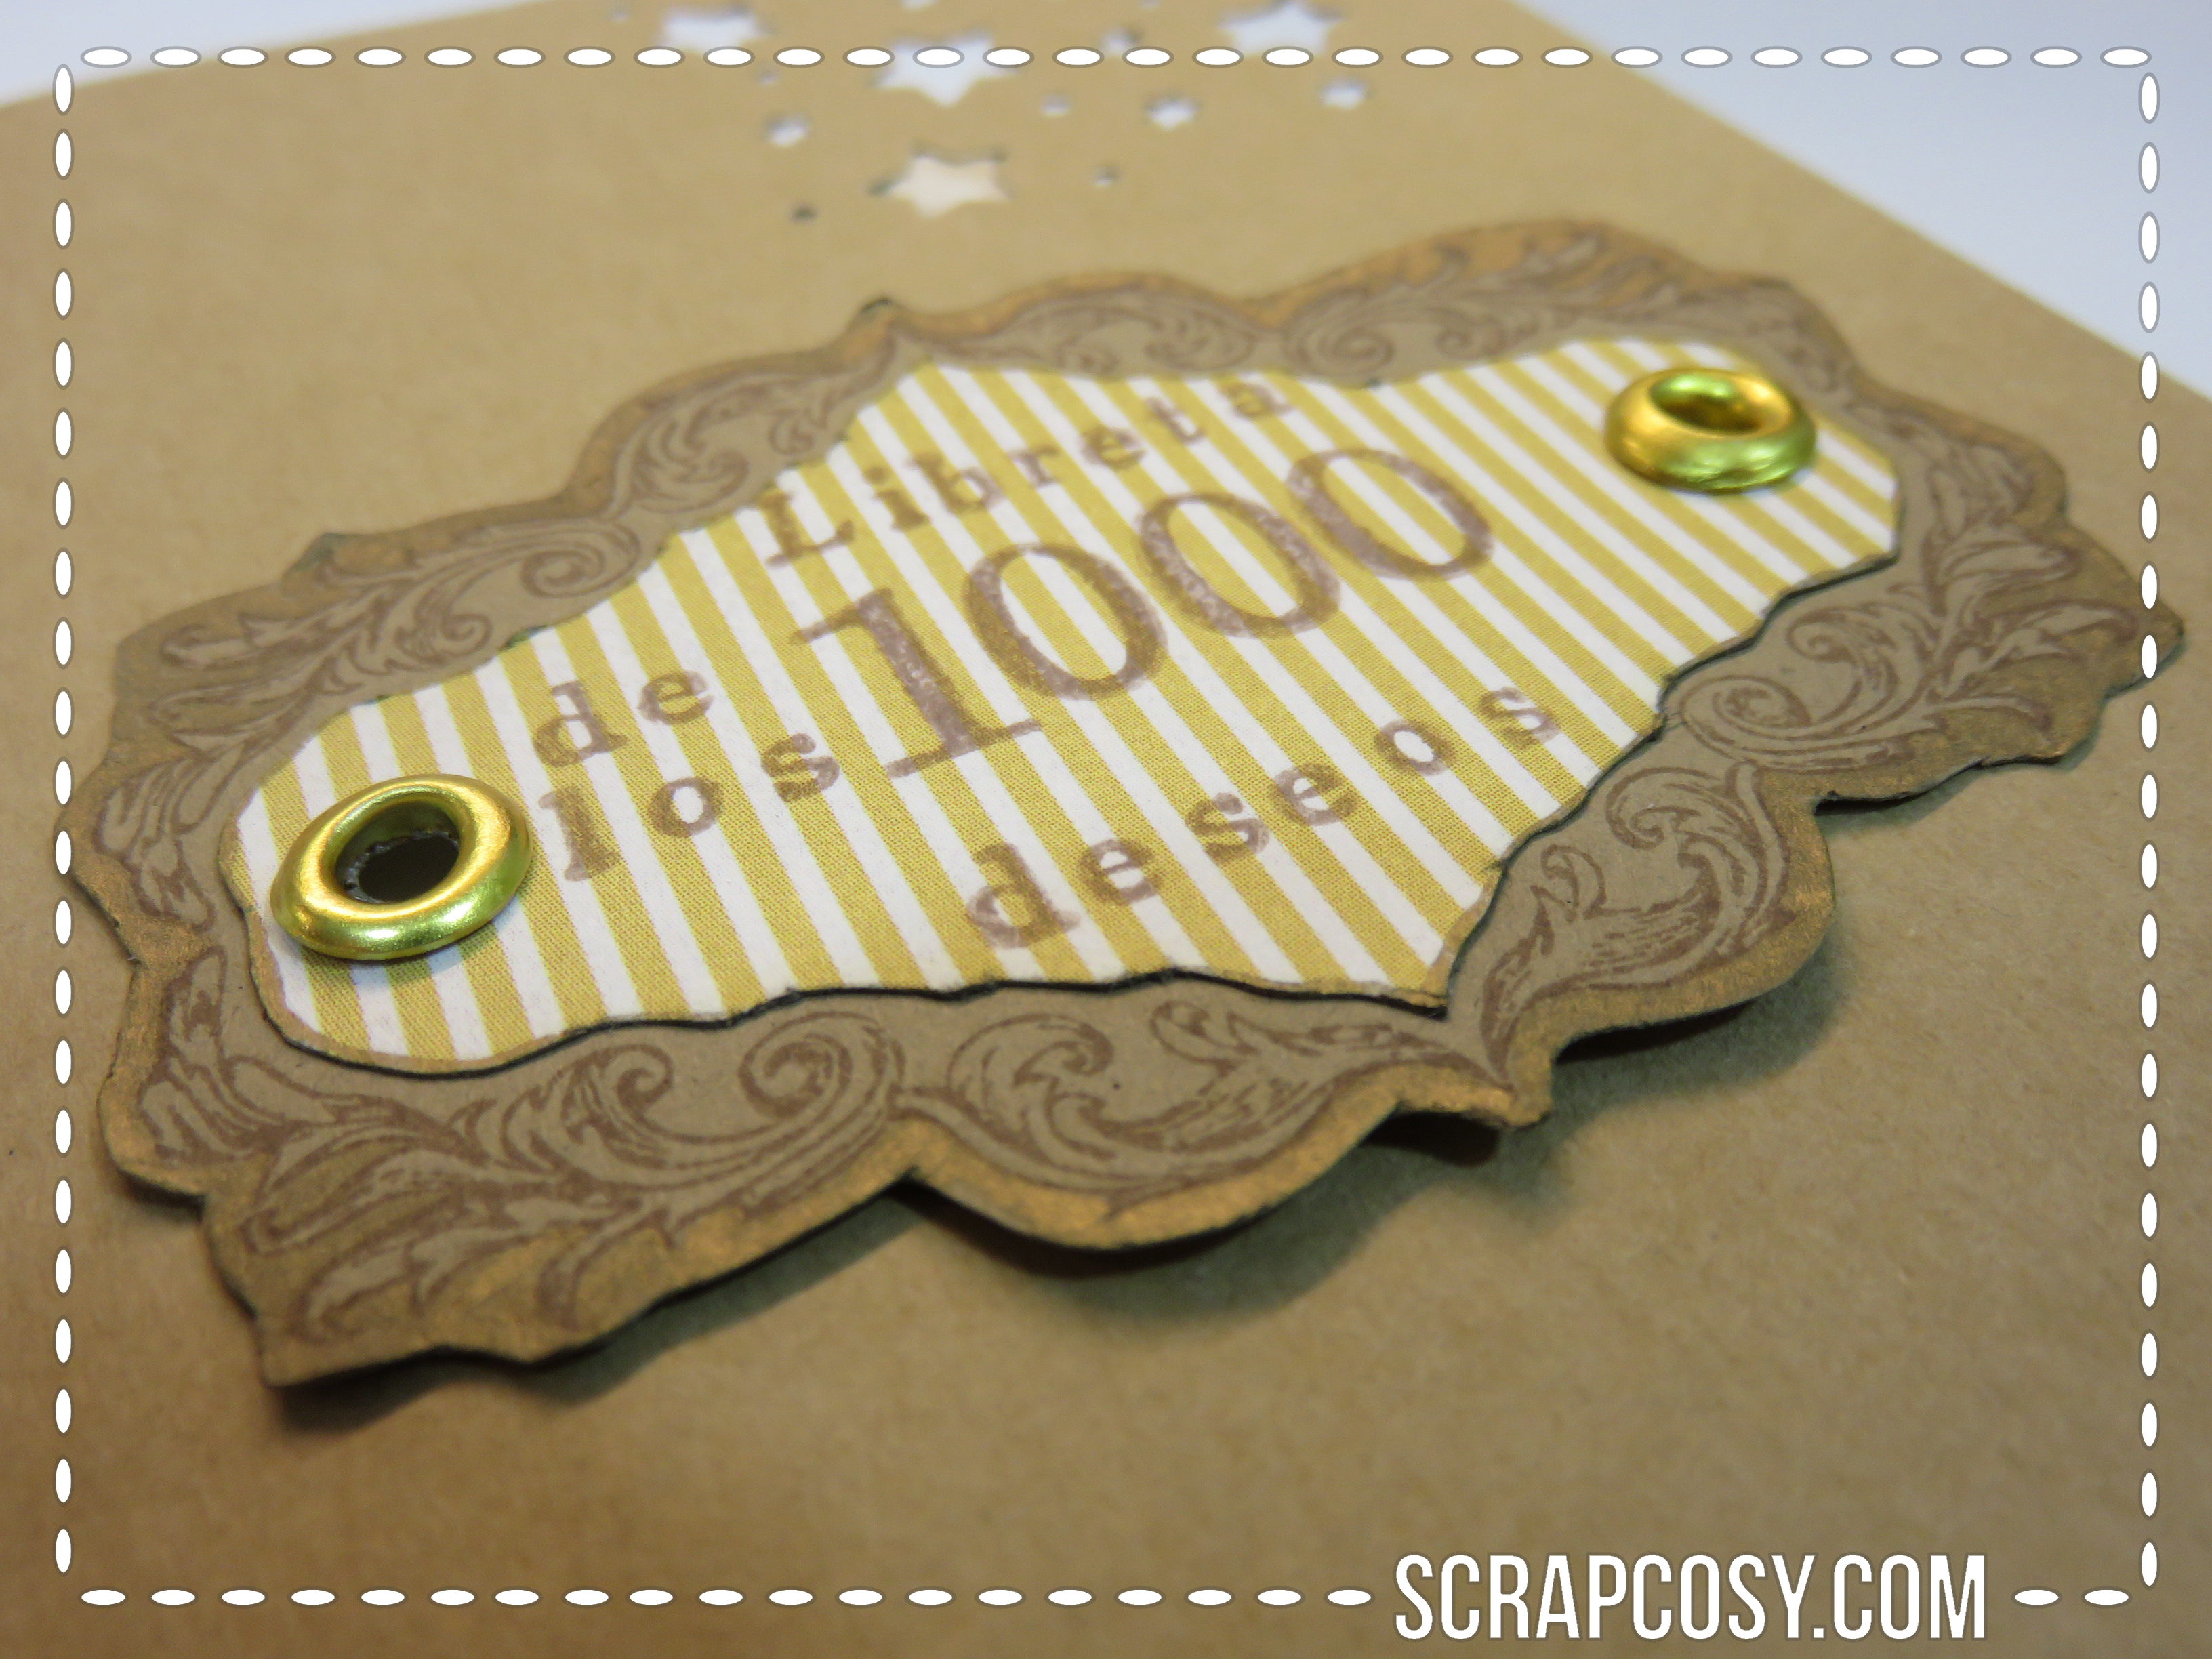
For the one in the middle you need a bit more “advanced” crafter material, such as stamps, inkpad, eyelets and a punch. I wanted that one to be more special. It reads Libreta de los 1000 deseos (1000 wishes notebook). I think the purpose of that notebook is already clear. Isn’t it satisfying to go back to a to-do list and cross out things you’ve already done? Imagine if they are not tasks but dreams! Even if you achieve to cross just one it would be awesome!! 🙂
Here is a look at the back…
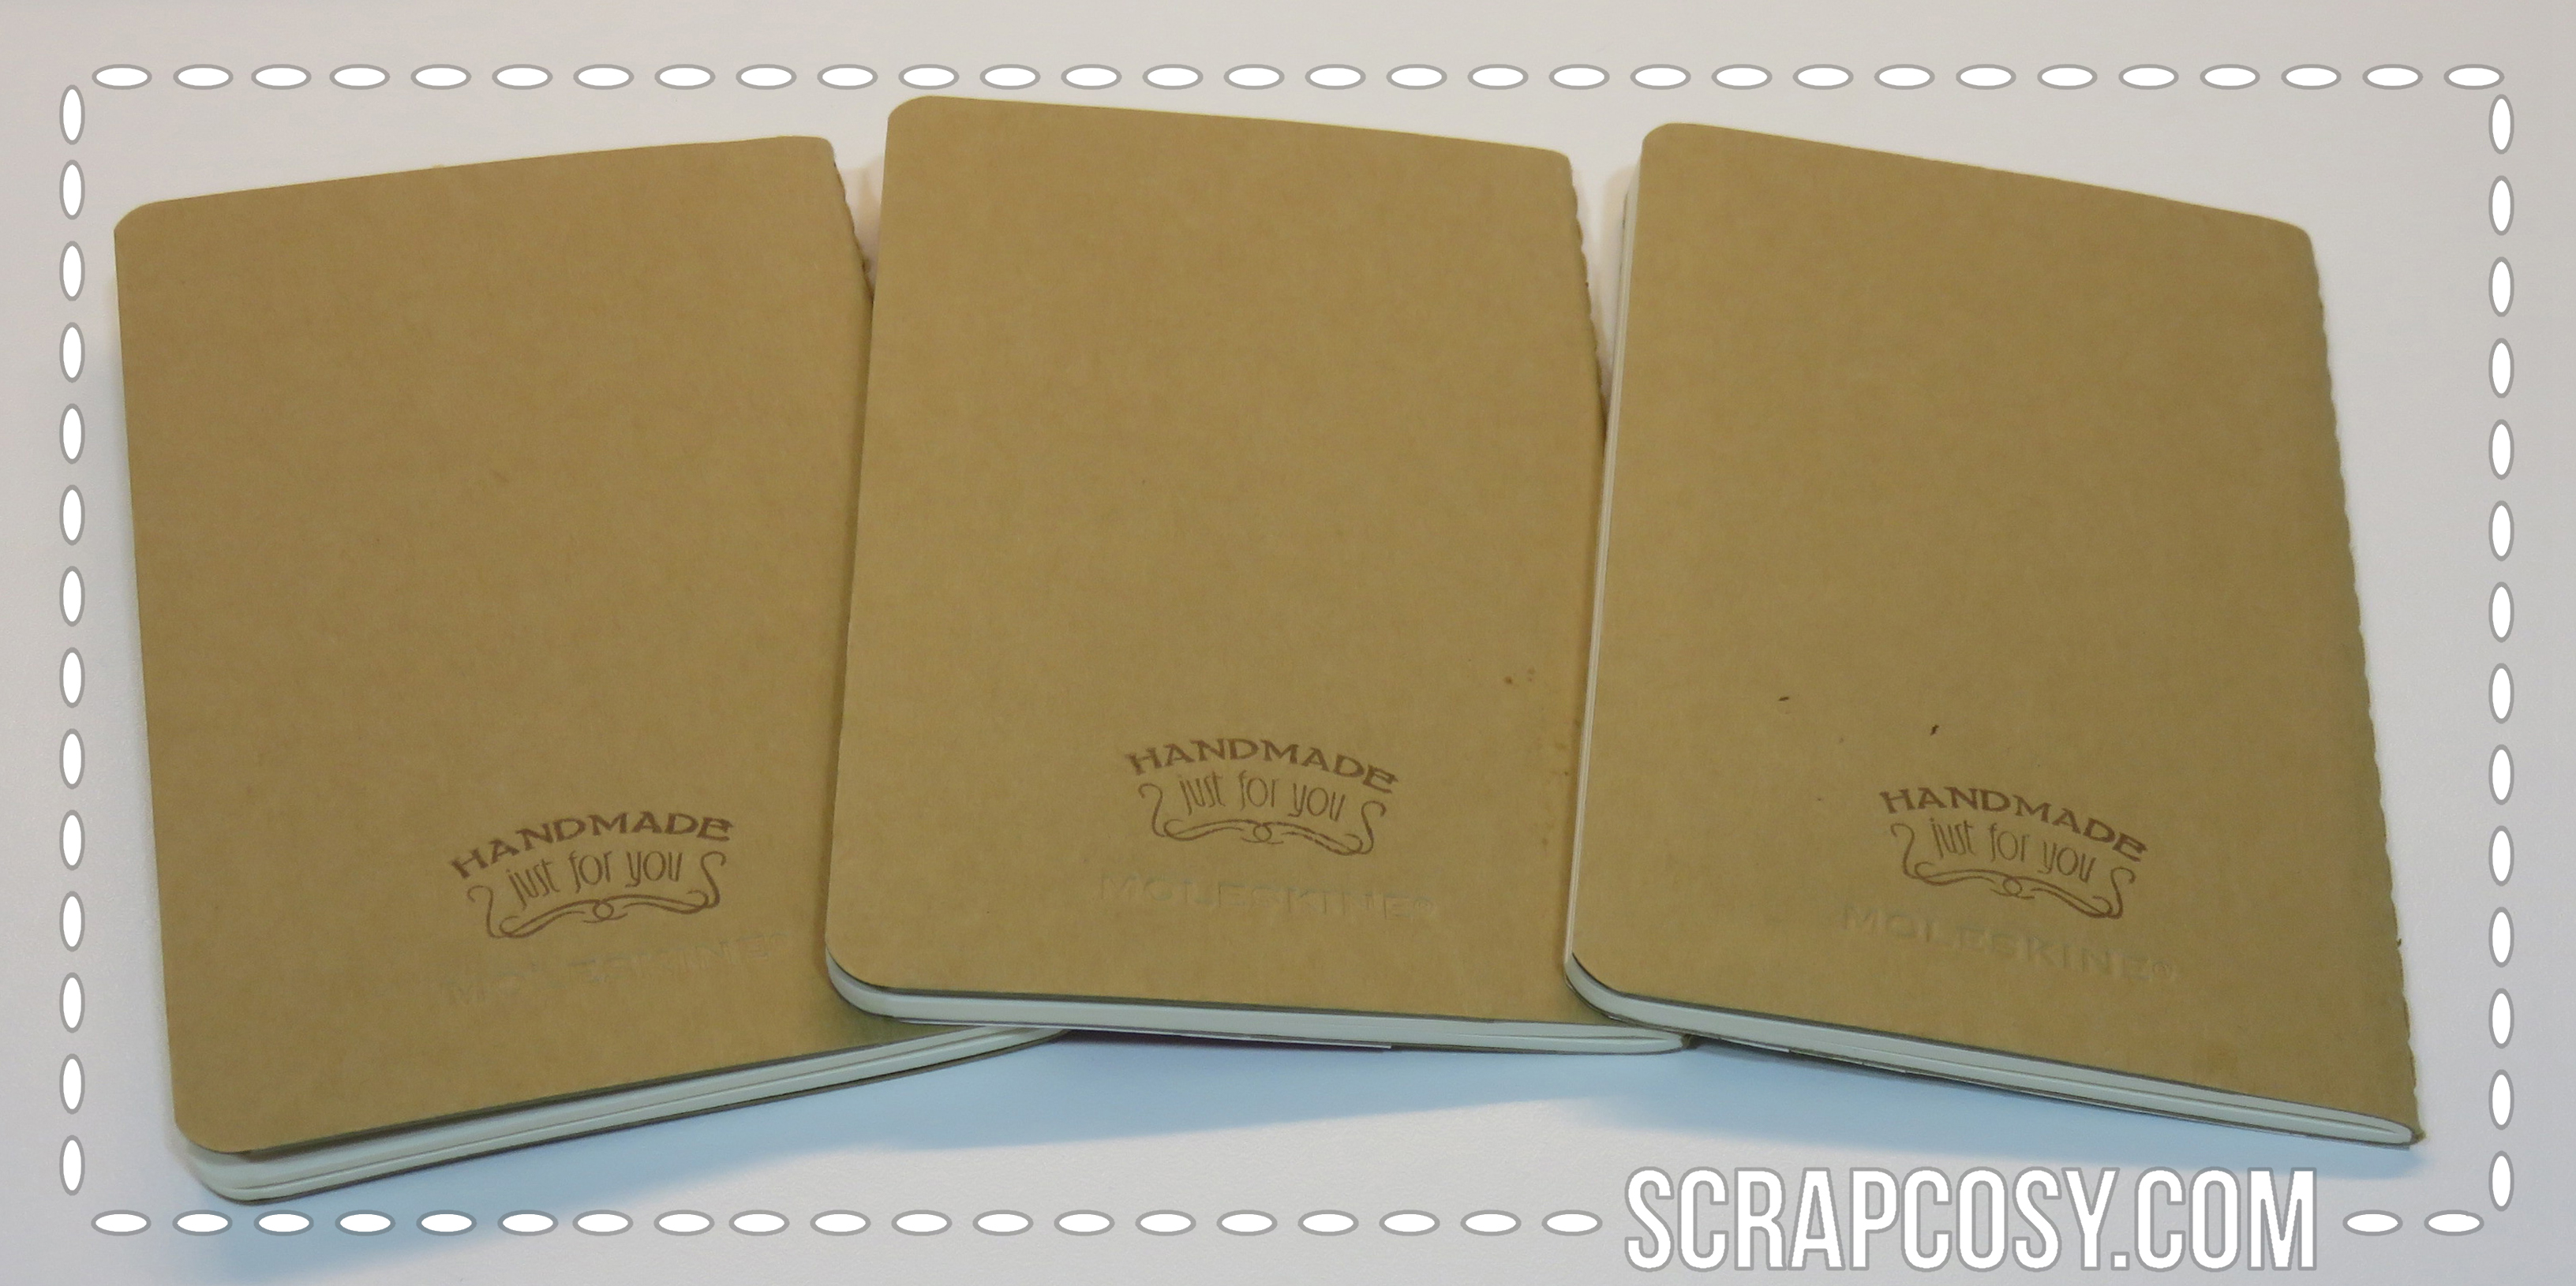
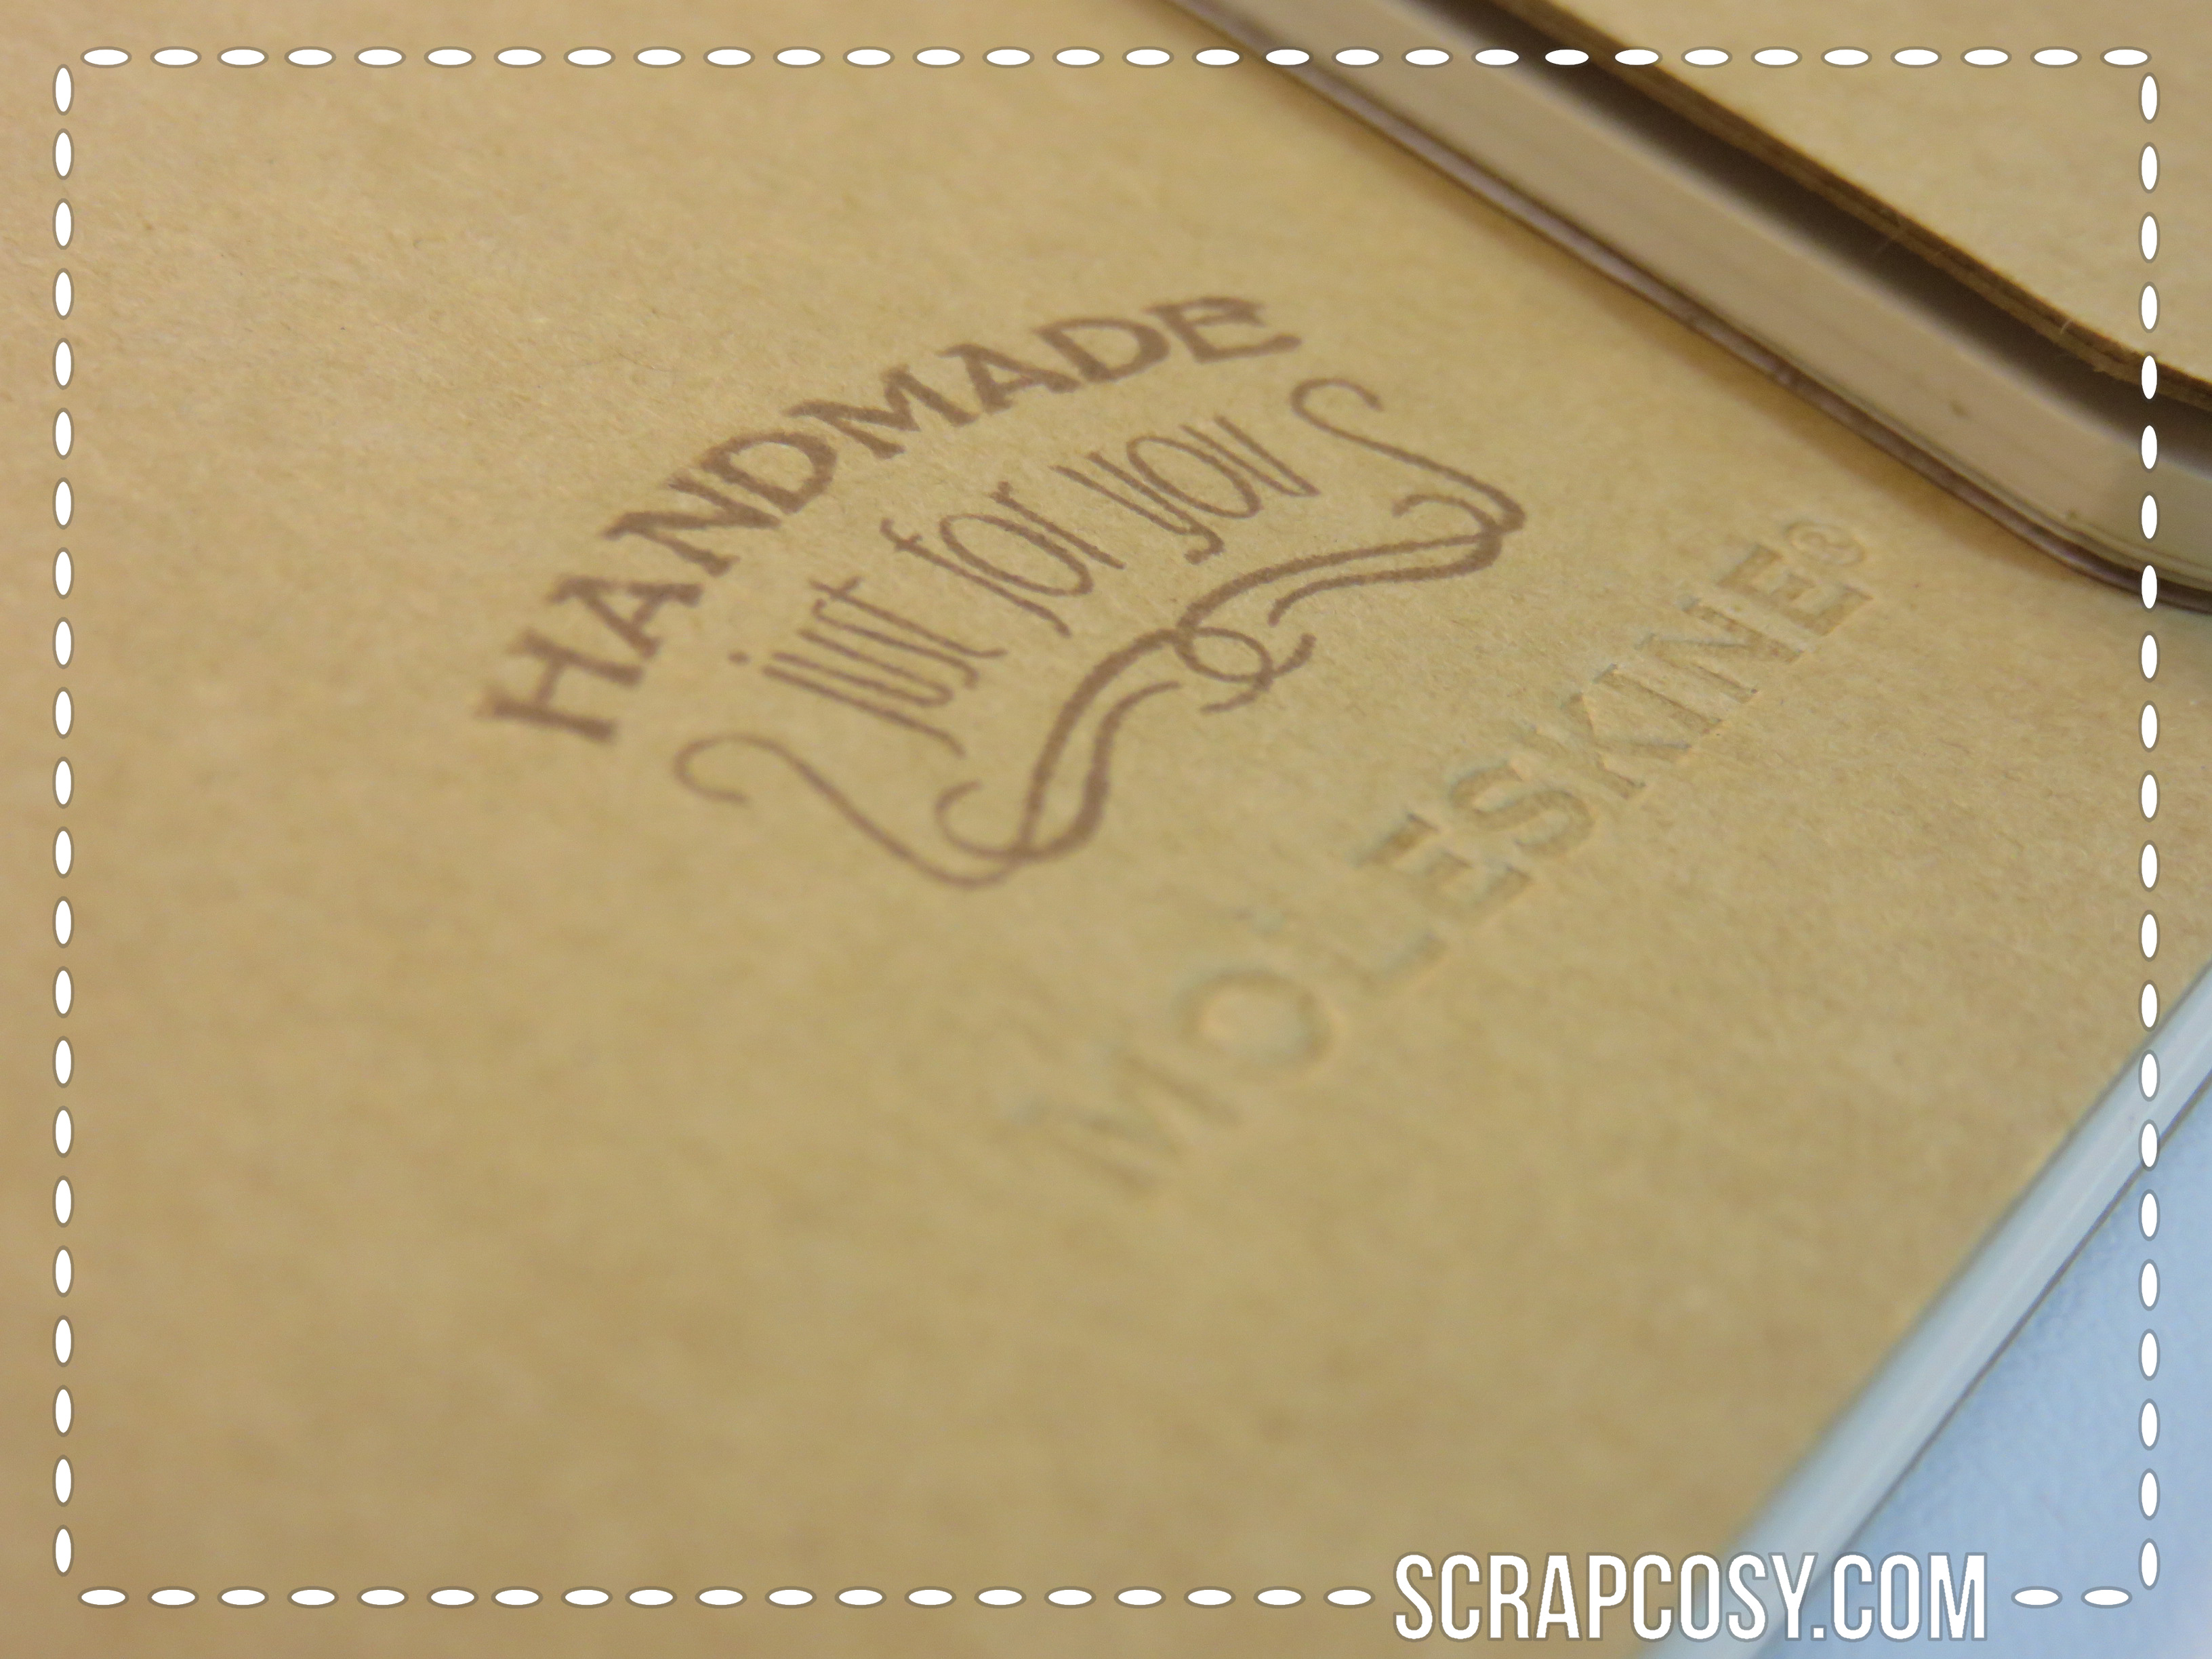
I thought it would be nice to add this sentiment “Handmade just for you“, since it was exactly what I was doing 🙂
This was the first set that my aunt opened as a present and she loved it! What she didn’t know was that the second set was even better! (or that’s what I think, you can tell me tomorrow) 😉
So now let me tell you what I did (how-to) and what I used (supplies) on each of them:
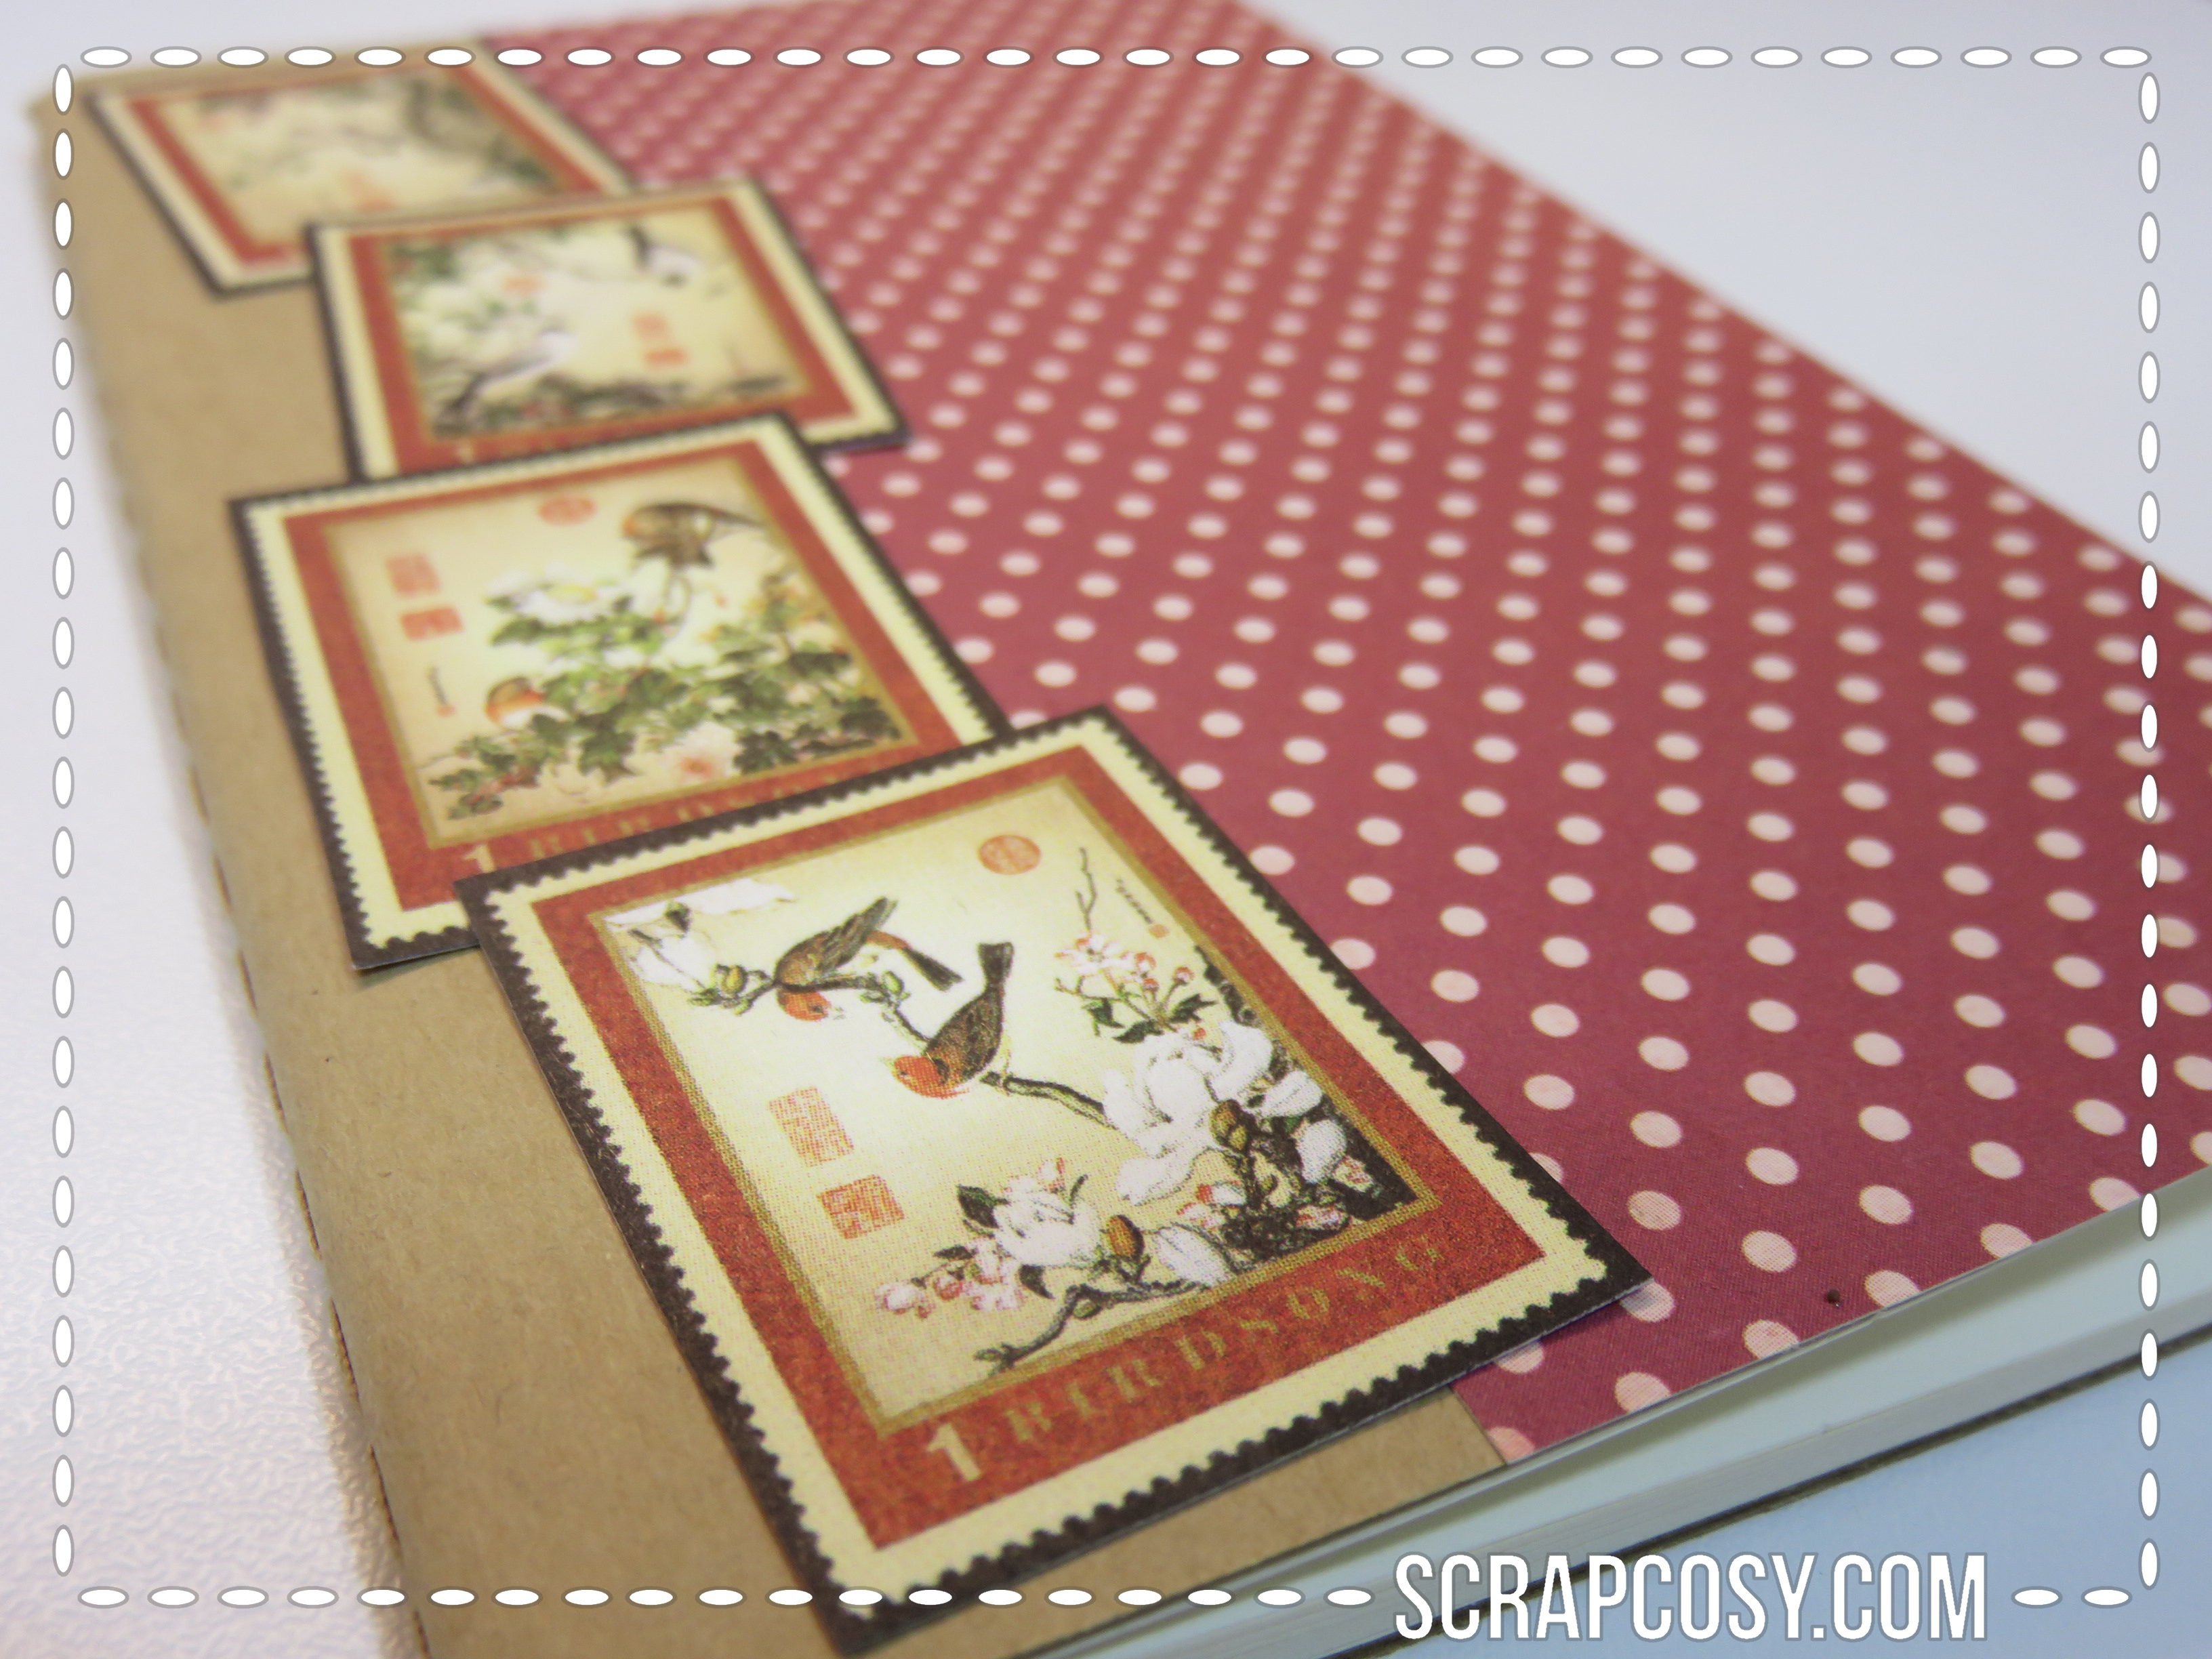
#1 – Birds stamps and polka dots
SUPPLIES
- Moleskine Pocket Cahier Plain Kraft Set/3 – 9.2 x 14.3 cm
- Graphic45 Birdsong 12×12 paper
- Dovecraft – Back to Basics Christmas Vintage 12×12 paper – polka dots
- Adhesive
- Scissors
HOW-TO

Cut a piece of patterned paper (in this case a polka dot one) so it covers about 2/3 of the notebook cover and allow some additional paper to excess the sides of the cover, you will cut that later. Adhere the paper to the cover with adhesive leaving 1/3 on the left without covering (I recommend to put the adhesive on the cover, instead of on the paper). Trim the excess of paper with the scissors following the edge of the cover (it may be easier if you open the notebook while you cut).
Cut the bird stamps and adhere them on the left side of the cover, one on top of the other, forming a dispersed column (as per the picture).
Done!
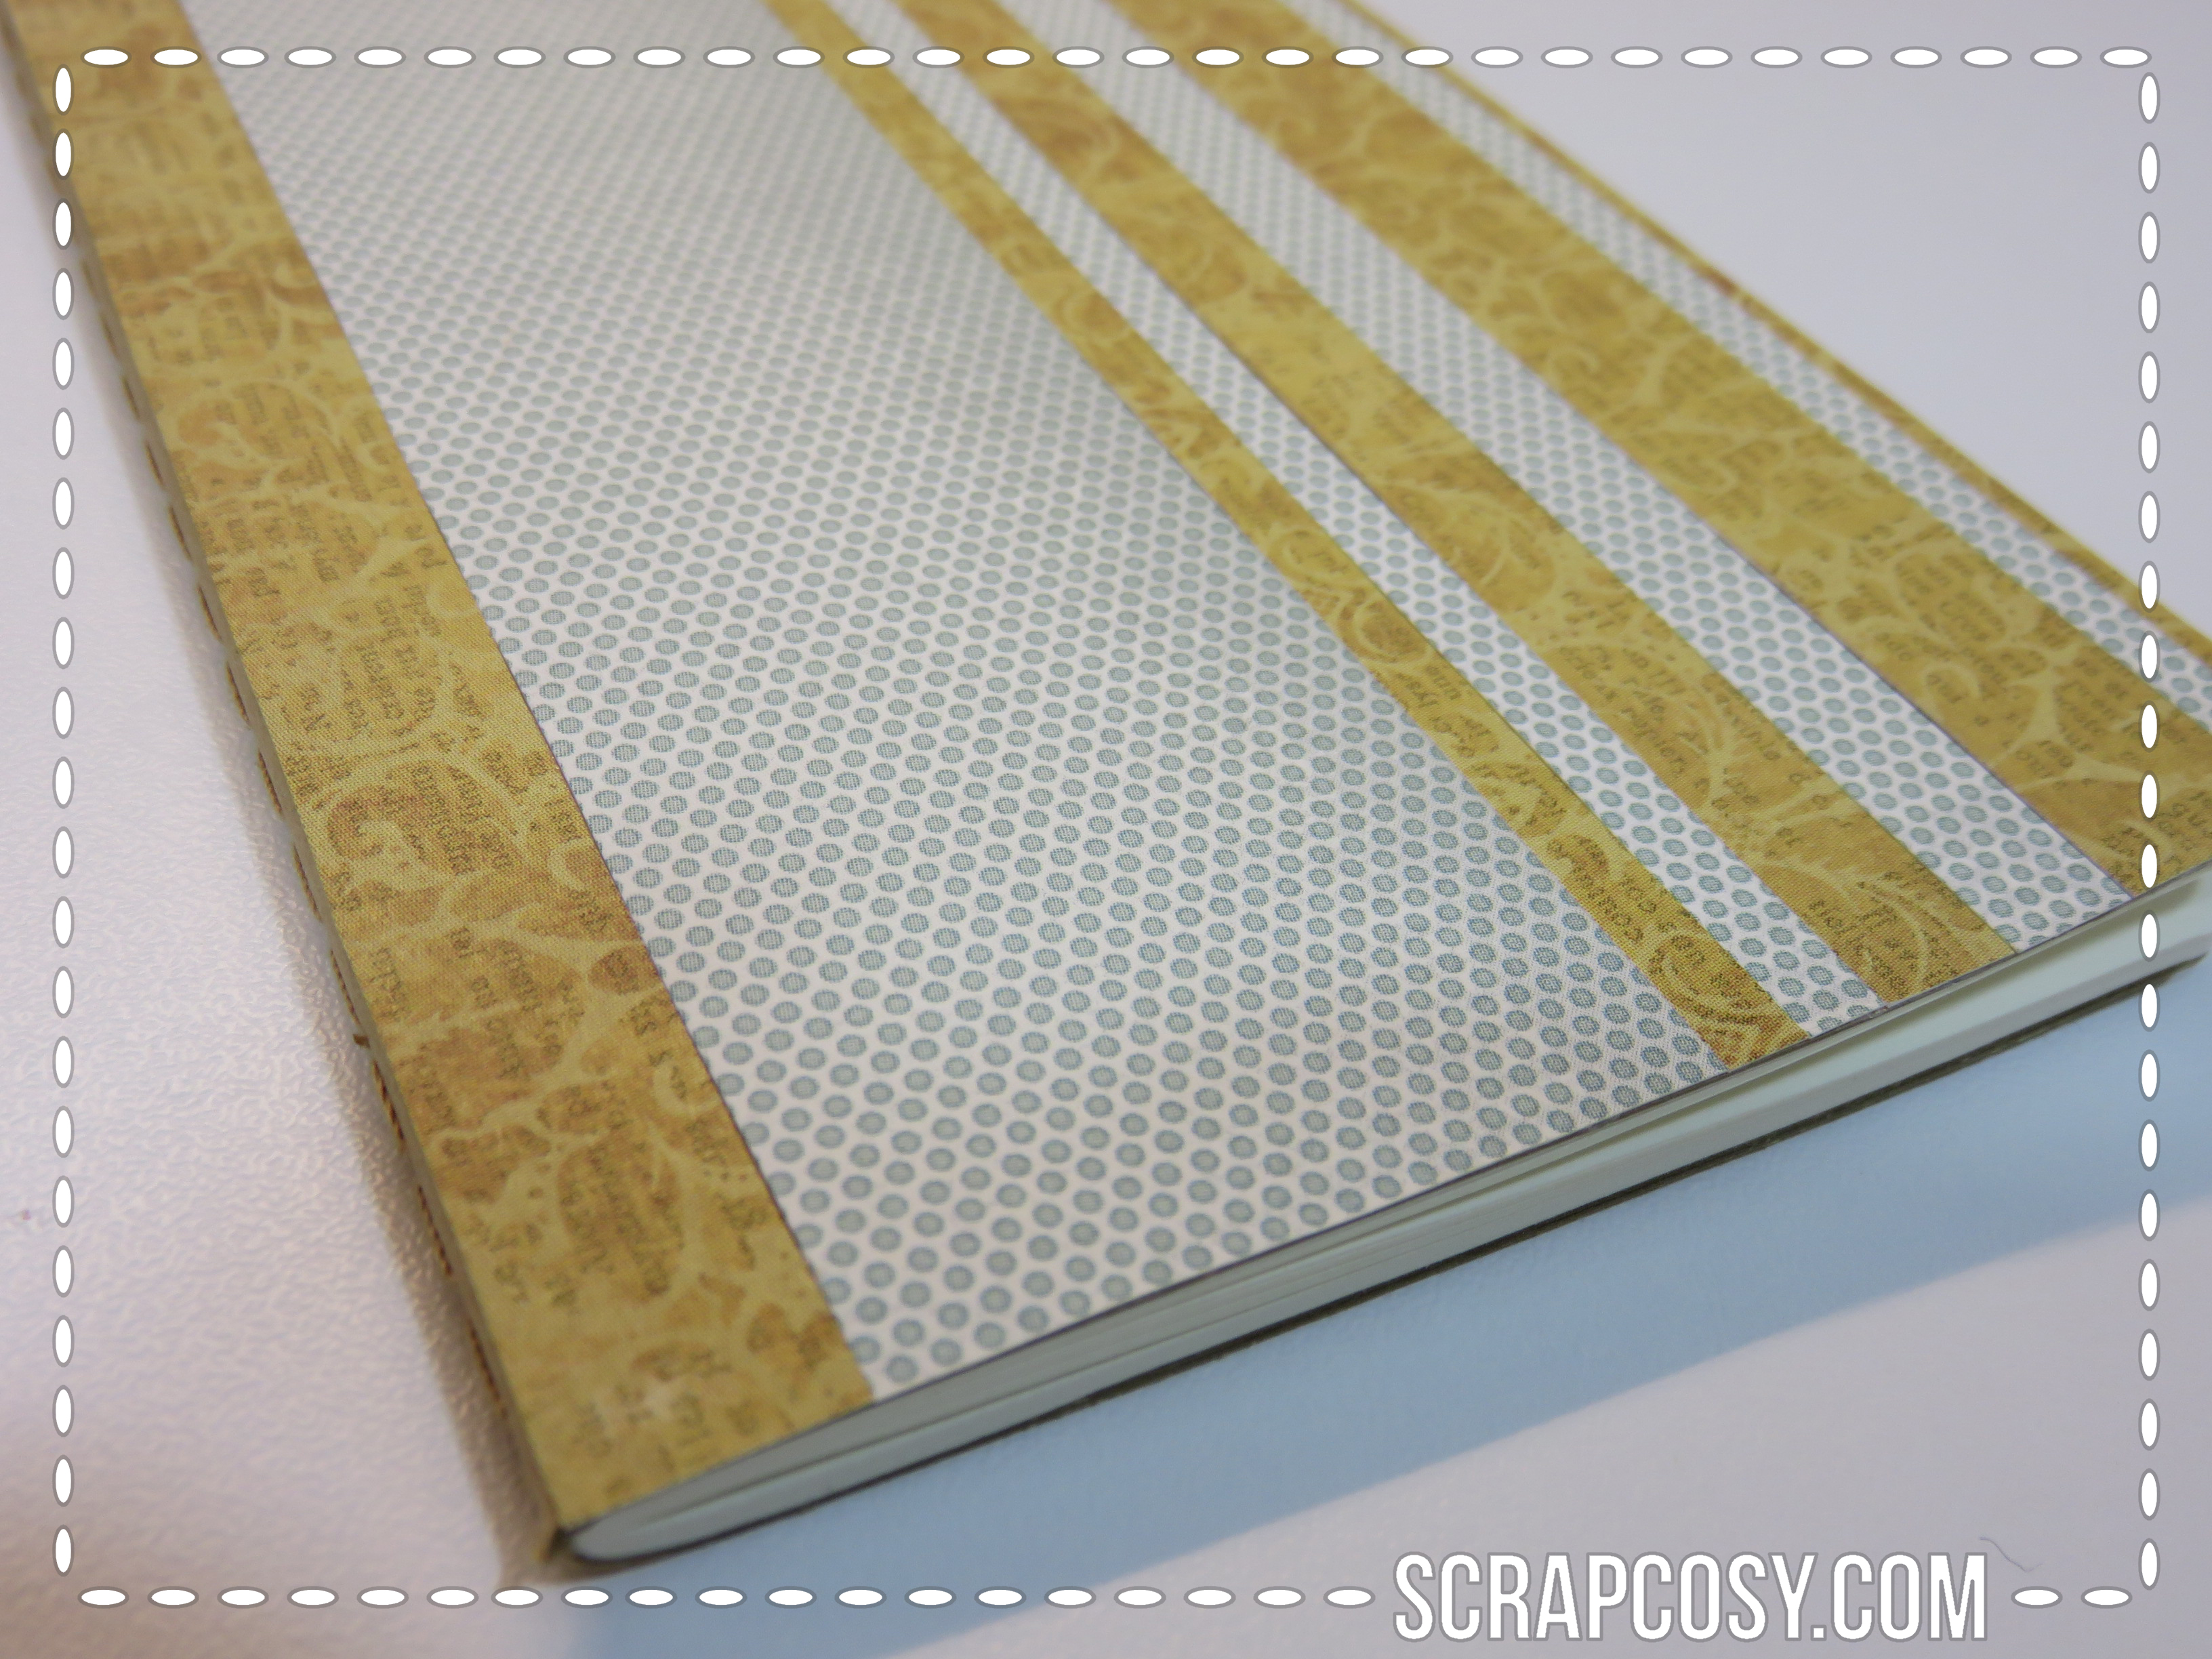
#2 – Patterned stripes
SUPPLIES
- Moleskine Pocket Cahier Plain Kraft Set/3 – 9.2 x 14.3 cm
- My Mind’s Eye LF2104 “Sunshine ” Designer Paper Pad 6×6
- Adhesive
- Scissors
HOW-TO
Select 2 pattern papers that make a contrast. In this case I chose a blue and white dotted pattern and a yellow/brown with typography and damask faded shapes (I’m not sure if you can notice it).
Cut stripes of different widths to cover the entire cover. Allow extra paper to go over the edge so you ensure it is fully covered.
Adhere the stripes to the cover and cut the excess paper around the edge of the notebook (it may be easier if you open the notebook while you cut).
Done!
#3 – 1000 wishes
SUPPLIES
- Moleskine Pocket Cahier Plain Kraft Set/3 – 9.2 x 14.3 cm
- My Mind’s Eye LF2104 “Sunshine ” Designer Paper Pad 6×6 (or any striped paper would do)
- Eyelets & punch set
- Clear Impressions – “Labelled with love” stamp set
- Artemio Clear Stamps Alphabet V, Transparent
- Martha Stewart punch all over the page starry sky
- Brown cardstock
- Sharpie Metallic Permanent Marker Fine Gold
- Versafine vintage sepia inkpad
- Adhesive
- Foam adhesive
- Scissors
HOW-TO
For the label:
Select a frame stamp and stamp it with brown ink on brown cardstock. That will be your focal point. Cut the frame around the edges. Paint the edges with the gold metallic pen.
Select a striped paper and stamp the same frame on it. Cut the window of the frame and once you paint in gold the edges, adhere it on the brown frame. You just did a paper-piercing technique! 🙂
Stamp the title of the notebook on the window. I went for Libreta de los 1000 deseos. I tried to keep the 1000 in the middle. In English I would have probably gone for My 1000 wishes, so the words My and wishes are above and below the 1000 respectively.
Adhere a narrow stripe of of foam adhesive in the back of the frame, in vertical, in the middle only. This will give the label a bit of dimension. Add some more adhesive in the other sides (left and right) of the label. Stick the label to the cover, centered. Open the cover of the notebook and make 2 holes on each side of the label with the eyelet set tool. Position the eyelets in the holes and set them with the pressing tool.
OK, label done. Now the easy stuff…
Decorate the left bottom corner by stamping a corner stamp in brown
Decorate the right top corner by punching the cover (only the cover!) with a punch (I selected the Martha Stewart one). Please note that this step may be dangerous if you are not strong enough (like me)! The cover is pretty thick, so after trying to punch by hand several times without succeeding I had to place the notebook on the floor, step on it and press hard (I had to even jump on it few times). Please, if you go for this option, take care, be really careful and gentle and seek help to stabilise yourself!! If you find it difficult just do it the other way around: Punch a white paper and adhere the stars on top of the cover (that´s a safest approach)
Decorate the back with the “Handmade just for you” stamp, by stamping it in brown on the bottom centre of the back cover.
And done! Finally!!

I hope you liked it! And see you tomorrow with the second set of notebooks
RETROSPECTIVE – DECEMBER 2014 – VINTAGE NOTEBOOKS – SET 1
En diciembre de 2014, mientras estaba en Barcelona por Navidades, quería hacerle un regalo muy especial a mi tía . A ella le encanta escribir y el material de papelería (como a mí) y en su ocupada vida apenas tiene tiempo para sí misma, así que decidí crear unos cuadernos bonitos para ella, donde pudirea escribir sus pensamientos y sus deseos, y al hacerlo esperaba que se animase y se decidiese a cumplirlos e ir a por ellos:)
Así que fuí a la Abacus y compré 2 juegos de Moleskine (cubierta marrón lisa, sin ningún tipo de decoración), un set de cuadernos pequeño y otro de tamaño medio. Este primer conjunto de 3 es el pequeño (mañana os enseñaré el otro) y el resultado de mi tarde de manualidades fue el siguiente:
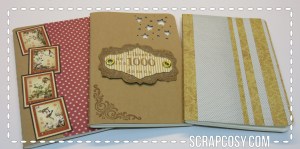
Los que están a los lados son muy fáciles de hacer, sólo se necesita un poco de papel decorativo, cinta de doble cara o cualquier otro adhesivo, una regla, tijeras y paciencia para cortar y pegar (más adelante incluyo la lista de los materiales que he utilizado en cada cuaderno y explico los pasos a seguir).
Para el del medio hace falta material un poco más “avanzado”, como sellos, tinta, ojales y una perforadora. Quería que ese fuese el más especial. La etiqueta dice Libreta de los 1000 Deseos. Creo que la finalidad de esa libreta está clara. ¿No os gusta el hecho de tachar de una lista las cosas que estaban pendientes y que por fin habéis acabado? Imaginaos si esa lista no contiene tareas, sino sueños! Sólo tachar uno de ellos sería increíble !! 🙂
Esta es la parte de atrás …
Me gustó la idea de añadir esta frase Handmade just for you (Hecho a mano sólo para ti) ya que era exactamente lo que estaba haciendo 🙂
Este fue el primer set de libretas que mi tía abrió como regalo y le encantó! Lo que ella no sabía era que el segundo set era aún más bonito (O a mí me gusta más, ya me daréis vuestra opinión mañana 😉
Así que ahora os explicaré lo que hice (how-to) y lo que he usado (Materiales) en cada uno de ellos:
# 1 – Pájaros sellos y lunares
MATERIALES
- Moleskine de bolsillo Cuaderno liso Kraft Set / 3 – 9,2 x 14,3 cm
- papel Graphic45 Birdsong 12×12
- Dovecraft – Back to Basics Christmas Vintage papel de 12×12 – de lunares
- Adhesivo
- Tijeras
HOW-TO
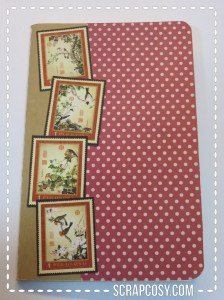
Corta un pedazo de papel estampado (en este caso uno de lunares) para que cubra aproximadamente 2/3 de la tapa del cuaderno y deja que el papel sobresalga un poco por los lados de la cubierta, ya lo cortarás luego. Pega el papel a la tapa con adhesivo dejando 1/3 de la izquierda de la tapa sin cubrir (recomiendo poner el adhesivo en la tapa, ajustado a los 3 bordes, en lugar de en el papel). Recorta el exceso de papel con las tijeras siguiendo el borde de la cubierta (puede serte más fácil si abres la libreta mientras cortas).
Recorta los sellos de pájaros y pégalos en el lado izquierdo de la tapa, uno encima del otro, formando una columna desigual (como en la foto) .
Uno listo!
# 2 – a tiras
MATERIALES
- Moleskine de bolsillo Cuaderno Liso Kraft Set / 3 – 9,2 x 14,3 cm
- My mind’s eye LF2104 “Sunshine” papel 6×6
- Adhesivo
- Tijeras
HOW-TO
Selecciona 2 papeles que contrasten. En este caso he elegido uno de puntos azules y fondo blanco y otro color amarillo / marrón con tipografía y arabescos en el fondo (no sé si se aprecia bien en la foto).
Corta tiras de diferentes anchos para que cubran toda la tapa. Deja que el papel sobresalga del borde, mejor cortar luego que hacer corto!
Pega las tiras a la tapa combinando distintos grosores y corta el exceso de papel alrededor del borde de la tapa.
Listo!
# 3-1000 deseos
MATERIALES
- Moleskine Cuaderno Liso Kraft Set/3 – 9.2 x 14.3 cm
- My Mind’s Eye LF2104 “Sunshine ” Papel 6×6 (o cualquier papel a rayas)
- Ojales y set de herramientas para aplicarlos
- Clear Impressions – “Labelled with love” set de sellos
- Artemio Sellos de silicona Alphabet V, Transparent
- Martha Stewart perforadora posicionable starry sky
- Cartulina marrón
- Sharpie Rotulador dorado Permanente
- Versafine vintage sepia tinta marrón
- Adhesivo
- Espuma adhesiva
- Tijeras
HOW-TO
Para la etiqueta:
Selecciona un sello de un marco y estámpalo con tinta marrón en la cartulina marrón. Este será el foco de la libreta. Corta el marco alrededor de los bordes. Pinta los bordes con el rotulador metálico de color oro.
Selecciona un papel a rayas y estampa el mismo marco en él. Corta la ventana del marco y una vez le pintes los bordes en dorado, pégala al marco marrón. Acabas de hacer una técnica que se llama paper piercing!🙂
Estampa el título del cuaderno en la ventana. Yo puse Libreta de los 1000 Deseos. intenté de mantener el 1000 centrado. En Inglés, habría elegido probablemente My 1000 wishes, para que las palabras my y wishes quedan encima y debajo del 1000, respectivamente.
Pega una tira delgada de espuma adhesiva en la parte posterior del marco, en vertical, solamente en el medio. Esto le dará a la etiqueta un poco de relieve. Pon adhesivo normal en los otros lados (izquierdo y derecho) de la etiqueta. Pega la etiqueta a la cubierta, centrada. Abre la tapa del cuaderno y haz 2 orificios a cada lado de la etiqueta con la herramienta de los ojales. Coloca los ojales en los agujeros y fíjalos con la herramienta de presión.
OK, la etiqueta está lista. Ahora a lo fácil…
Decora la esquina inferior izquierda estampando un sello de esquina en color marrón
Decora la esquina superior derecha perforando la cubierta (sólo la tapa!) Con una perforadora (he seleccionado la de Martha Stewart). Cuidado, que este paso puede ser peligroso si no eres lo suficientemente fuerte (como yo)! La cubierta es bastante gruesa, por lo que después de tratar de apretar con la mano varias veces sin éxito (incluso apoyándome con todo mi peso) que tuve que pasar al plan B, colocar el cuaderno en el suelo con la perforadora en su sitio y subirme encima haciendo fuerza hacia abajo (tuve que saltar incluso en él varias veces). Por favor, si pruebas esto, ten mucho cuidado, buscar ayuda para que alguien te aguante mientras perforas!! Si no has podido, entonces hazlo al revés: Perfora un papel blanco y adhiere las estrellas de papel en la parte superior de la cubierta (esta estrategia es menos arriesgada)
Decora la parte de atrás con el sello Handmade just for you “hecho a mano sólo para ti”, estampado en marrón en la parte inferior central de la tapa posterior.
¡Y listo! ¡¡Se acabó!!
Espero que os haya gustado! Os veo mañana en la segunda parte

One thought on “Retrospective – December 2014 – Vintage Notebooks – Set 1”