

Hi everyone, today I’m going to show you how to create three different models of covers using my stamps and stencils along with infusions. I’ll use this covers to bind the tags that I’ve made for my video series “all about infusions” in which I explain many techniques on how to use these products. Today’s post and video is basically the make and take I gave at Ally Pally this April 2017. Let’s get started!
Hola a todos, hoy os voy a enseñar como hacer tres modelos de tapas diferentes utilizando mis sellos y estenciles con infusions. Con ellas encuadernaré las tags que he hecho como parte de la serie de videos “all about infusions” en las que explico muchas técnicas sobre como usar estos productos. El post y vídeo que hoy os presento es el taller (make and take) que di en Ally Pally este abril de 2017. Empezamos!

En castellano por aquí / Spanish here
When I did my first series of videos “All about Infusions” I ended up with loads of technique tags about Infusions, which I bound using a ring binder. I thought it would be nicer to have some covers for them and what better way that actually creating my own and decorating them using infusions too.
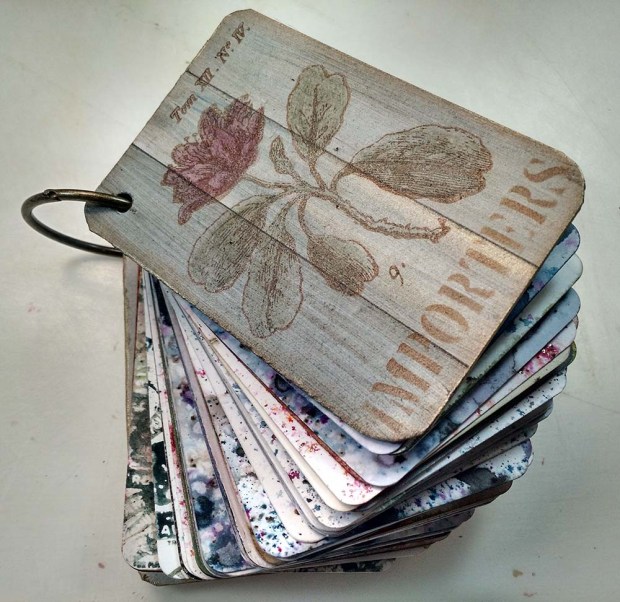
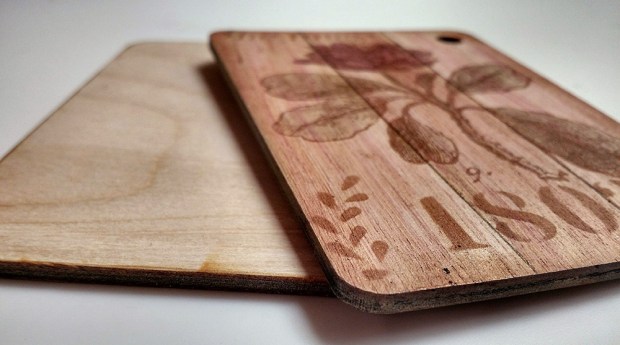
That is when I thought that this project would be a great Make and Take so I taught it last weekend at Crafting at Ally Pally show. In this way some of you could actually go back home with the booklet and start practising with your Infusions (which I’m sure you’ll have by now). By the way, the wood covers that PaperArtsy provided are great! Let’s see if we are lucky and they include them at the PaperArtsy shop at some point… 🙂
I used my new stamps and stencils, now available in my Etsy shop:
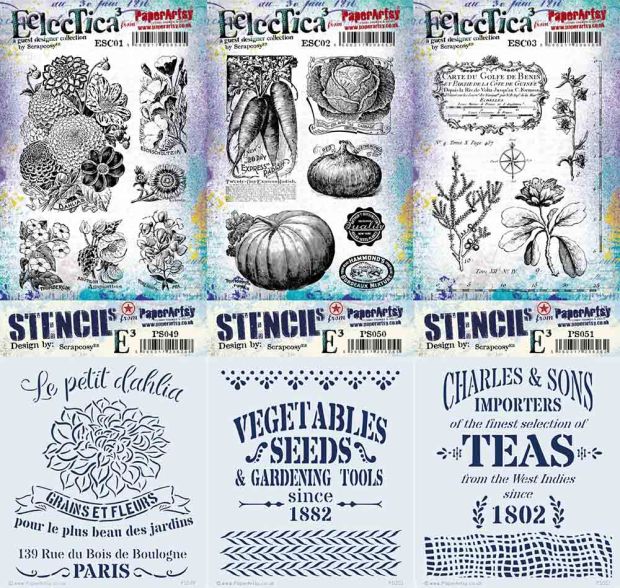
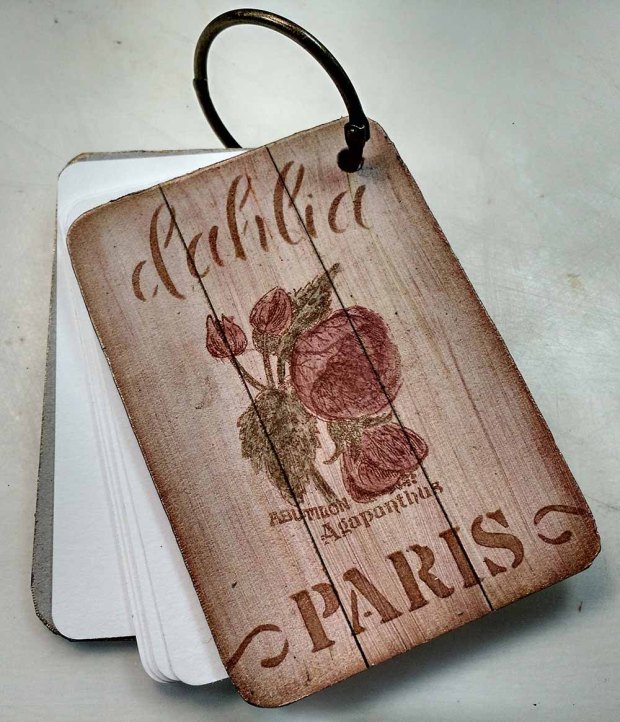
For ESC01 and PS049 I did this sample:
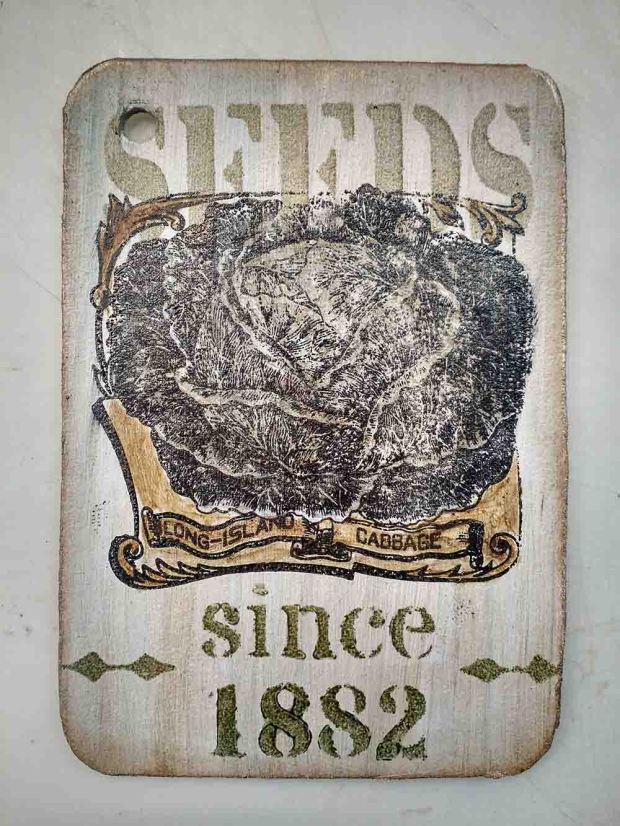
For ESC02 and PS050 I did this sample:
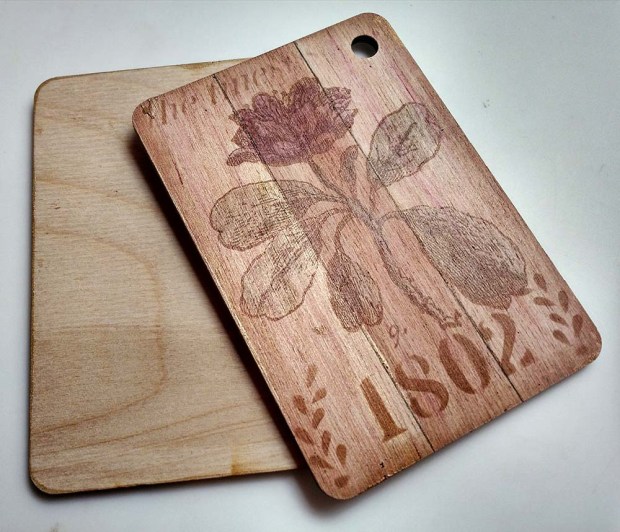
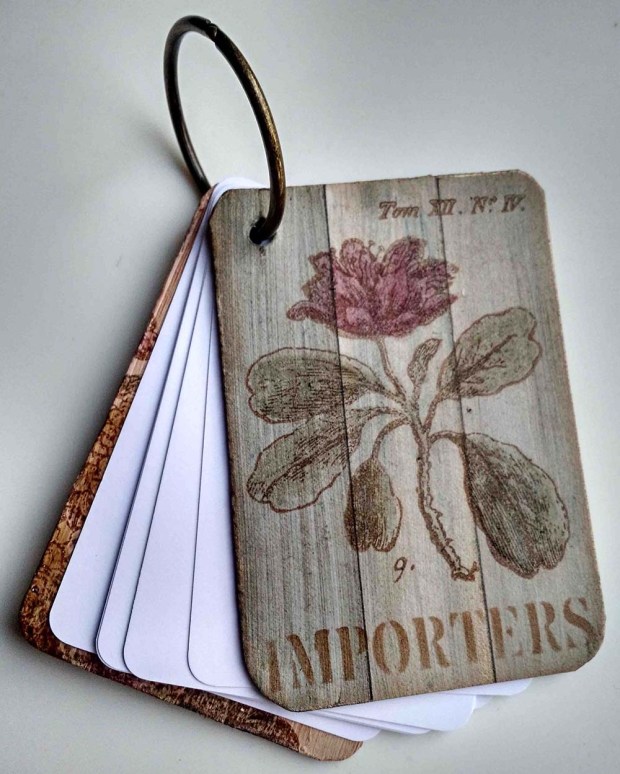
For ESC03 and PS051 I did this sample:
And here you can see the video to do the make and take and home. By way of covers you can use a chipboard or greyboard cut in the shape of the tags, as I did at my end:
PRODUCTS
- Nougat Fresco paint
- Satin Glaze
- Gold Fresco Paint
- Infusions Olive tree
- Infusions Rusty Car
- Infusions Sleight Blue
- Infusions Raspberry
- Infusions Golden Sands
- Versafine ink – vintage sepia
- Versafine ink – black onyx
- Eclectica {scrapcosy} ESC01 stamp set
- Eclectica {scrapcosy} ESC02 stamp set
- Eclectica {scrapcosy} ESC03 stamp set
- PS049 stencil {by scrapcosy}
- PS050 stencil {by scrapcosy}
- PS051 stencil {by scrapcosy}
- Black fine liner and pencil
- Post it notes
- Thin brush
- Thick brush or 4 pieces of cut and dry foam
- Wood or grey chipboard covers
- Binding ring
- craft sheet
STEP OUTS
1 – Using the thick brush or a piece of foam paint the cover with a base of Nougat fresco paint, let it dry.
2 – Draw 2 vertical lines with the fine liner or the pencil to divide the panel in 3 sections of roughly the same width
3 – Mask the cover with a post it note so only one of the 3 sections is exposed, and work independently on each section. This will help you getting 3 different looks on all of them. Apply Infusions on the first section, load the thick brush or square foam with glaze and a hint of gold fresco paint and extend infusions with few vertical strokes, don’t overwork, we want to keep the lines visible from the pigment and the walnut crystals. This will give you a metallic wood effect. Remove the post it note. Let it dry and repeat this step with the other 2 sections.
4 – Get the stencil and pick a word, get a cut and dry foam, rub on the vintage sepia versafine ink and apply the ink through the stencil. With that sponge also apply ink to the edges to frame the cover. Or instead of using the ink through the stencil, you can load your sponge with some satin glaze, apply some infusions (olive tree in this case) and massage to create you own acrylic paint and then apply it, as I did in the cabbage sample
5 – Stamp the image you want with versafine ink and dry it completely.
6 – Paint the stamped image mixing a hint of infusions with satin glaze on your craft sheet and apply it lightly with the thin brush to paint all the details. We want to achieve a washed out effect, so in this case less is better.
7 – for a final touch, once all is dry, paint with gold the edges with a sponge or a brush
Thanks for reading! And see you in the next post! 🙂 If you want to send any comments or subscribe, go to the end of the post below
TAPAS PARA TAGS – ALLY PALLY MAKE AND TAKE – APRIL 2017
Cuando hice la primera serie de vídeos de “All about Infusions” acabé teniendo una colección de tags de técnicas de Infusions que encuaderné con una anilla. Pensé que sería una buena idea hacerles unas tapas y qué mejor manera que decorarlas usando Infusions y mis sellos y estenciles.
Entonces pensé que este sería un buen proyecto para hacer un taller (les llaman Make and Take) en la feria de Londres de scrap que se llama Crafting at Ally Pally. Así quien asistiese se llevaría a casa una mini libreta en la que practicar con sus infusions. Por cierto, las tapas de madera que cortó PaperArtsy son una pasada! Con un poco de suerte igual PaperArtsy las ponga a la venta en su tienda… 🙂
Usé mis nuevos sellos y estenciles, que tengo a la venta en mi tienda Etsy:
Para ESC01 y PS049 hice esta muestra:
Para ESC02 y PS050 hice esta otra muestra:
Y finalmente, para ESC03 y PS051 hice esta muestra:
Y aquí tenéis el vídeo en el que explico el Make and Take, para que podáis hacerlo desde casa. En lugar de tapas de madera podéis usar unas cortadas por vosotros en chipboard o cartón duro, como he hecho yo:
PRODUCTOS
- Nougat Fresco paint
- Satin Glaze
- Gold Fresco Paint
- Infusions Olive tree
- Infusions Rusty Car
- Infusions Sleight Blue
- Infusions Raspberry
- Infusions Golden Sands
- Versafine tinta – vintage sepia
- Versafine tinta – black onyx
- Eclectica {scrapcosy} ESC01 stamp set
- Eclectica {scrapcosy} ESC02 stamp set
- Eclectica {scrapcosy} ESC03 stamp set
- PS049 stencil {by scrapcosy}
- PS050 stencil {by scrapcosy}
- PS051 stencil {by scrapcosy}
- Punta fina permanente negro y lápiz
- Post its
- Pincel delgado
- Pincel gordo o esponjas cut and dry
- Tapas de cartón o de madera
- Anilla de encuadernar
- craft sheet
PASOS
1 – Usar el pincel gordo o un trozo de esponja para pintar la tapa con una base de pintura acrílica Nougat fresco paint, deja secar.
2 – Dibuja dos líneas verticales con el puntafina o el lápiz para dividir la tapa en 3 secciones iguales
3 – Con una hoja de post it colocada en una de las líneas, cubre dos de las zonas y deja una descubierta, sobre la que trabajar. Trabajando en cada sección independientemente conseguiremos el efecto de tener 3 tablones ligeramente distintos. Aplica Infusions sobre la primera sección, unta el pincel gordo o un nuevo trozo de foam con satin glaze y una gota de Gold Fresco Paint y extiende con él las infusions en pinceladas verticales. De esta forma conseguiremos un efecto de madera metalizada.
4 – Selecciona una palabra del estencil y una nueva esponja y aplica con ella tinta Vintage Sepia a través del estencil. Con esa misma esponja aplicar tinta en los bordes para enmarcar la tapa. O en lugar de usar tinta para el estencil, untad la esponja en glaze y luego en infusions y aplicar las palabras que queráis, como he hecho en la muestra de la col
5 – Estampar la imagen que quieras con tinta versafine y secadlo completamente.
6 – Pintar la imagen estampada con una mezcla de satin glaze y una pizca de infusions con un pincel delgado y pintad los detalles de la imagen. Queremos conseguir un efecto aguado, con lo que cuanto menos infusions apliquemos, mejor.
7 – Como toque final, una vez todo está seco, pintar los bordes con gold fresco paint
Muchas gracias por leer! Hasta el siguiente post!

One thought on “Covers for tags – Ally Pally Make and Take”