

Hi everyone! I’m super excited to share with you my newest release for PaperArtsy: 2 stamps and coordinating stencils.
As you may know by now, I love vintage flowers and butterflies and other decorative vintage elements, so for this release I wanted to create 2 stamp sets with one big flower arrangement each, so we can simply stamp and colour and besides these, I wanted to add other surrounding elements that can help creating nice backgrounds and sentiments. Similarly, for the stencils, I went for my usual: patterns and sentiments. In this case just 2 patterns but lots of sentiments, since at the end of the day, I love stencilling these titles and use them as focal points in some of my creations.

Over the next few days, we will be sharing ideas with my newest products by myself and Jennie Atkinson, just go to PaperArtsy blog. You can also see ideas on Instagram, Facebook, Twitter, Pinterest that Leandra and I will share. So no matter what your preferred social media platform, we will be sharing with you!
Let’s start with some ideas with each of the new products.
Eclectica³ Scrapcosy Set 17 (ESC17)
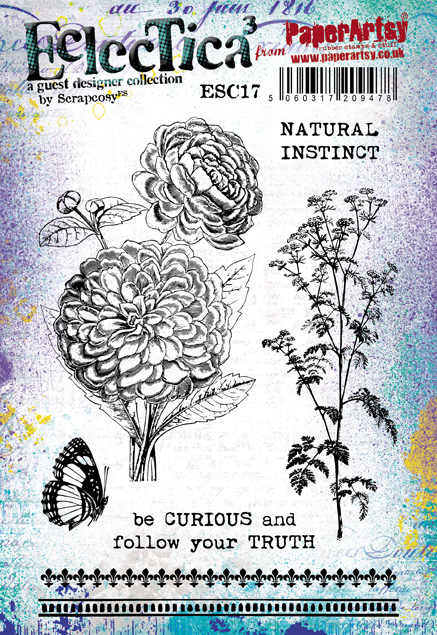

I love these flowers. I have a confession, they are actually made up! I mixed my favourite blossoms and my favourite leaves to make this bouquet combination which by the way, it’s meant to fit size 8 tags (I love them as a substrate!). And I love the background herbs, I can’t wait to emboss them in gold!
I was going to just stamp and fussy cut the butterfly once, but I wanted to give it proper wings, so it’s done twice and glued in 3D (using foam and bending it) so that gives it a very airy finish.

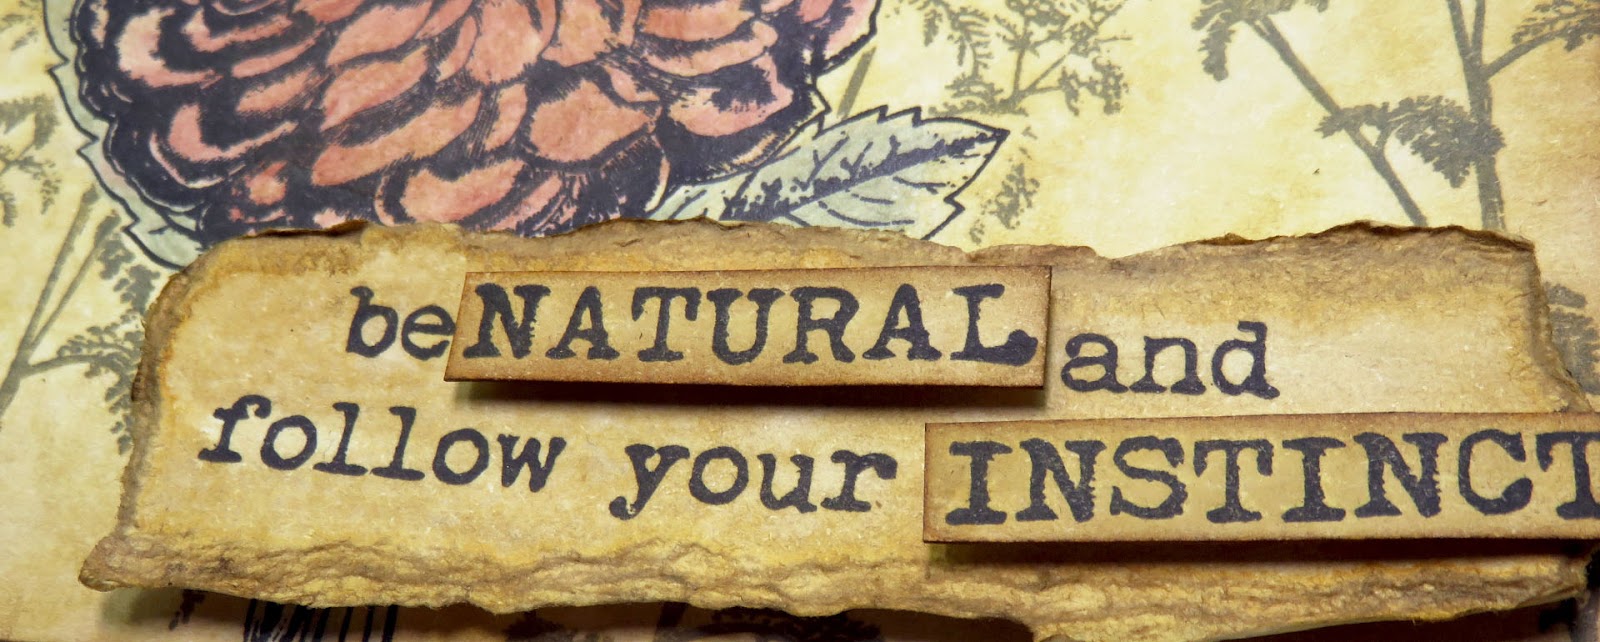
The original sentiment (be CURIOUS and follow your TRUTH) has been altered and now it reads something different, so you can mix and match the words NATURAL INSTINCT as you want to create your own sentence (4 different combinations if you do your maths).
And I haven’t used the ribbons, but as you may have seen on the first sample that Leandra shared, that these are perfect to frame sentiments or whatever you want. I loved adding these when I did my previous release (tea related) and I wanted to add a couple more to complete the whole thing.
Eclectica³ Scrapcosy Set 18 (ESC18)
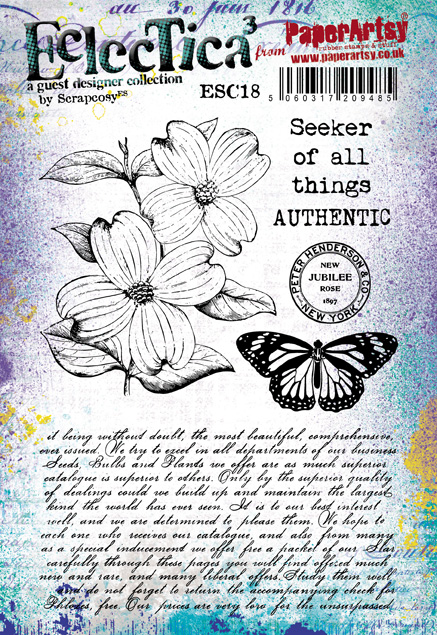

I love browsing old flowers catalogues from the past centuries and in one of them I found a letter from the company owner in a hand-written style font that I fell in love with, it’s perfect for backgrounds or even to stamp into Grunge Paste. And the round postage stamp mark had to be here. In my previous tea collection release I added postage stamps and now with this stamp, you can mark them and add an extra vintage mail related touch to your project. When I found these flowers I knew they were perfect to colour and fussy cutting, so it was no brainer, they had to be here as well (and again, perfect for a size 8 tag!). And the butterfly, well, I just love these creatures, so why not getting an even bigger version that before, so easy to cut and bend it to set it to fly!
PaperArtsy Stencil 133 (PS133)

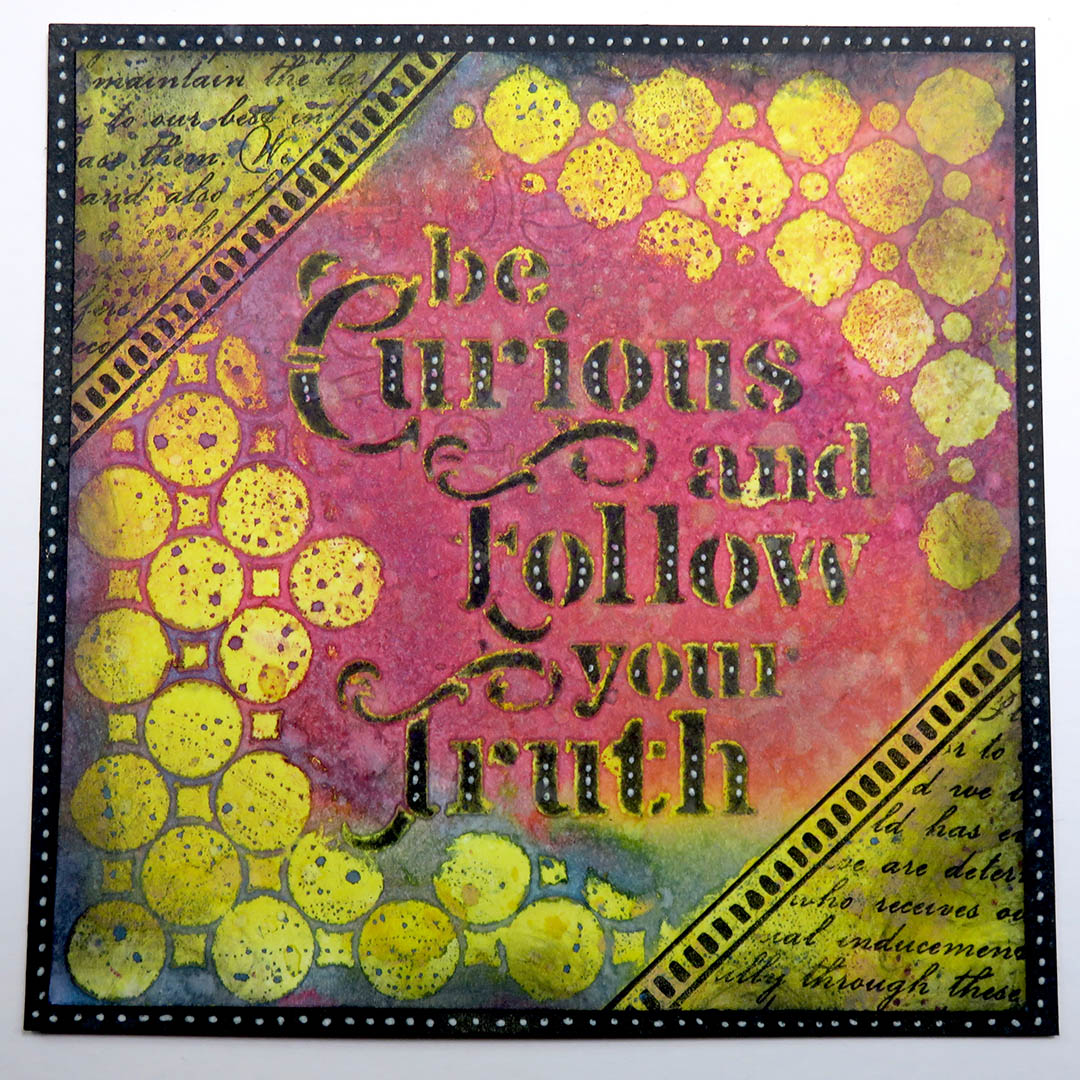
Stencils are very versatile, and in this case for this sample I went for a flat finish, no volume, created with distress oxides. But you can use many other things with them: fresco paints, infusions and glaze, ink sponged through or just a spray. Or you can go for volume and apply Grunge Paste to create 3D sentiments. I decided to incorporate the same sentiment as one of the sets for this sample, but the stencil incorporates another sentiment (bloom like a rose) that would 100% match as well a previous stamp set of mine (ESC04). There are 2 patterns on this stencil and you could overlap them if you wished or you can just extend one of the patterns by repositioning it (I always try to allow that possibility, you never know how big your canvas will be!). I wanted open gaps in this stencil, so it can also be used with your gelly plates. I’ve made videos of all these samples, I’ll share them in YouTube once ready (and maybe Leandra will incorporate them here as well)
PaperArtsy Stencil 134 (PS134)
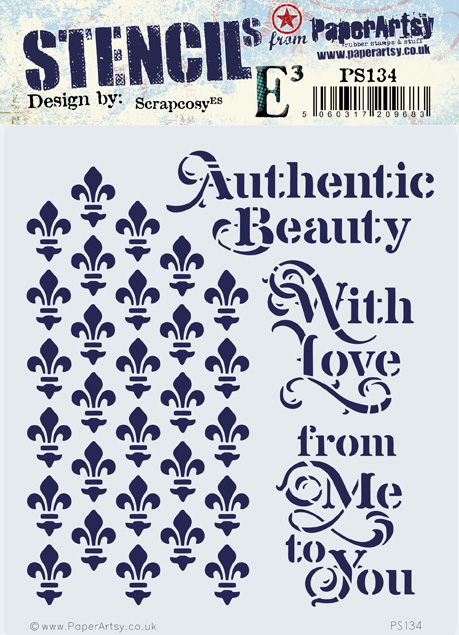

It’s been so long since I wanted to add a Fleur de Lis somewhere… that I decided to go for a patterned stencil that can be repeated to the infinite and beyond! In this sample I went for the same technique as before, using it with distress oxides and micro glaze, but as mentioned, it can be used with many other things and of course in my case, I will use it so much with Grunge paste! I love 3D stencilled areas. And since I love to work on size 8 tags, except for the biggest one, which can only be used on a landscape or diagonal way, the other 2 sentiments will match both ways on a tag (landscape and vertical), allowing you to create customised present tags for any occasion. You can say I went for a practical approach this time… Tip: try stencilling the pattern once and then match it upside down, you get a brand new pattern, very cool!
Quick project: Smudge with oxides and bump effect with Grunge Paste
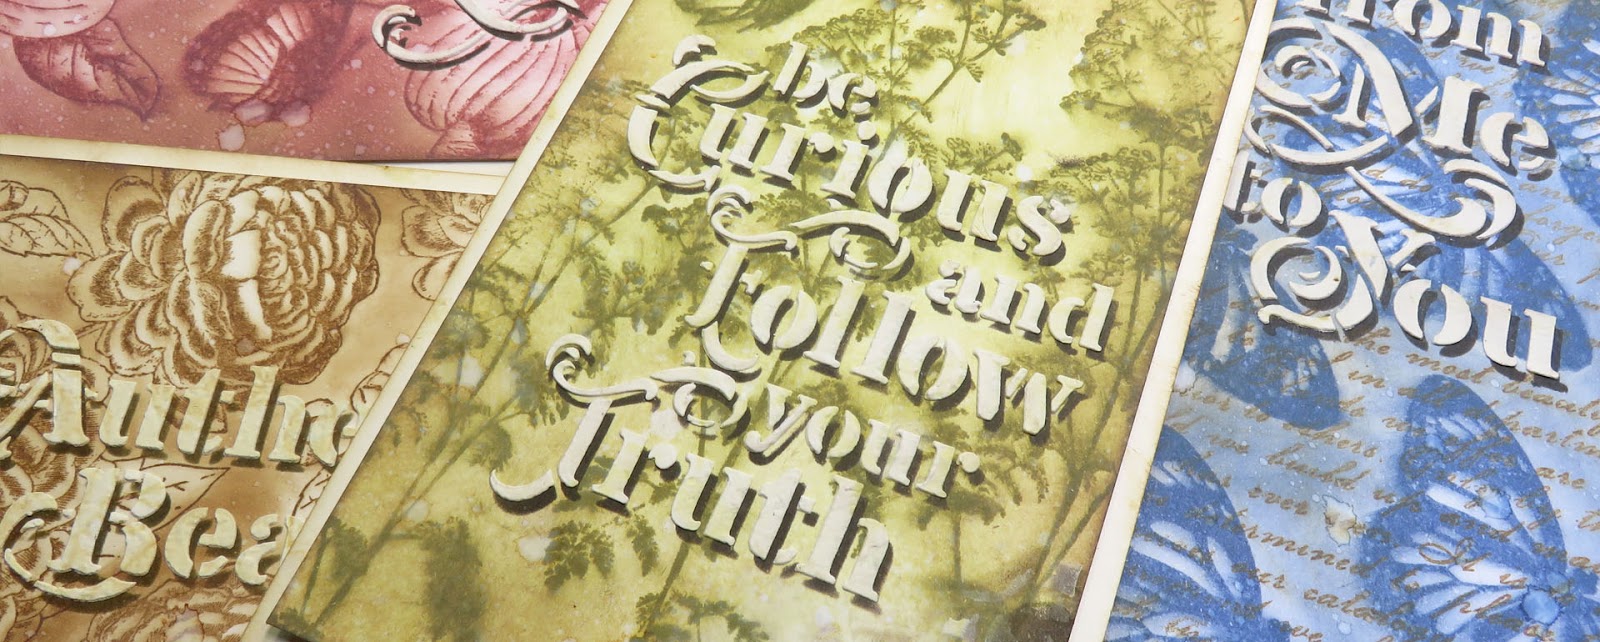
I decided to go for a smudge technique to get 4 quick cards in no time. If you want to see this technique, you can watch any of these 2 videos from my Youtube Channel that I did in the past and enjoy the detailed pictures of these 4 cards further below:
Step 1: select your ink. Not all Distress Oxide inks (part dye part pigment) will work for this smudge technique: the darker ones will work OK whereas the light ones just cause a mess (try yourself). The technique explodes the fact that we separating the pigment (low drying) from the dye (fast drying) when smudging, so you need a dark dye that defines your image and rest of the ink (pigment side) will add colour when smudge (without fear, ladies and gentlemen! Be quick and rough or you won’t get any effect at all!). I’ve chosen Faded Jeans, Aged Mahogany, Forest Moss and Vintage Photo, stamped my image one at a time and smudge with cut and dry foam

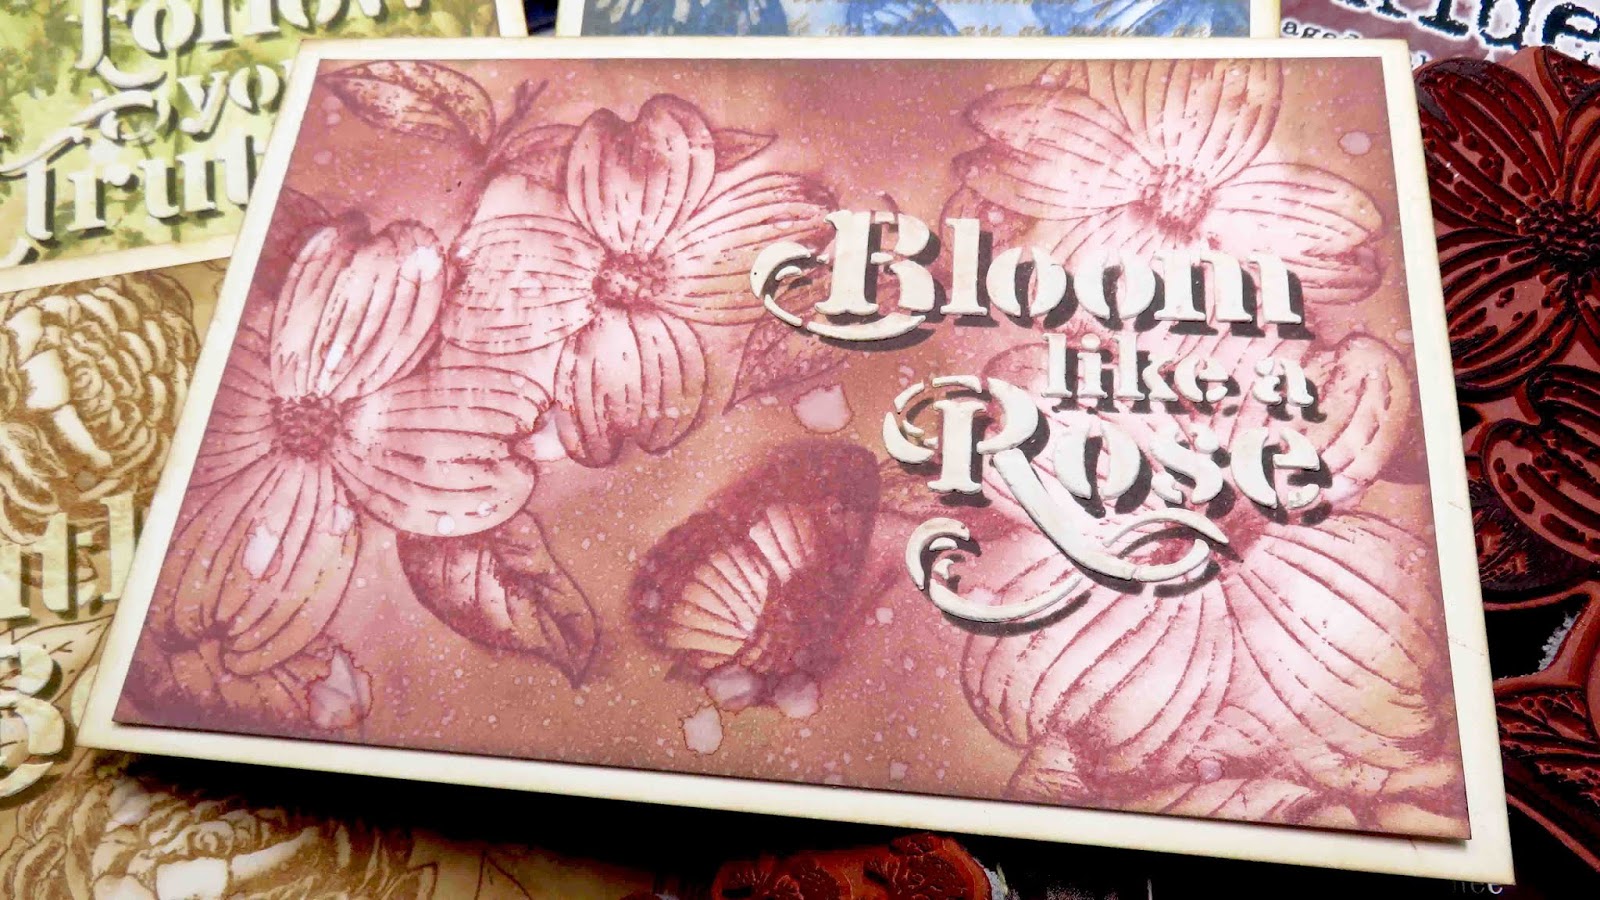
In all cases, after stamping I add more ink to the background with the sponge, trying to keep the elements (the flowers in this case) with white areas, so you get a 3D effect.

Then add some splashes of water (with spray or dropping some small drops on your surface) and either let it airdry or heat set with a heat tool.

Once the background is ready, you can select the stencil of your choice and apply a first dark layer with an ink (waterproof). In this case I selected Versafine ink fallen leaves and I applied it with a sponge through the stencil.
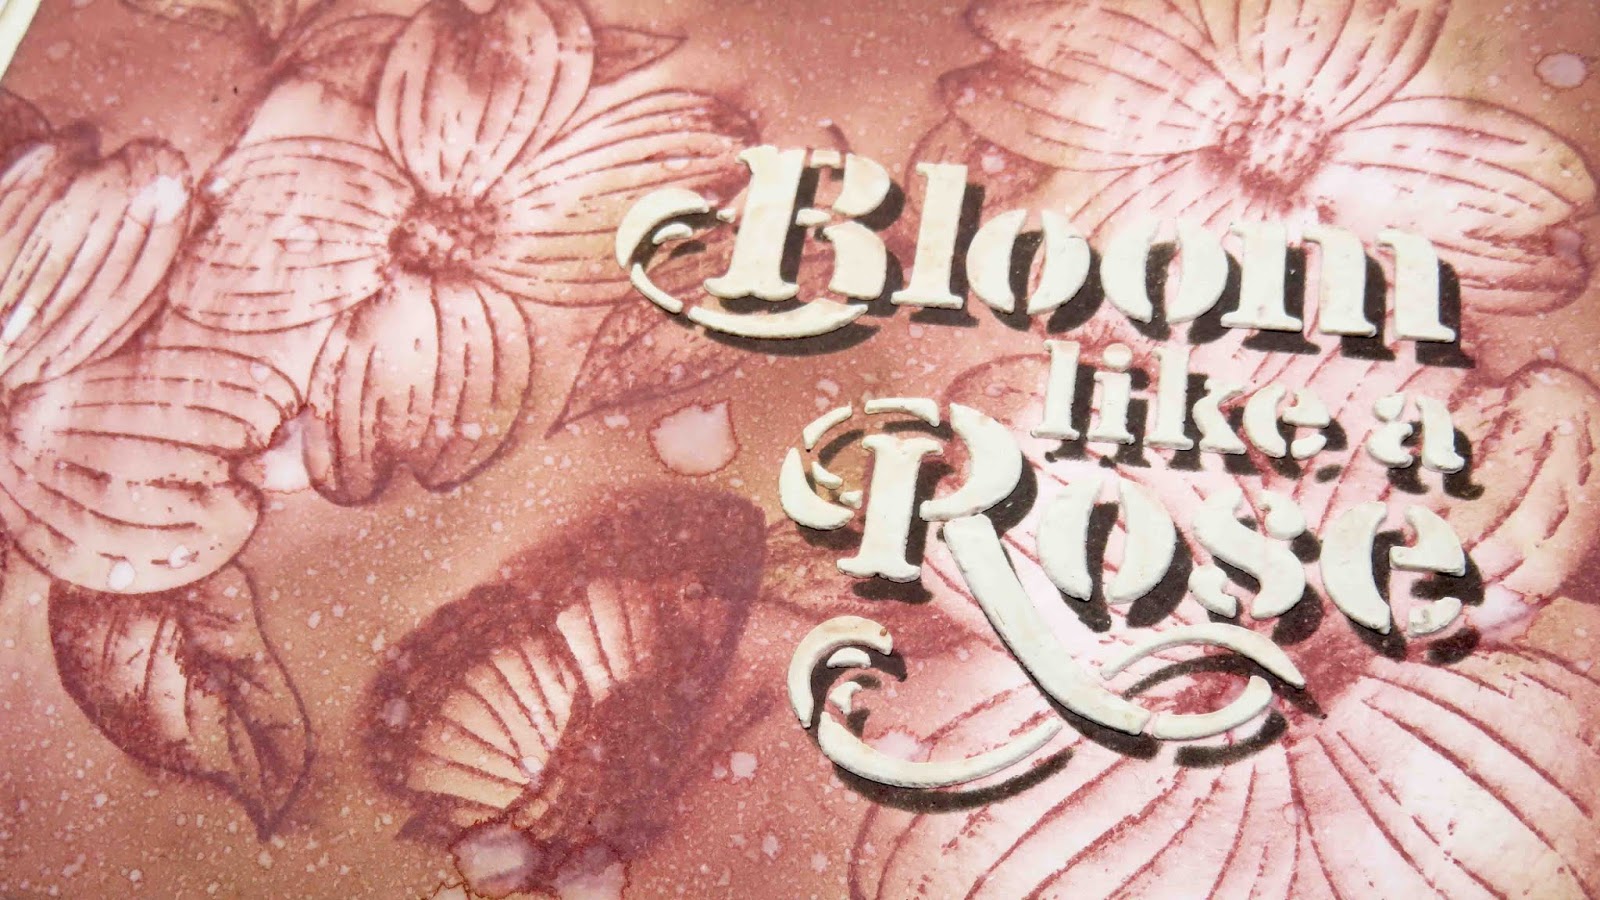
And finally magic comes when you re-position the stencil where it was, you shift it up 3mm and left 3mm (roughly, the more you shift it, the bigger the shadow) and apply Grunge paste through stencil. Lift stencil and watch the WOW outcome.
That was all from me for today! I hope you like my new release! I’m very excited and by the time you read this I should be in Phoenix, about to head back home after the Creativation show! I would love to know what you think about the new products so feel free to share any thoughts or comments you have.
Here are some places where you can find me:
Here in my blog: https://scrapcosy.com
My scrapcosy YouTube channel: https://www.youtube.com/c/scrapcosy
Instagram (@scrapcosy): https://instagram.com/scrapcosy/
Facebook: https://www.facebook.com/raquel.burilloperez
My Etsy shop: https://www.etsy.com/uk/shop/Scrapcosy
Teaching Schedule:
No more face to face teaching until later in (or end of) the year, I’m afraid. You will only see me in YouTube for a long while, and here is why: I’m expecting a baby! Surprise! So by end of April, if all goes well, I’ll be taking care of him, so I expect it will be very time consuming and he will need all my immediate attention, therefore I can only expect to see you on-line eventually, until I get used to my new mum life! I will really miss seeing you in person in the different shows, but don’t worry, time will come when I’ll be back there! Maybe I’ll bring him there as well! And I hope to find the time to design new products for Mark and Leandra if I get a spare time, in between naps and feeding times! We will see how it goes… wish me luck! I’m really excited but also terrified! OK, enough from me now… see you soon! 🙂
I hope you liked it! Thanks for reading! And see you soon! 🙂 If you want to send any comments or subscribe, go to the end of the post below.

Congratulations on your baby news – how exciting. Congratulations also on your new stamps and stencils – I fear that I won’t be able to choose between them. Take care of yourself and your bump.x
LikeLiked by 1 person
Thanks very much Tracey!! 😊
LikeLike
Wishing you well with the next phase of your life. So enjoyed seeing you in the US at Creativation that you shared. Love your new release. Will look forward to your posts.
LikeLiked by 1 person
Thanks very much Diana!! 😘😘
LikeLike