

Hi everyone! Today I’m sharing with you how to use foil in 6 different ways to create 4 different grungy vintage christmas tags. I’ve done this project for the current PaperArtsy blog fortnight Challenge which is about foil. I’ve prepared a video so you can see all the details of each technique 😉 Enjoy!
Hola a todos! Hoy os enseño a usar foil de 6 formas diferentes para crear 4 tags vintage/grungy para Navidad. Las he preparado para el reto vigente en el blog de PaperArtsy. He creado un vídeo para que podáis ver al detalle cada técnica. Ya me diréis qué os parece en la sección de comentarios de abajo 😉 Espero que os guste!
En castellano por aquí / Spanish here
Hi everyone, Raquel here from scrapcosy. Today I’m sharing with you how to use foil in 6 different ways to create 4 different grungy vintage christmas tags. I’ve prepared a video so you can see all the details of each technique.
As usual I like to experiment, so I didn’t stick to one technique only. Instead I prefer to share with you different options, so you have many choices. I really enjoyed creating each tag. I hope you like them too. Pictures and details below.
Rough diamonds – GP and foil

For this first tag I’ll use the following property: foil sticks to a rough surface if you rub it against it. I first created a background with Infusions (olive tree and golden sands) and then I added Grunge Paste (completely dry) as my rough surface to rub the foil against. I use a lollypop wood stick to rub it.

For this technique I first used Acorn Achival ink through the stencil to create a complete diamonds pattern and then I applied some Grunge Paste through my stencil PS074
PS074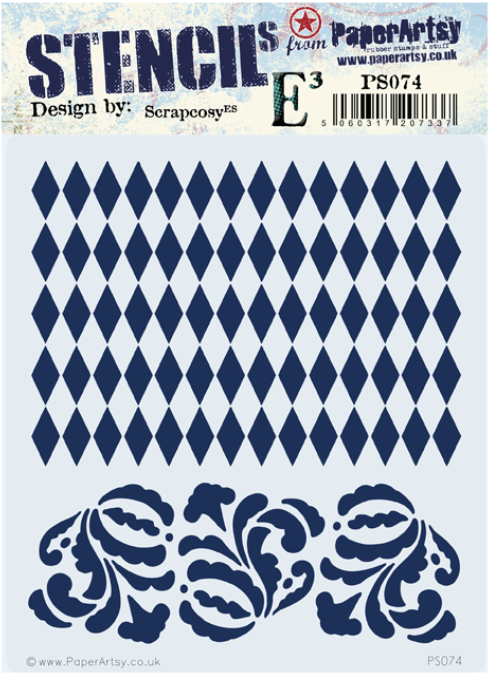
The foil will not stay permanently if you re-wet the surface, that is why you can see some shiny foil escaping from the diamonds, because I added more infusions after I rubbed the foil for the first time, to make my diamonds darker. You can see the entire process in the video. Instead of GP you could rub it on a rough wood surface and it would work as well.

Christmas sticky stripes
For this second technique I use the fact that foil sticks to sticky surfaces (adhesive), so I’ll use the double sided tape to transfer the foil into my project.

I’m adding stripes of double sided adhesive tape to over an infusions background using the same colour combination as before (olive tree and golden sands) then adding a piece of foil and with a wood stick I make sure it stays in place and I add more texture and marks on the foiled parts.

This is a super simple and quick technique and I think it would also look awesome on a red background!
Walnut crystals all the way

For the next technique I’m using the following principle: foil sticks to hot and rough surfaces, so I’ll use the walnut crystals that are part of the Infusions dye stains as the rough and hot points, that when are not 100% disolved will make the foil stick to them once passed through a laminator.

The results of this technique are very subtle and can only be seen when the light hits them in the right way. But when the light does hit them… Oh, my! Magic happens!

I love the results you get with this technique. Just make sure that the crystals don’t get too much dissolved when you spray water (blop them with a paper towel so you stop the action of the water on them).
Golden mulled wine – Alcohol and foil

For the final tag I’m using a different type of stickiness, I’m using alcohol inks that when not fully dried and if they are very concentrated they become sticky enough as to get the foil adhered to them when foil is pressed against the surface.

This technique needs a little bit of practice, to know how dry the ink needs to be and how much ink is needed. I used Cranberry and Lettuce Tim Holtz alcohol inks.

I love how random and striking this technique is, you just drop the ink and blow through a straw (or an empty pen) so you create puddles while drying your ink as well. And when pressing the foil against your surface, you can also add foil lines using a wooden stick (lollypop), to add more texture, as I did on the corners.

Golden sentiments – Stamp with glue

Then for the sentiments I used 2 different techniques. For this one I used glue (mod podge, like a PVA glue) that I put in a piece of cut-n-dry foam so I could use that foam to “ink up” my stamps with glue. Then I stamped my sentiments, one at a time on a piece of smoothy heavy cardstock and passed it through the laminator. Make sure you clean your stamps straightaway! A spray of water followed by drying it with a towel will do. I used ESC09 (my vintage frames stamp set) for my sentiments.
ESC09

I find it gives very nice results, still a lot of details on the stamped and foiled image


Toner ink maker and foil

And the final technique I tried was using the Minc toner ink marker to ink up my stamps (just the Merry Christmas in the picture above) and stamp the sentiment with them. Toner ink has an iron component (micro particles) that when passed through the laminator they become really, really hot, so the foil sticks to them. That is why printed images via toner ink printer can be used for foiling, whereas regular laser jet ink will not work for this technique. Instead of printing, I’m a fan of stamps (as I’m sure you are as well) so I wanted to find a way of adapting this technique to stamps and I could only achieve it by using a toner ink pen (if anybody knows about an inkpad of toner ink, please shout! I was not able to find one when I looked at this a year ago or so, I then tried to create my own toner inkpad and I didn’t succeed. I guess it’s a pretty unstable substance as to make it work on an inkpad, since even toner printers have the toner ink in dry mode…)
Here are some extra pictures if you want to see more details.


I hope you liked my different experiments. Now I have 4 tags ready for Christmas, to decorate some of those special gifts. Let me know if you’ve tried any of these techniques in the past or which one you’d like to try now that you’ve seen them.
Thanks very much for reading! Here are some places where you can find me:
My blog: https://scrapcosy.com
YouTube: https://www.youtube.com/c/scrapcosy
Instagram: https://instagram.com/scrapcosy/
I’ll be teaching 2 classes at Creativation 2019 sponsored by PaperArtsy, full Creativation 2019 schedule here details about my classes below:
– With Seth Apter on 17/01/2019 11:00 AM – 2:00 PM – W102: Perfectly PaperArtsy (Part 1)
– On my own, on 18/01/2019 10:00 AM – 12:00 PM – W209: A Cup of Vintage Tea – Infused with Mixed Media Techniques
I hope you liked it! Thanks for reading! And see you soon! 🙂 If you want to send any comments or subscribe, go to the end of the post below
Técnicas con Foil – Tags Vintage de Navidad
Hola a todos, aquí Raquel con un proyecto más. Hoy os enseño cómo usar el foil de 6 formas diferentes para crear 4 tags navideñas de estilo grungy vintage. Aquí podéis ver el video con todos los detalles:
Como siempre, a mí me gusta experimentar así que en lugar de explicar una sola cosa, pues ya de paso explico más para que podáis sacarle el máximo partido a vuestro foil. Me lo he pasado genial haciendo estas tags. Aquí os escribo detallitos y podéis ver fotos.
Diamantes en bruto – Grunge Paste y foil
Para esta primera tag he usado la siguiente propiedad del foil: si lo frotas contra una superficie rugosa, se queda fijado. Primero hice un fondo con infusions (olive tree and golden sands) y luego incluí Grunge Paste (completamente seca) para tener mi superficie rugosa y poder frotarle encima el foil (usando un palito de madera, como los de helado).
Primero llené mi tag de rombos con tinta Acorn Achival, resistente al agua, aplicada a través de mi estencil y luego puse Grunge Paste en varios sitios. Usé mi estencil PS074
PS074
Con esta técnica el foil no se queda permanentemente fijo, si lo mojas, se desplaza de sitio, por eso podéis ver en la foto puntitos de foil en otras partes de la superficie, porque tras la primera aplicación de foil, quise poner más infusions para poder oscurecer los rombos. Podéis ver el proceso completo en el vídeo. Otra superficie en la que funcionaría esta técnica además de en la pasta Grunge Paste, sería en la madera.
Christmas sticky stripes
Para esta segunda técnica he usado la propiedad de que el foil se engancha a superficies enganchosas (adhesivas), en este caso he usado cinta de doble cara adhesiva para transferir el foil a mi proyecto.
De nuevo he creado un fondo de infusions (misma combinación que antes olive tree y golden sands) y en este caso he pegado la cinta de doble cara creando líneas en diagonal y paralelas. Luego con un palito de helado he aplicado el foil encima y esto ha creado una textura y marcas que me encantan.
Es súper rápida de hacer y creo que en rojo también quedaría genial.
Cristales de nuez por doquier
Para esta técnica utilizo otra propiedad del foil: si lo usas con una laminadora se engancha a cosas en relieve y que se calienten mucho. En mi caso los polvos de nuez de las infusions harán este papel, así que transformaré los puntitos marrones en dorados. Esta técnica funciona si los polvos de nuez no están del todo disueltos.
Los resultados de técnica son sutiles, sólo puedes ver los toques dorados si la luz les da bien, pero una vez la luz les da, Oh! Parece magia!
Vino especiado dorado (Golden Mulled wine) – Tintas de alcohol y foil
Para la última tag he usado otro tipo de superficie pegajosa, la que queda al trabajar con tintas de alcohol. Al trabajar sobre una superficie no porosa, en este caso papel yupo que he pegado encima de un papel de alto gramaje para que tuviese más consistencia, las tintas tardan mucho más en secarse y quedan pegajosas durante un rato. Aprovechamos esa particularidad para aplicar foil encima y que se quede adherido a las partes que tienen más tinta.
Hace falta un poco de práctica para pillarle el punto de secado vs pegajosidad a las tintas, pero una vez lo consigues queda muy guay. He utilizado las tintas de colores Cranberry y Lettuce de Ranger – Tim Holtz.
Me encanta lo aleatorio de esta técnica. Para aplicar las tintas basta con dejarlas gotear en la superficie y luego soplar poco a poco usando una caña o el tubo de un bolígrafo vacío. Eso hace acumular la tinta hacia algunos sitios y la va secando hasta el punto que hace falta. También se pueden añadir detalles con un palito de helado y crear líneas como las que he puesto en las esquinas.
Deseos navideños en dorado – Estampar con pegamento
Para los Merry Christmas y los marcos he usado dos técnicas diferentes. En esta primera he usado pegamento (mod podge, como una cola blanca) que he aplicado con una esponja cut-n-dry foam a modo de tintero para mis sellos. He estampado con pegamento y a continuación se pone el foil encima y se pasa por una plastificadora. Sobretodo, limpiad vuestros sellos inmediatamente, que no queden restos de pegamento! Un poco de agua es suficiente. He usado mi set de sellos ESC09.
ESC09
Esta técnica me encanta. Si lo aplica con cuidado, se siguen mostrando hasta los detalles más delicados de estos sellos
Rotulador con tinta de Toner
Para esta última técnica he usado el rotulador Minc que tiene tinta de tóner (sólo en el Merry Christmas de la foto de arriba) y con él he aplicado tinta al sello, a continuación he estampado y luego lo he cubierto con foil y a la plastificadora. La tinta de tóner y las impresiones hechas con esta tinta, tiene la propiedad de que al pasarlas por la plastificadora se calientan mucho. Eso es porque tienen micropartículas de hierro. Por eso una impresión en cualquier otro tipo de impresora (inkjet, por ejemplo) no funciona, porque la tinta es diferente y no se calienta. Yo prefiero estampar y no imprimir imágenes así que esta es mi forma de conseguirlo. Si alguien sabe de un tintero de tóner, que me lo diga! Aunque si no existe debe de ser porque sería una tinta muy inestable en formato líquido. Al fin y al cabo, las impresoras de tóner tienen la tinta en polvo…
Os dejo algunas fotos más:
Espero que os hayan gustado mis experimentos. Ahora ya puedo decorar algunos regalos especiales para esta Navidad. Qué técnica os ha gustado más? Dejadme un comentario si queréis compartirlo.
Muchas gracias por leer y hasta pronto! Si queréis ver más cosas sobre mí me podéis encontrar aquí:
Mi blog: https://scrapcosy.com
YouTube: https://www.youtube.com/c/scrapcosy
Instagram: https://instagram.com/scrapcosy/
Daré dos clases en Creativation 2019 (antiguo CHA) esponsorizadas por PaperArtsy y Ranger, todas las clases de Creativation 2019 aquí y detalles sobre mis clases aquí:
– Conmigo y con Seth Apter el 17/01/2019 11:00 AM – 2:00 PM – W102: Perfectly PaperArtsy (Part 1)
– Yo sola, el 18/01/2019 10:00 AM – 12:00 PM – W209: A Cup of Vintage Tea – Infused with Mixed Media Techniques

Super gorgeous and great video!
LikeLike