

Hi everyone! Today I’m bringing you a project created for the topic Torn, Ripped, Burnt that PaperArtsy is holding on this fortnight challenge. Make sure you participate for the chance to win a £50 voucher to spend on their shop. Once you see the stamps I used, you’re going to want to win! 😉 Enjoy! And make sure to watch the video!
Hola a todos! Hoy os traigo un proyecto que he creado para el reto de esta quincena del blog de PaperArtsy que se llama Torn, Ripped, Burnt (Roto, Rasgado, Quemado). Participad que podéis ganar un vale de £50 para gastar en su tienda! Seguro que cuando veáis los sellos que he usado os entran las ganas locas de ganar el reto! 😉 Espero que os guste! Hay vídeo con todos los pasos!

En castellano por aquí / Spanish here
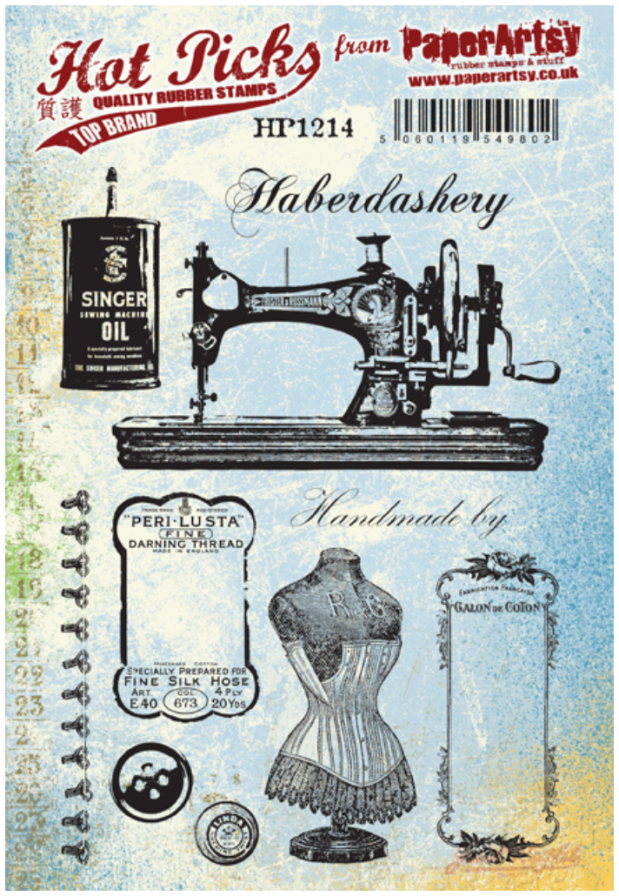
I was craving to try these stamps by HotPicks. They are the most awesome stamps I’ve seen on the haberdashery subject! Every single image of them is absolutely beautiful. I’m so happy to have them as part of my collection now.

I love vintage style and I love aged items, so to me this challenge was the perfect opportunity to try and get even a much more distressed and aged look on a project. With that objective in mind, I torn some pages and played with my distress (plain and oxides) as well as with infusions, and additionally I decided to incorporate many different textures: lace, metal, buttons, thread and cheesecloth. I enjoyed it very much! As you will be able to see in the how-to video I created.

I had this idea in my mind to create some holes in my pages and leave the edges curled up and dark, so they could give like a burned effect, and I wanted to show something through the holes. That’s when I decided to incorporate some cheesecloth dyed with Golden Sands Infusions and glued on the underlying page, which painted with Chocolate Pudding Fresco Paint. You can still see the words behind the cheesecloth. And the holes were the perfect place to insert my metallic scissors, which are not glued.

I always love incorporating something playful or interactive in my projects. In this case I decided to add a chain to my scissors so I could move them around between holes but at the same time don’t loose them. The chain is attached by a brass safety pin.

When I see a stamp of a spool of thread, I have the urge of actually loading it with real thread. So I created these three by stamping the 3-spool image thrice: from the first stamped image I cut the spool in the middle, from the second one I cut the left and right spools (in this instance I ignored the middle spool and I just cut the shape of the 2 spools the best I could) and the third one I used it as a base to glue the 3 spools back in place. Instead of thread, for the one on the left I used baker’s twine that I frayed.

Again, I found an opportunity to put some thread through the sewing machine. This stamp is so detailed!

The stamp set also incorporates a lace image which I stamped, cut and then I combined with 2 real laces and used these as a base to ground some other images. I love how these 3 laces stacked look like. Next time I may try to emboss the stamped lace, to try and get more texture. I also added more torn details in the bottom of the pages, some of them were intentional, like these ones:

But this other bit was broken by chance (or by me being to harsh when applying ink in the edges), so I decided to embrace it and keep it. And I also added cheesecloth and paint as I did on the main big holes so everything came together. By the way, here you can see a bit of detail in the background which I created using regular Vintage Photo Distress ink combined with Vintage Photo Distress Oxide and flickering some water.

I love the manikin Image! Here I decided to incorporate the same lace I used before to create a skirt for the manikin. I stamped the image twice. I cut the corset from one of them and this allowed me to glue the little skirt behind and then I glued these on top of the other stamped manikin. It reminded me of playing with dolls and dressing them up, I really had fun with it! By the way, all images are stamped with Vintage Sepia Versafine Ink and then water coloured with only 2 colours of Infusions: Golden Sands and Rusty Car. And then I always like to age the edges with Vintage Sepia Distress Ink, that gets rid of any white edges of the cut images and gives some volume.

A friend of mine (Aida) taught me a trick on how to torn very little pieces of paper, you just need to wet them with water and paper becomes super flexible. That’s what I did on that little piece of paper on the left, I did few little cuts with the scissors and then with a wet brush you just touched them and then you can curve the paper. I did the same on the corners. I only “knew” the trick but I hadn’t tried till now and OMG, it really works!! Super easy! On another matter, I love these stamps which have empty space where you can sew whatever you want. I, of course, chose to sew mother of pearl buttons, my favourite type.

Another chance to sew few more buttons, but on a bigger piece. By repeating the same techniques or same materials in different places of the project you achieve that all comes together.

And if you want to see how this Art Journal came to life, you can watch the video below.
I enjoyed so much this challenge! It gave me the chance to explore a more grunge side of my vintage style. And the best of this challenge is that it teaches you to embrace imperfection: if something gets broken while you’re working on a project, relax, don’t throw it away and just incorporate it in the design by breaking few other elements in the same way. It will seem you did it on purpose and it will add a twist.
I also enjoyed playing with these stamps, they are so much fun to use! I would love to create a little sewing book with them. They would also be perfect to decorate a box so it becomes a proper sewing kit. Or even another option can be creating your DIY mini sewing kit for when you travel. I’m sure it would be the most cute travel sewing kit ever, perfect for a little stocking gift, now that Christmas is round the corner! 😉
If you want to stay in touch, apart of subscribing to this blog, you can also follow me in these places below. Thanks for reading and watching!
Youtube: https://www.youtube.com/c/scrapcosy
Etsy: https://www.etsy.com/uk/shop/Scrapcosy
Blog: https://scrapcosy.com
Instagram: https://instagram.com/scrapcosy/
Facebook: https://www.facebook.com/scrapcosy
I hope you liked it! Thanks for reading! And see you soon! 🙂 If you want to send any comments or subscribe, go to the end of the post below
Art Journal de Costura – Roto, Rasgado, Quemado
Estaba deseando probar estos sellos de HotPicks. Son los sellos más bonitos que he visto de la temática de costura! Cada una de las imágenes son preciosas. Una gran nueva adquisición para mi colección de sellos!
Como ya sabéis, me encanta el estilo vintage y cualquier cosa antigua y desgastada, que parezca que tenga una historia. Este reto me ha permitido explorar mi lado más grunge dentro del vintage, e incorporarlo dentro de un proyecto. Con ese objetivo en mente, rasgué y envejecí las páginas y los elementos en ella y jugué con mis tintas Distress (normales y oxides) y con mis infusions y además decidí incorporar distintos materiales para crear más texturas: puntillas, metales, botones, hilos y gasas. Me lo pasé pipa! Ya veréis todos los detalles en el vídeo que he creado.
Mi idea para este Art Journal era hacer unos agujeros en las páginas y dejar los bordes de estos curvados hacia arriba y oscurecidos, para crear el efecto de quemado, y quería mostrar algo a través de los agujeros. Entonces es cuando decidí incorporar gasas tintadas con infusions (Golden Sands) de fondo, pegadas sobre la página de debajo que está pintada de marrón oscuro (con pintura acrílica Fresco, Chocolate Pudding). Se pueden ver aún las letras de fondo en los agujeros. Además, estos agujeros resultaron ser el sitio ideal para guardar mis tijeritas metálicas, que las quería poner y no sabía dónde. Están sin pegar, para que pueda sacarlas y ponerlas.
Siempre que puedo me gusta incorporar detallitos interactivos en mis proyectos. En este caso, es lo que hice con las tijeras, como no me decidía sobre dónde pegarlas, decidí dejarlas sueltas y sólo pasarles una cadena por uno de los agujeros. Los dos extremos de la cadena se unen al proyecto mediante un imperdible dorado que coloqué en una etiqueta estampada.
Cuando veo un sello de una bobina de hilo, me entran unas ganas locas de ponerle hilo de verdad a la bobina. Me encanta como quedan, así que en este caso repetí esta idea que he aplicado otras veces. Como la imagen contiene 3 bobinas, estampé 3 veces: de una estampación recorté la bobina de en medio, de otra estampación recorte las bobinas de los lados (imaginándome la forma que tendrían si la bobina de en medio no estuviese), cargué las 3 bobinas con hilo y las pegué en su lugar usando la tercera estampación como base. La bobina de la izquierda en realidad no tiene hilo, he usado cordel que he deshilachado a mano, pero a que da el pego?
Y aquí de nuevo se me brindaba la oportunidad de poner más hilo de verdad, así que pasé el hilo por la máquina de coser, lista para arrancar! Me encanta este sello, tiene tanto detalle!
Uno de los sets de sellos incorpora una imagen de una puntilla que decidí estampar, colorear y cortar y que luego combiné con puntillas de verdad arriba y abajo y este montaje me permitió crear una base en la que asentar las imágenes del maniquí, la máquina de coser, etc. y que así no quedasen en el aire. Me gusta mucho como han quedado las tres puntillas combinadas. La próxima vez, igual pruebo a hacer un embossing, a ver como queda y si parecería más real aún. En esta misma imagen podéis ver que empecé a rasgar el papel en los bordes de abajo. Estos rotos eran intencionados:
Pero sucedieron después de que este otro se rompiese solo… bueno, solo no se rompió, fui yo, que soy una bruta a veces aplicando tinta en los bordes… y ya que estaba roto, repetí la misma técnica que en los agujeros grandes: pintar el papel de debajo oscuro, aplicar una gasa encima y curvar y entintar más los bordes. Por cierto, aquí podéis ver como queda el fondo de mi art journal. Lo creé aplicando tinta distress normal (vintage Photo) y luego la misma en versión oxide, unas gotas de agua por encima, secador y listo.
Me encanta la imagen del maniquí! Decidí ponerle una faldita con la misma puntilla que usé antes. Estampé la imagen dos veces, una es la base y de la otra solo usé el corsé. La faldita va enganchada entre las dos partes de papel. A que queda mona! Me recodó a jugar a vestir muñecas, me lo pasé pipa! Por cierto, todas las imágenes las estampé con tinta Versafine Vintage Sepia y luego las coloreé con Infusions a modo de acuarela (sólo usé Golden Sands y Rusty Car) y una vez recortadas todas las piezas, usé tinta Distress Vintage Photo para colorear los bordes, que no se vean blancos y también para que las piezas parezca que tengan volumen.
Mi amiga Aida (igual ni se acuerda) me enseñó un truco para rasgar hasta el más pequeño de los trozos de papel, sólo necesitas mojar lo que quieras rasgar con un poco de agua. El papel se vuelve súper flexible! Eso es lo que hice con la etiqueta de la izquierda, pequeños cortes perpendiculares al borde y en cuanto los tocas con un pincel húmedo, ya puedes trabajarlos y redondearlos. Hice lo mismo con las esquinas. El truco lo sabía pero aún no lo había probado, y jolin, que bien que va! Súper fácil! Cambiando de tema, me encanta que entre estos sellos se incluyen unas etiquetas que están muy vacías y son el lugar perfecto para coser lo que quieras. En este caso cosí unos botones de nácar, que son una de las cosas que me encanta incorporar en mis proyectos.
Esta es otra de las etiquetas en las que se pueden coser botones, pero es todavía más grande que la anterior! Al repetir técnicas y materiales en varios sitios del proyecto, consigues que el conjunto del proyecto parezca un todo.
Y si queréis ver como este Art Journal toma forma desde cero, aquí os dejo el vídeo.
Me lo pasé tan bien con este reto! Me dio la oportunidad de explorar mi lado más grunge. Y lo mejor de este reto es que te enseña a aceptar la imperfección: si algo se rompe mientras estás creando un proyecto, no lo tires a la basura, sencillamente acéptalo como técnica y repite ese mismo tipo de roto en otras partes o elementos del proyecto, de esta forma parecerá que es intencionado y le dará un toque diferente.
También disfruté un montón jugando con estos sellos! Me encantaría crear un mini libro de costura con ellos. O serían perfectos para decorar una caja que poder convertir en costurero. O mejor aún, te podrías hacer un mini costurero de viaje, guardar un poco de hilo en uno de los carretes, coser unos botones de repuesto y guardar algunas agujas en esas etiquetas preciosas. Un regalillo perfecto para Navidad o para un amigo invisible! 😉
Si queréis seguirme en más canales a parte de suscribiros al blog, me podéis encontrar aquí:
Youtube: https://www.youtube.com/c/scrapcosy
Etsy: https://www.etsy.com/uk/shop/Scrapcosy
Blog: https://scrapcosy.com
Instagram: https://instagram.com/scrapcosy/
Facebook: https://www.facebook.com/scrapcosy
Gracias por leer y hasta el siguiente post!

Precioso 😍😍… me encantó el efecto de la cadena y la tijera . Te quedo una trabajo ideal.. Felicidades 👏👏👏
LikeLike
Gracias!! 🙂
LikeLike
Precioso¡¡¡ Esos detalles de las tijeritas y la utilización de los hilos un acierto, me encanta…no me extraña que lo pasaras tan bien haciéndolo.Felicidades de nuevo.Un trabajo muy bien hecho.
LikeLike
Muchas gracias!! 😘😘😘
LikeLike