

Today I’m sharing with you a card that matched the current fortnight challenge by PaperArtsy, which is about to finish, this time is about typography. I created this card for my cousin Sofía on her 13th birthday and she liked it very much. I also gave her as present the book that trigger it: The Complete Book Of Chalk Lettering, by Valerie McKeehan. I also include other signs that I’ve made using the same technique.
Hoy comparto con vosotros esta postal que encaja con el reto de estas dos semanas que organiza Paperartsy que está a punto de finalizar, va de tipografía. Le hice esta postal a mi prima Sofía por su cumpleaños y le gustó mucho. Se la mandé junto con una copia del libro que me empujó a hacerla: The Complete Book Of Chalk Lettering, de Valerie McKeehan. Incluyo también otros ejemplos de carteles que he hecho usando la misma técnica.

En castellano por aquí / Spanish here
On the left you can see the black and white version, just a white pen on a black cardstock, and on the right you can see the final result of applying perfect pearls to give some metallic accents.

In the video below you can see all the details and by way of summary I’ll include some photos of the different stages, pictures of other handlettering signs and finally a list of the supplies I used for the card:
STEPS
Draw your design with pencil on the black cardstock and follow the lines with a white gel pen. In this case I used Uni-ball Signo white gel pen, which is not waterproof. I trimmed the card and mounted it on a white card base created with white cardstock. To create the base I used score-pal to mark the folding line and again the Tim Holtz’s Tonic Studios paper trimmer to trim it down.

Once it’s ready, if you want to add a shimmer / metallic look, then spritz some water on an acrylic block and mix in some perfect pearls pigment, then apply the colour on the selected areas with a brush. You must be quick and not overdo, because as I mentioned before, the white gel pen I used is not waterproof, so you don’t want the ink to smear by applying to much water and pressure.

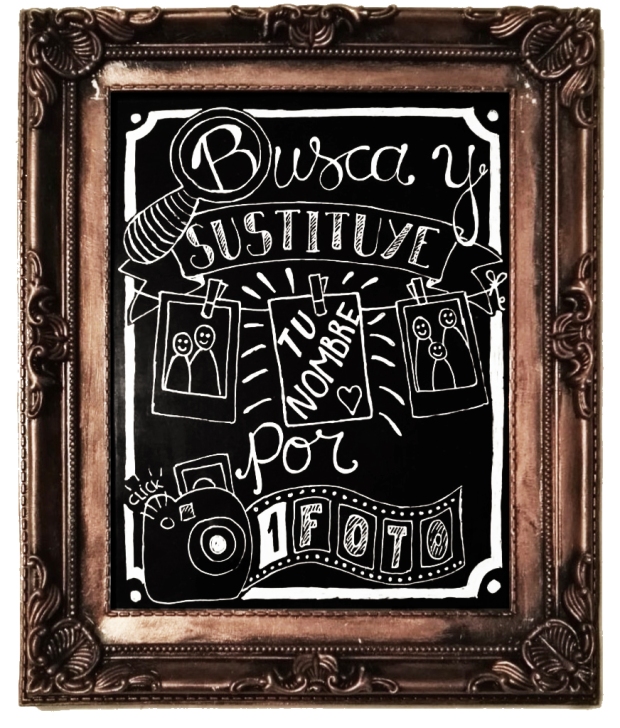
Here is another example of sign that I created for a wedding of 2 friends (Ana and Ignacio), for the photobooth section, it reads: “Search and substitute your name by a picture” and we placed it hanging from a playground and we left an instax mini so the guests could search their name among the cards that were hanging in a cord with pegs, take a picture and leave it where the card was.
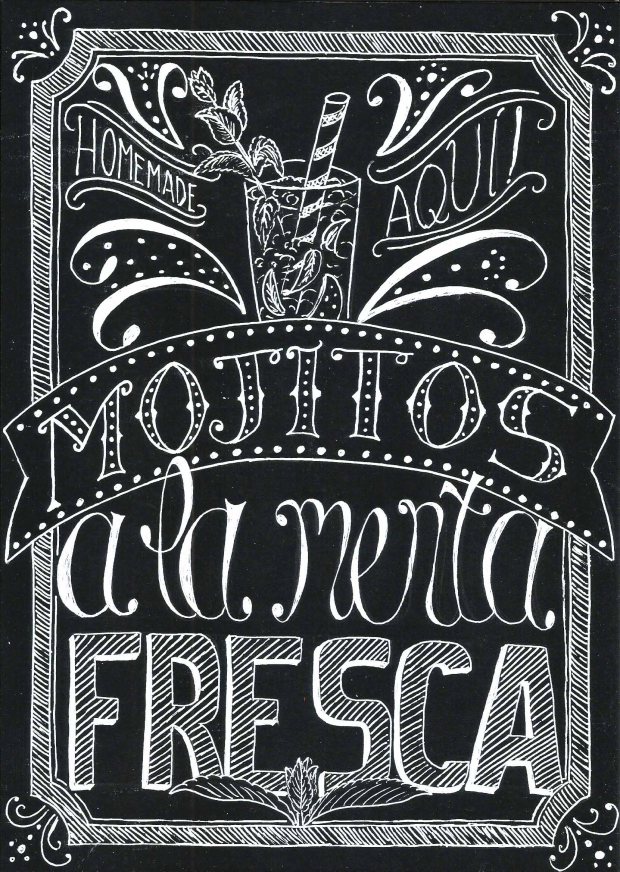
And here is another example which I did first, with my mum. She wanted a mojito sign for her birthday and she did her version and I did mine. It was such fun! It reads “Home made mojitos here. With fresh mint”
SUPPLIES
-
Source of inspiration: The Complete Book of Chalk Lettering by Valerie McKeehan
- Uni-ball Signo white gel pen
- Pencil and eraser
- Black cardstock
- White Cardstock
- Tim Holtz – Tonic Studios paper trimmer
- Score-pal
- Perfect Pearls by Ranger: Perfect Pearl, Perfect Copper, Pewter
- ATG gun
Thanks for reading! And see you in the next post! 🙂 If you want to send any comments or subscribe, go to the end of the post below
TARJETA DE CUMPLEAÑOS CON LETRA DE PIZARRA
A la izquierda esta la version en blanco y negro y a la derecha la version con perfect pearls, para añadir detalles metalizados.
En el siguiente vídeo podéis ver todos los detalles, a continuación pondré fotos explicando los pasos y mostrando otros ejemplos de cartes. Finalmente os pondré la lista de los materiales utilizados:
PASOS
Dibuja tu diseño con un lápiz en una cartulina negra y a continuación pinta el diseño por encima con un puntafina blanco. En este caso estoy usando el puntafina tipo gel Uni-ball Signo de color blanco, que no es indeleble. Recorto la cartulina con la guillotina y la monto sobre una base blanca hecha también con cartulina, pero esta vez es blanca.
Ahora lo que queda por hacer es añadir Perfect Pearls para darle un toque perlado y metalizado. Para eso pulverizo agua en un bloque acrílico y añado el Perfect Pearls que quiera usar, aplico la mezcla con un pincel en las partes del diseño que quiero colorear. Hay que evitar aplicar mucha agua y no re-pintar excesivamente porque como he comentado antes, el puntafina blanco no es indeleble (no es waterproof) con lo que la tinta se puede correr, así que poca presión y poca agua.
Aquí os muestro otro ejemplo de otro cartel que creé para la boda de unos amigos (Ana e Ignacio) para la parte de jardín en la que instalamos el photobooth. En el cartel ponía las instrucciones, los invitados tenían que buscar su nombre de entre una serie de tarjetas colgadas en unos cordeles con pinzas de madera, hacerse una foto con una cámara de fotos instax mini y cambiarla por la tarjeta con su nombre. Así los novios tendrían un recuerdo de todos sus invitados al momento.
Y aquí hay otro ejemplo que en realidad es el que hice primero, con mi mami. Ella quería hacer un cartel para colgar en su cumpleaños para anunciar que se hacían mojitos, así que sacamos el maravilloso libro y cada una hizo su versión de cartel. Nos lo pasamos muy bien! 🙂 Esta es mi versión:
MATERIALES
-
Source of inspiration: The Complete Book of Chalk Lettering by Valerie McKeehan
- Uni-ball Signo white gel pen
- Pencil and eraser
- Black cardstock
- White Cardstock
- Tim Holtz – Tonic Studios paper trimmer
- Score-pal
- Perfect Pearls by Ranger: Perfect Pearl, Perfect Copper, Pewter
- ATG gun
Muchas gracias por leer! Hasta el siguiente post!

Que alternativa tan bonita para una felicitación.Me encanta como te ha quedado y como yo tengo experiencia de “un cartel” que hice para mi cumple he de decir que es superdivertido. Gracias Raquel por esas ideas tan estupendas
LikeLiked by 1 person